Rock tumbling is a great hobby that people all over the world enjoy. My daughter and I have really enjoyed tumbling rocks together, and I never tire of seeing her face light up when she sees the progress her rocks have made.
For the most part, rock tumbling is a pretty simple process. If you follow the general directions that came with your tumbler or that you find online you will usually end up with some good-looking rocks when it’s all said and done. However, I have learned some great tips through my own experience and doing quite a bit of research that can really make a difference in the quality of your end product. Here are 11 of my best rock tumbling tips:
Use a Different Barrel For Polishing
When it comes to rock tumbling, there are few things more disappointing than opening your barrel after the polishing phase only to discover that there were some bits of coarser grained grit left in the barrel, ruining the polish on all of your rocks. The best way that I’ve found to mitigate this disastrous outcome is to use a separate barrel just for the polishing step.
Of course, this requires that you own two separate barrels, so it’s not for everyone. But if you’ve been into the hobby for a while or you’re willing to spend a little more money for better results, in my opinion, this is the way to go.
By keeping a separate barrel just for the polishing stage you help ensure that there is no leftover grit from previous steps left in there when you go to polish your rocks. You’ll want to make sure to label each of your barrels so that you don’t get them mixed up in between batches. Just take a sharpie and write on the lid of each barrel which steps it is to be used for.
Bear in mind that this won’t completely ensure that there are no stray pieces of larger grit in the polishing phase. You’ll still need to diligently clean each rock and make sure that there is no grit left on any of them before starting the polishing phase, otherwise your efforts will be all for naught.
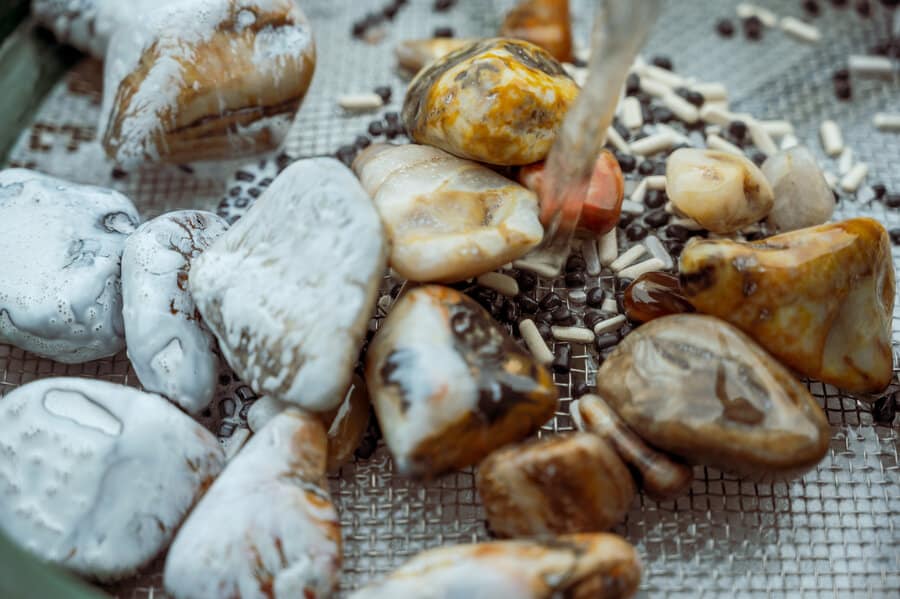
Add a Little Powdered Dish Soap
This is a technique you can use in every step of the rock tumbling process, from coarse grit all the way down to polishing. Adding a little bit of powdered dish soap at the beginning of each step can really improve the effectiveness of the grit and improve your overall results.
The idea behind adding the dish soap is that it will help prevent the grit from building up too much on the rocks. It keeps things moving and grinding against each other instead of clinging to the rocks, improving the effectiveness of each step. You don’t need to add much – I only use about a teaspoon for each step.
Be sure that you’re using powdered dish soap and not liquid soap. The powdered soap won’t bubble up like liquid dish soap will. If you add liquid dish soap you’re probably doing to have a bad time. You don’t want to use anything that has a foaming or lathering agent, otherwise you’ll probably end up with a pretty big mess on your hands.
Put Your Tumbler in a Plastic Bin
Thankfully, this is a tip that I didn’t have to learn the hard way. I have heard from other experienced rock tumblers that keeping your tumbling in a plastic bin is a good idea because if your barrel’s lid pops off or a seal is broken the mess will be contained.
The size and shape of the bin aren’t all that important, as long as the volume is enough to hold in all of the water you put into the tumbler. If you tumble long enough it’s only a matter of time before you experience an incident like this, so it’s better to be safe than sorry.
Most of us have some sort of plastic or rubber win laying around that will work for this purpose, but if not, there are other options available. You can use a metal baking pan – the deeper the better. The only problem with this is that it’ll rattle and will end up being a lot noisier than a plastic bin.
Even if you use a plastic pan as an extra safety measure it’s probably best to keep your tumbler somewhere that won’t spell disaster if the contents end up leaking. Personally, I keep mine in a closet on the far end of the house that has a hard waterproof floor. Most people who tumble like to keep theirs in a garage or shop if they have one available, but I like to keep mine inside so that it doesn’t experience a bunch of temperature changes.
Save Your Tumbling Media
I practice this technique because I’m a pretty frugal person. Rock tumbling isn’t an overly expensive hobby, but I always like to save money and reduce waste where I can. If you go about it the right way, you can save and reuse your tumbling media so that you don’t have to purchase new stuff for every batch of rocks you tumble.
The key with this tip is to make sure you only reuse the tumbling media for the same step it was previously used on. You can’t go using the stuff you used on Step 1 for the polishing phase, otherwise you’re going to ruin your entire batch of rocks.
Regardless of the type of media you use (ceramic, plastic beads, etc.) just keep it in a tupperware container after you’re done with it. Make sure to thoroughly rinse and dry it before storing it so that it’s ready to go for your next batch. Also, make sure that the containers are covered with a lid to make sure no debris gets in there while it’s being stored – you don’t want to find any surprises in your rocks after a week of tumbling.
The monetary savings isn’t the only reason to reuse your grit. I actually think that the tumbling results can be a little better with reused ceramic media than they would be with new stuff. Sometimes the ceramic media you get can have little rough parts on them that could potentially gouge and scratch your rocks a bit. They eventually wear down and become smoother but if you reuse your media you only have to go through that once.
Discard Small or Thin Rocks
This tip is absolutely critical to a successful tumble, in my opinion. Before every tumbling step, examine each rock to make sure it will survive through the next step. This means making sure that it’s not to small and that it hasn’t become so thin that it might break.
If the rock has become too small there is a chance that it will just be completely ground up and disappear into the slurry during the next tumbling stage. This is a waste of a good rock! You may as well just pull it out and set it to the side so that you can enjoy it as is. There’s no point putting it back into the tumbler just to have it be completely ground to dust.
More importantly, you want to make sure that none of the rocks you’re putting back in the tumbler have the potential to break. Depending on the original shape of the rocks and how worn they have become, they may have become too thin and fragile to survive the next step. It’s critical that you remove these rocks from the batch before starting up your tumbler again.
If you don’t take these fragile stones out you are risking them breaking and ruining the rest of the batch. When they break they will have fresh, sharp edges that will scratch everything else in the tumbler. It’s just not worth putting the rest of your batch at risk to polish one more rock, not to mention wasting the time and material on a ruined tumbling step. Take those thin rocks out and set them to the side.
Cover Your Tumbler With a Box
I don’t know if other rock tumbling enthusiasts do this, but I’ve been doing it from the very first time I used my rock tumbler. I was worried about the amount of noise that it was making and I didn’t want to hear it while eating dinner or watching TV (or, even worse, have my wife hear it and complain to me).
Part of my solution to the noise was just to cover the tumbler with a cardboard box. Conveniently enough, the Amazon box that the tumbler shipped in was just the right size for this. It was small enough to not greatly expand the footprint of the tumbler, but large enough to completely cover it without allowing any of the moving parts to rub against it.
The amount of noise reduction isn’t huge, but it’s definitely noticeable. The box also provides a sort of framework to allow you to cover it with extra blankets or pillows which will greatly reduce any noise. This can be a lifesaver for anyone trying to tumble rocks in an apartment or smaller house where there just isn’t enough space to put between you and a noisy tumbler while you’re trying to sleep. If you do this, make sure to leave some holes for ventilation – you don’t want your tumbler to overheat!
Clean Your Barrel Immediately
This tip is more for your own sanity and quality of life. When I first started tumbling I would always be in a hurry to clean my rocks after completing each tumbling step. After all, I had been waiting for days or weeks to see how the rocks had changed! But sometimes the process of cleaning the rocks took a long time and I would come back to a barrel filled with dried, caked-on grit and slurry.
Cleaning the barrel thoroughly between each stage is every bit as important for a successful tumbling batch as cleaning the rocks. Once that sludge dries onto the barrel it can sometimes be a pain to get off of there.
I have found that it’s a lot easier just to clean the barrel immediately after taking the rocks out while the sludge is still wet. This is a lot like doing the dishes right after you’ve eaten instead of waiting a few hours. You might not feel like doing it at the moment but it’s a heck of a lot easier than scrubbing off all the dried food (sludge) hours later.
While you’re cleaning out the barrel I would recommend putting your rocks in a bucket of water. This will do some initial cleaning and also prevent them from drying out. It is usually best not to allow your rocks to completely dry out throughout the entire tumbling process.
Use a Toothbrush to Clean
Sometimes it can be pretty difficult to get all of the old grit and slurry off of your rocks and out of the barrel. I have found that an old toothbrush is the best tool for the job. The job it’s designed to do (scrub nasty stuff out of small holes and cracks in hard teeth) is basically the same thing you’re using it for when cleaning your rocks.
Most people use soft bristled toothbrushes to brush their teeth, but I bought a hard bristled brush specifically to use on my rocks. I tried a soft bristled toothbrush and it worked okay, but the bristles just weren’t quite stiff enough to get into the hardest to reach places and get all of the old grit out. The hard bristled brush is a lot more effective and takes less time.
It’s important to get all of the grit off of the rocks between each tumbling stage, otherwise you’ll end up with sub-par results. The old grit will eventually work its way into the slurry of the new step and cause the rocks to not look as smooth as they otherwise would. Which brings us to my next tip…
Remove Any Rocks Containing Grit
Sometimes no matter how much you clean and scrub a rock you just can’t get all of the old grit out of it. There are some rocks that have deep pits or cracks which collect grit and slurry and no amount of elbow grease or ingenuity will get it out of there. If you put these rocks into the next step they will ruin the rest of the batch.
It’s best to just take these rocks out of the batch and save them for later. It doesn’t make sense to risk the quality of an entire batch of rocks just for that one rock. If you try to put it through to the next step some of that old grit will work its way out as the rock grinds down and that grit will ruin the entire step.
You don’t have to completely abandon that rock, though. After you set it aside, label it and save it to add to the next batch of rocks you run at the step it just finished. If you pulled it out at step 2, put it back in at step 2 of your next batch. It may grind down small enough to remove the hole or crack the grit was stuck in, allowing you to advance the rock to the next step.
Use a variety of rock sizes
For some of you this may seem obvious, but I have run across a lot of lesser experienced rock tumbling hobbyists that for some reason think that all of their rocks need to be of similar size. This couldn’t be further from the truth.
The best batches of tumbling rocks will have a nice variety of sizes. This size variation allows for the rocks to tumble more effectively and increase the grinding action. The rocks grind against each other at their contact points, so the more contact points the better. If you have some smaller rocks mixed in with the larger ones there will be a lot more contact and grinding between them.
If you don’t have enough variation in the size of your rocks that’s not necessarily a cause for concern. You can always add some ceramic media that will basically serve the same purpose as smaller rocks would. It will fill the gaps between the larger rocks, increase the grinding action, and keep the entire batch tumbling more smoothly.
Keep Meticulous Records
As you tumble more and more rocks it’s sometimes easy to forget what works and what doesn’t. It can be very helpful (and fun!) to write down everything you do in each step of every batch of rocks you tumble. This is particularly important if you are experimenting with a new technique or material. If a step ends up looking better or worse than usual you definitely want to be able to remember why.
Some of the things that I like to keep track of are:
- The type of rocks
- Relative sizes of the rocks
- Type and size of grit used
- Date the step was started & finished
- Speed of the tumbler in each step
- What type of tumbling media was used
- How the results of each step looked
It can be fun to look back on notes like this and remember what worked and what didn’t. It will also help you refine your own process and understand your results. Sometimes it’s easy to forget when you started the step your on, especially if you’re running multiple batches at once. Keeping quality notes will remove all the guesswork and make your process much more reliable and repeatable.