Identifying minerals can be a challenging process, especially if you’ve never done it before. When I was learning how to identify minerals in college it took me a while to understand the process and remember all the characteristics I needed to know, so I feel your pain! Over the years I have learned that identifying minerals is actually usually a fairly straightforward process, especially once you’ve done it a few times.
To identify a mineral, first observe its physical characteristics like hardness, color, streak, luster, cleavage, and specific gravity. Write these traits down, then compare the mineral’s traits to those of known mineral types. Additionally, you can use identification resources like books and flow charts.
Observing and documenting your mineral’s physical attributes is usually the most intimidating aspect of mineral identification for beginners. It can also be very frustrating trying to find a mineral that matches yours when comparing the attributes you’ve observed. I’ll walk you through the entire process and soon you’ll be identifying your minerals like a pro.
Observe Physical Characteristics of the Mineral
Did you know there are over 5,000 species of minerals in the world? It’s virtually impossible to remember them all, let alone what they all look like. This is why it’s important to take a methodical, scientific approach when identifying a mineral.
Minerals are solid, inorganic, and naturally occurring substances that usually have a defined crystal structure. It’s important to keep this in mind and differentiate them from rocks, which are aggregates of one or more minerals.
Tip: If you’re interested in learning to identify rocks, check out my complete rock identification guide.
Because mineral types are so well defined and their chemical composition doesn’t vary, they can be distinguished from one another by observing their physical properties. Testing as many of these properties as possible is the first essential step in properly identifying a mineral.
Color
The first thing that most people notice about a mineral is its color. It is an important identifying characteristic, but you must also keep in mind that color can often be deceiving. Take note of your mineral’s color, but don’t immediately rule out minerals that don’t usually occur in that color.
Minor impurities in a mineral can have a drastic impact on its color, so relying too heavily on color for identification is often a mistake. In fact, color is fairly low on the list of diagnostic traits for most minerals because it is too unreliable.
Luster
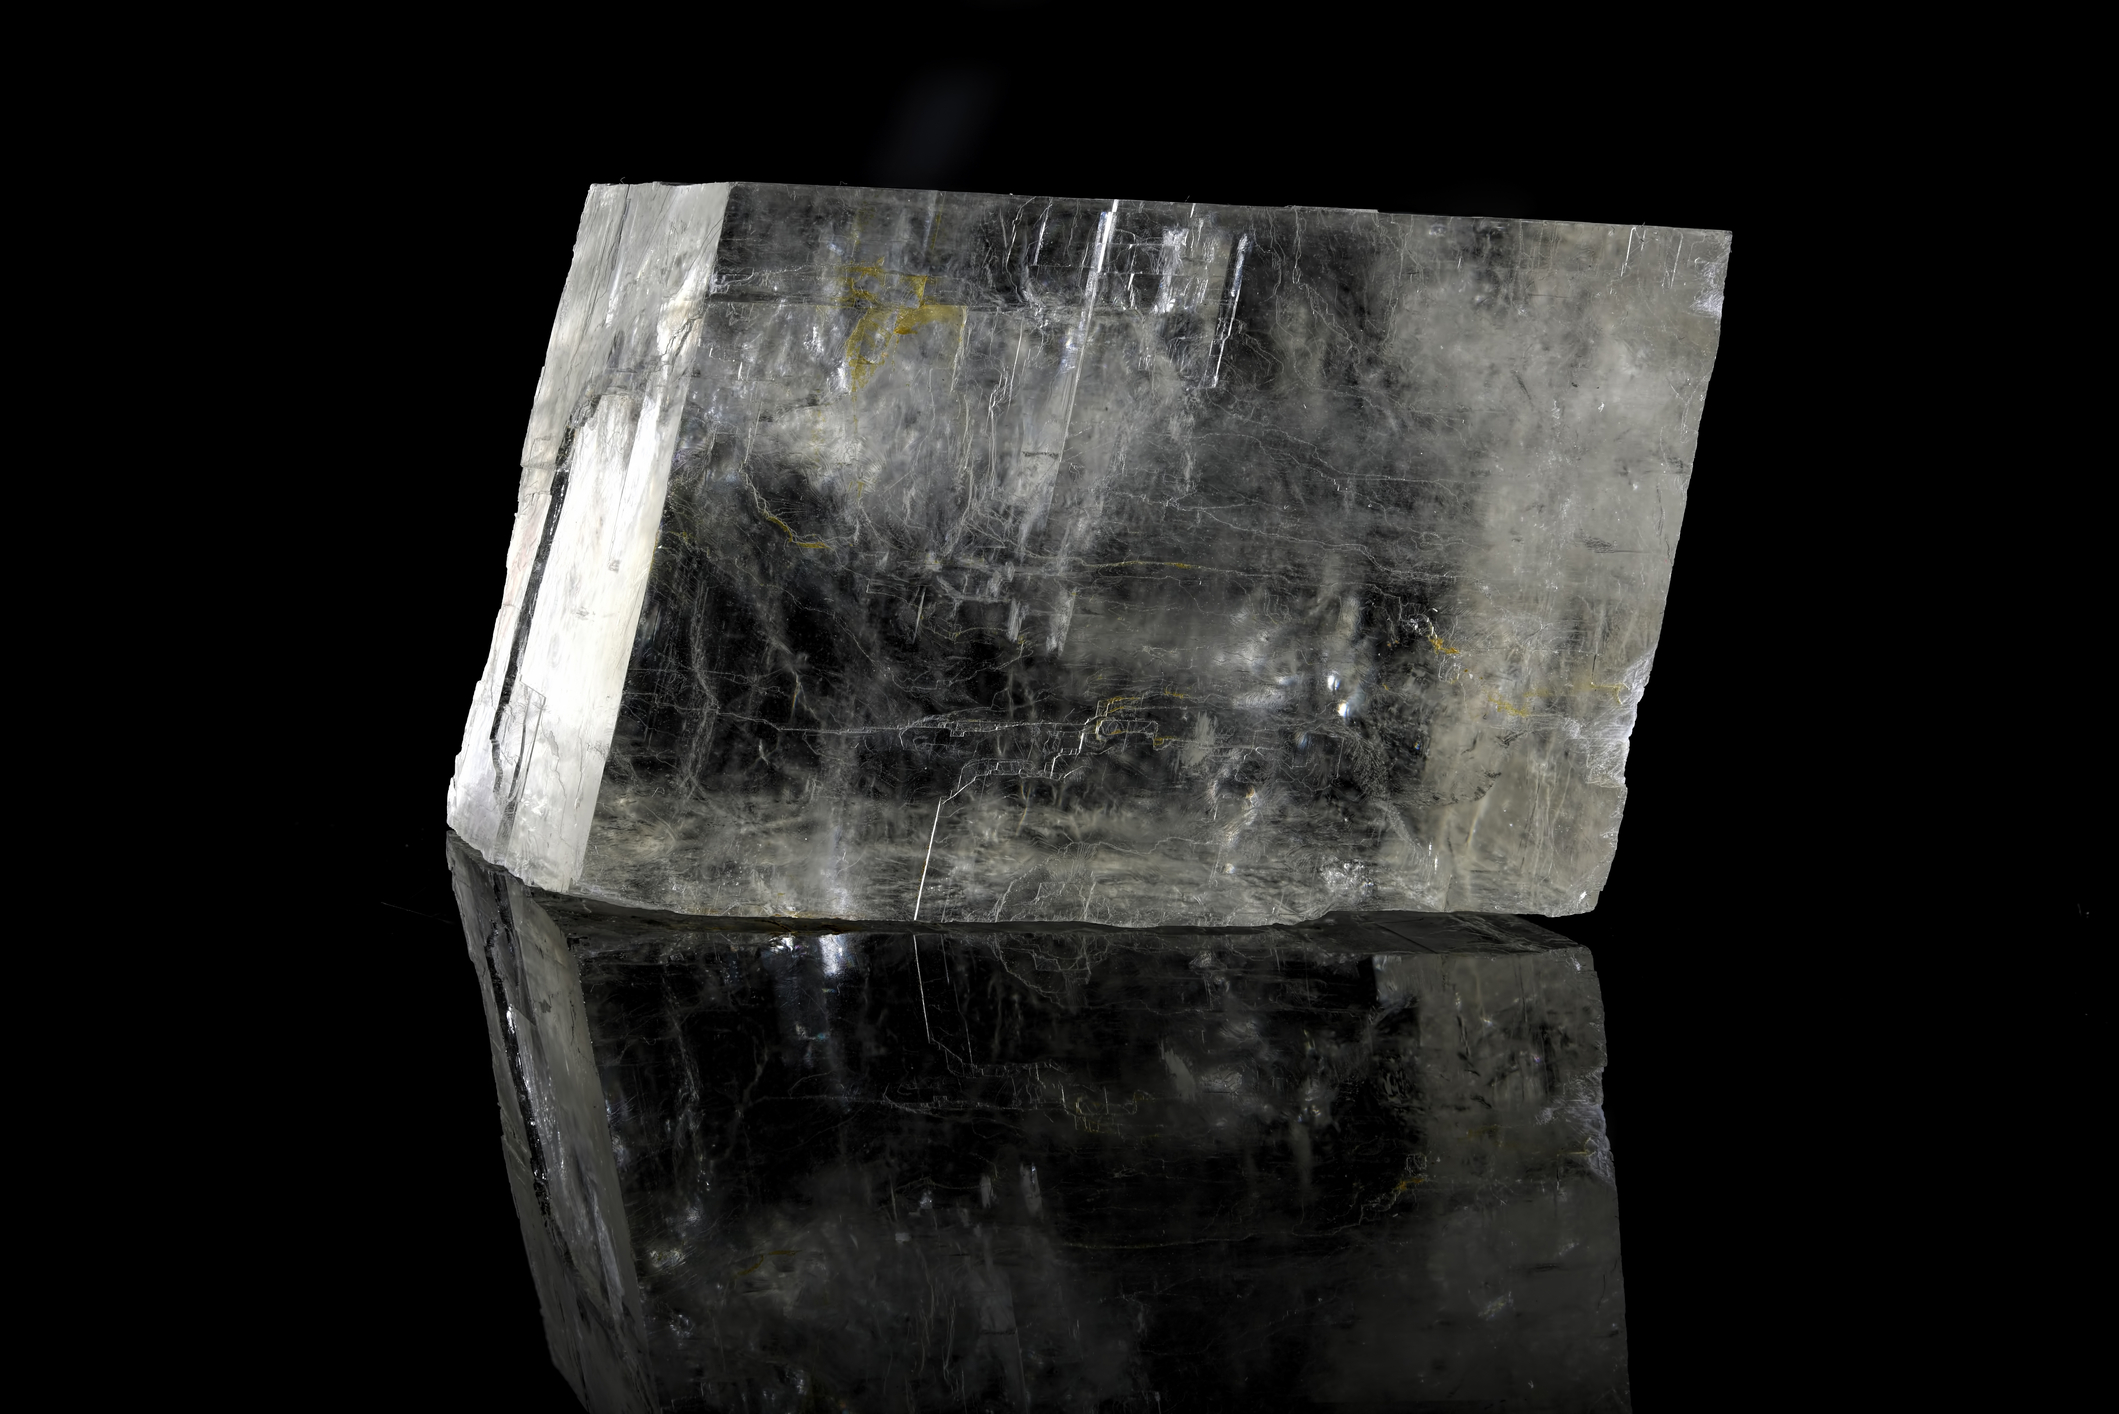
The luster (or lustre) of a mineral describes how light reflects off of the surface. This trait is especially useful when the surface is relatively fresh and undamaged, or when looking at the flat surface of a crystal.
The two main types of luster used for identification purposes are ‘metallic’ and ‘non-metallic’. As you might guess, these descriptions simply separate minerals into two groups that either appear metallic or don’t.
Luster can be subdivided further than those two groups, and narrowing down your mineral’s luster can often be very useful for identification.
Mineral luster types include:
- Metallic – Like polished metal, with reflective surfaces
- Submetallic – Similar to metallic, but less reflective
- Glassy – Translucent or transparent, highly reflective
- Resinous – Translucent or transparent, moderately reflective
- Pearly – Looks like a pearl, with low reflectance
- Waxy – Like wax from a candle, opaque or translucent
- Adamantine – Highly reflective, usually transparent like diamond
- Dull – Almost no reflectance, with coarse grains
- Earthy – Similar to dull, but larger grains and less reflectance
- Greasy – Looks like hardened fat, often also feels greasy
- Silky – Has a sheen like silk due to parallel fibers
For more example pictures of what these lusters look like I would recommend checking out the Wikipedia page on luster.
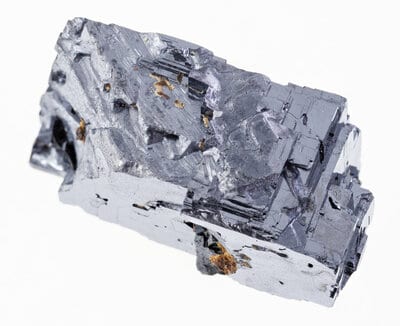
Hardness
The hardness of a mineral is one of the best traits to use for identification. Hardness describes the ability of a mineral to resist scratching. It is measured on a non-linear scale called Mohs Hardness Scale, which uses 10 minerals as benchmarks to describe how hard they are to scratch. Diamond is the hardest (10) while Talc is the softest (1).
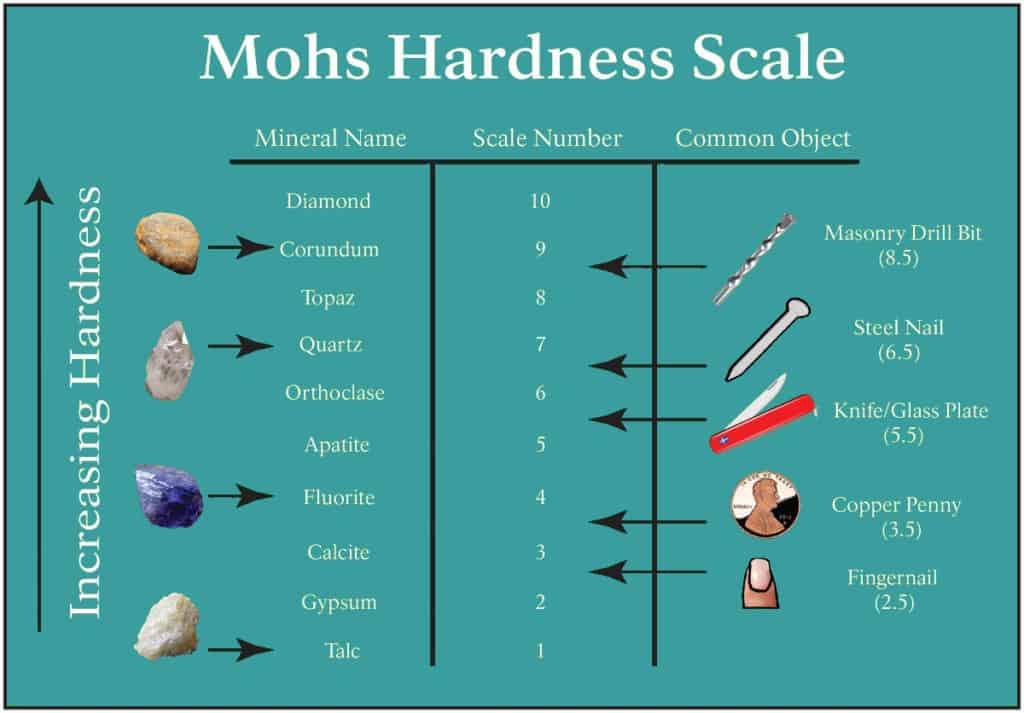
Not only is it extremely consistent between mineral samples of the same kind, but it is usually very easy to test for.
In order to test your mineral’s hardness, you’ll need a few basic tools. In order to have a fairly complete hardness testing kit, you’ll need to gather as many of the following as possible:
- Penny (copper)
- Glass
- Nail (steel)
- Drill bit (masonry)
The masonry drill bit will likely be the most difficult to acquire if you don’t already have one in your garage. It is only used to help identify the hardest of minerals, so chances are you can get by without it. But if you really want/need one, you can pick one up for cheap at your local hardware store or buy one off of Amazon. Make sure it’s a masonry drill bit, which is different from a regular drill bit. The tip is made of carbide which is harder than usual.
To test your mineral’s hardness, you’ll want to attempt to scratch the mineral with the items above, or vice versa. I like to start in the middle of the hardness scale, so I usually try to scratch my glass plate with the mineral. If the mineral won’t scratch the glass, then that means it’s softer than glass so I’ll move down to the penny and then my fingernail, if necessary. If it does scratch the glass, that means it’s harder than glass so I’ll move up to the steel nail and the masonry drill bit, if necessary.
By finding the upper and lower bounds of the hardness of your mineral you can significantly narrow down the list of possible minerals you’re dealing with. As with all of the tests you perform, make sure to write down the result so you don’t forget!
Streak
A mineral’s streak is the color is leaves when you scratch it on the surface of a ceramic tile. Surprisingly, a streak’s color is often different than the color you see when just looking at the mineral.
Streak is a much more reliable and consistent identifier of minerals than color. This is because any impurities present in the mineral can have a drastic effect on color, but have a much less pronounced effect on the color of the streak.
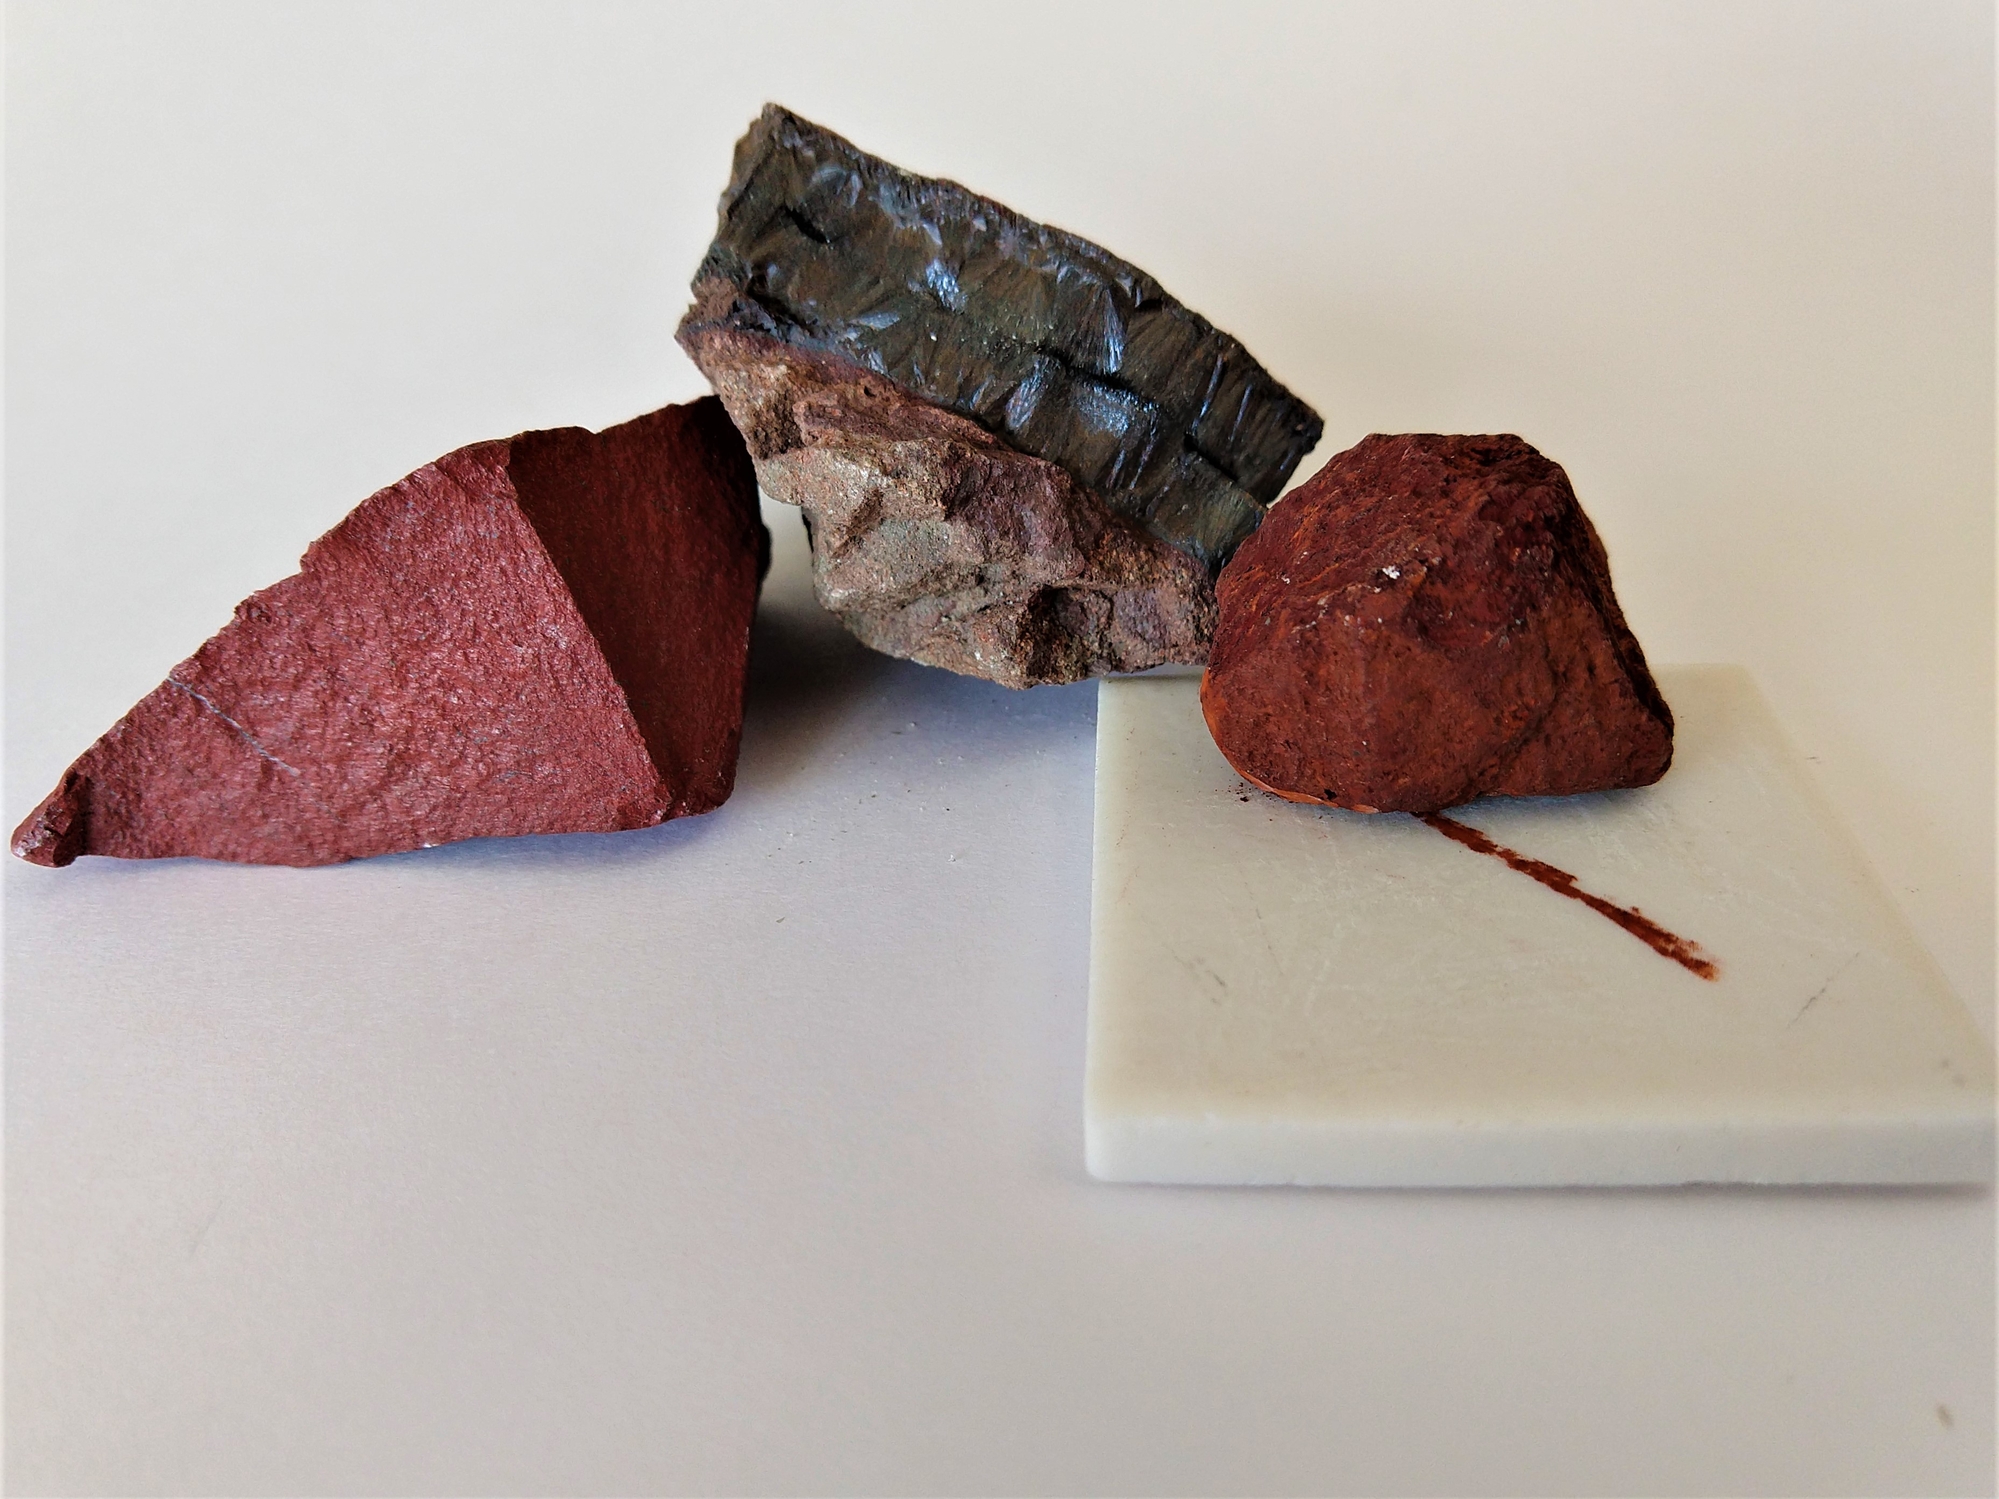
In order to test your mineral’s streak, you’ll first need a ceramic streak plate. You can pick up a batch of them for cheap on Amazon. All you have to do is rub the mineral along the plate for about an inch – enough to rub some of the mineral onto the plate and observe the color of the streak. You might be surprised at the result – sometimes it is quite different than the mineral’s normal color!
Cleavage
A mineral’s cleavage refers to its tendency to easily break along one or more planes. This behavior is due to weaknesses in the crystal structure in certain directions, and it can be very useful when identifying minerals.
This trait can be a little difficult for new rockhounds to reliably identify, but it’s usually only due to a lack of confidence. Observe your mineral and look for any structural tendencies like parallel flat surfaces.
There are many different kinds of cleavage, and it can happen in more than one direction. Take note of how many directions (if any) your mineral displays cleavage and how those directions are oriented to one another. Types of mineral cleavage include:
- Basal – Along one plane, separates into sheets
- Cubic – Three planes intersecting at 90 degrees
- Octahedral – Four planes
- Dodecahedral – Three planes intersecting at non-90 degree angles
- Prismatic – Two planes
- Rhombohedral – Six planes
- Indistinct – No discernible cleavage
Keep in mind that not all minerals display cleavage. It’s also possible that your particular mineral sample doesn’t display any identifiable cleavage but others of that type may. This means that a lack of visible cleavage is not necessarily a good indicator that you have a mineral with no cleavage. It could just mean that your specimen is damaged or weathered.
The best way to combat this issue is to try to break off a small piece of your specimen and look for cleavage planes. This has the obvious drawback of damaging the specimen and often isn’t allowed in lab or classroom settings.
Specific Gravity and Density
Specific gravity is one of the very best properties to measure when trying to identify a mineral. Most mineral species have a very narrow range of specific gravity, so if you can get an accurate measurement then it can go a long way towards identification.
Specific gravity is basically a unitless number that describes how heavy a mineral is compared to an equal volume of water. So, if a mineral is 3 times as dense as water, it will have a specific gravity of 3. This is very useful because while two minerals may be the same size, they will have different specific gravities.
As useful as specific gravity is in identification, amateurs are often constrained by a lack of necessary tools for the job.
One workaround for this is to simply hold the specimen and take note of its ‘heft’, or how heavy it feels compared to what you’d expect a rock of that size to weigh. Does it feel particularly heavy or light? Or does it feel ‘average’? A good rule of thumb for approximating specific gravity this way is:
- ‘Light’-feeling minerals have a specific gravity lower than 2.0
- ‘Normal’-feeling minerals have specific gravities between 2.0 and 4.5
- ‘Heavy’-feeling minerals have specific gravities higher than 4.5
If you want to be more accurate in your measurements (which I would recommend) you can get a few basic tools to step up your game. You’ll need a glass or plastic container (like tupperware) and a scale that can measure in fractions of a gram. I like to use a food scale like this one from Amazon.
This video does a good job of showing how to perform the test. It’s quick and simple as long as you have these basic tools.
A quick step-by-step to perform a specific gravity test:
- Weigh your mineral specimen and record the result
- Fill your container with water high enough to submerge the specimen
- Place the container on the scale and 0 out the scale
- Tie a string around the specimen
- Hold the string and suspend the specimen in the water
- Record the weight displayed on the scale
- Divide the number from step 1 by the number in step 6
This procedure will give you a very accurate reading of your mineral’s specific gravity. The larger your sample is the more accurate it tends to be. Keep in mind that this can only be used for single crystals or mineral masses, not minerals embedded in a host rock.
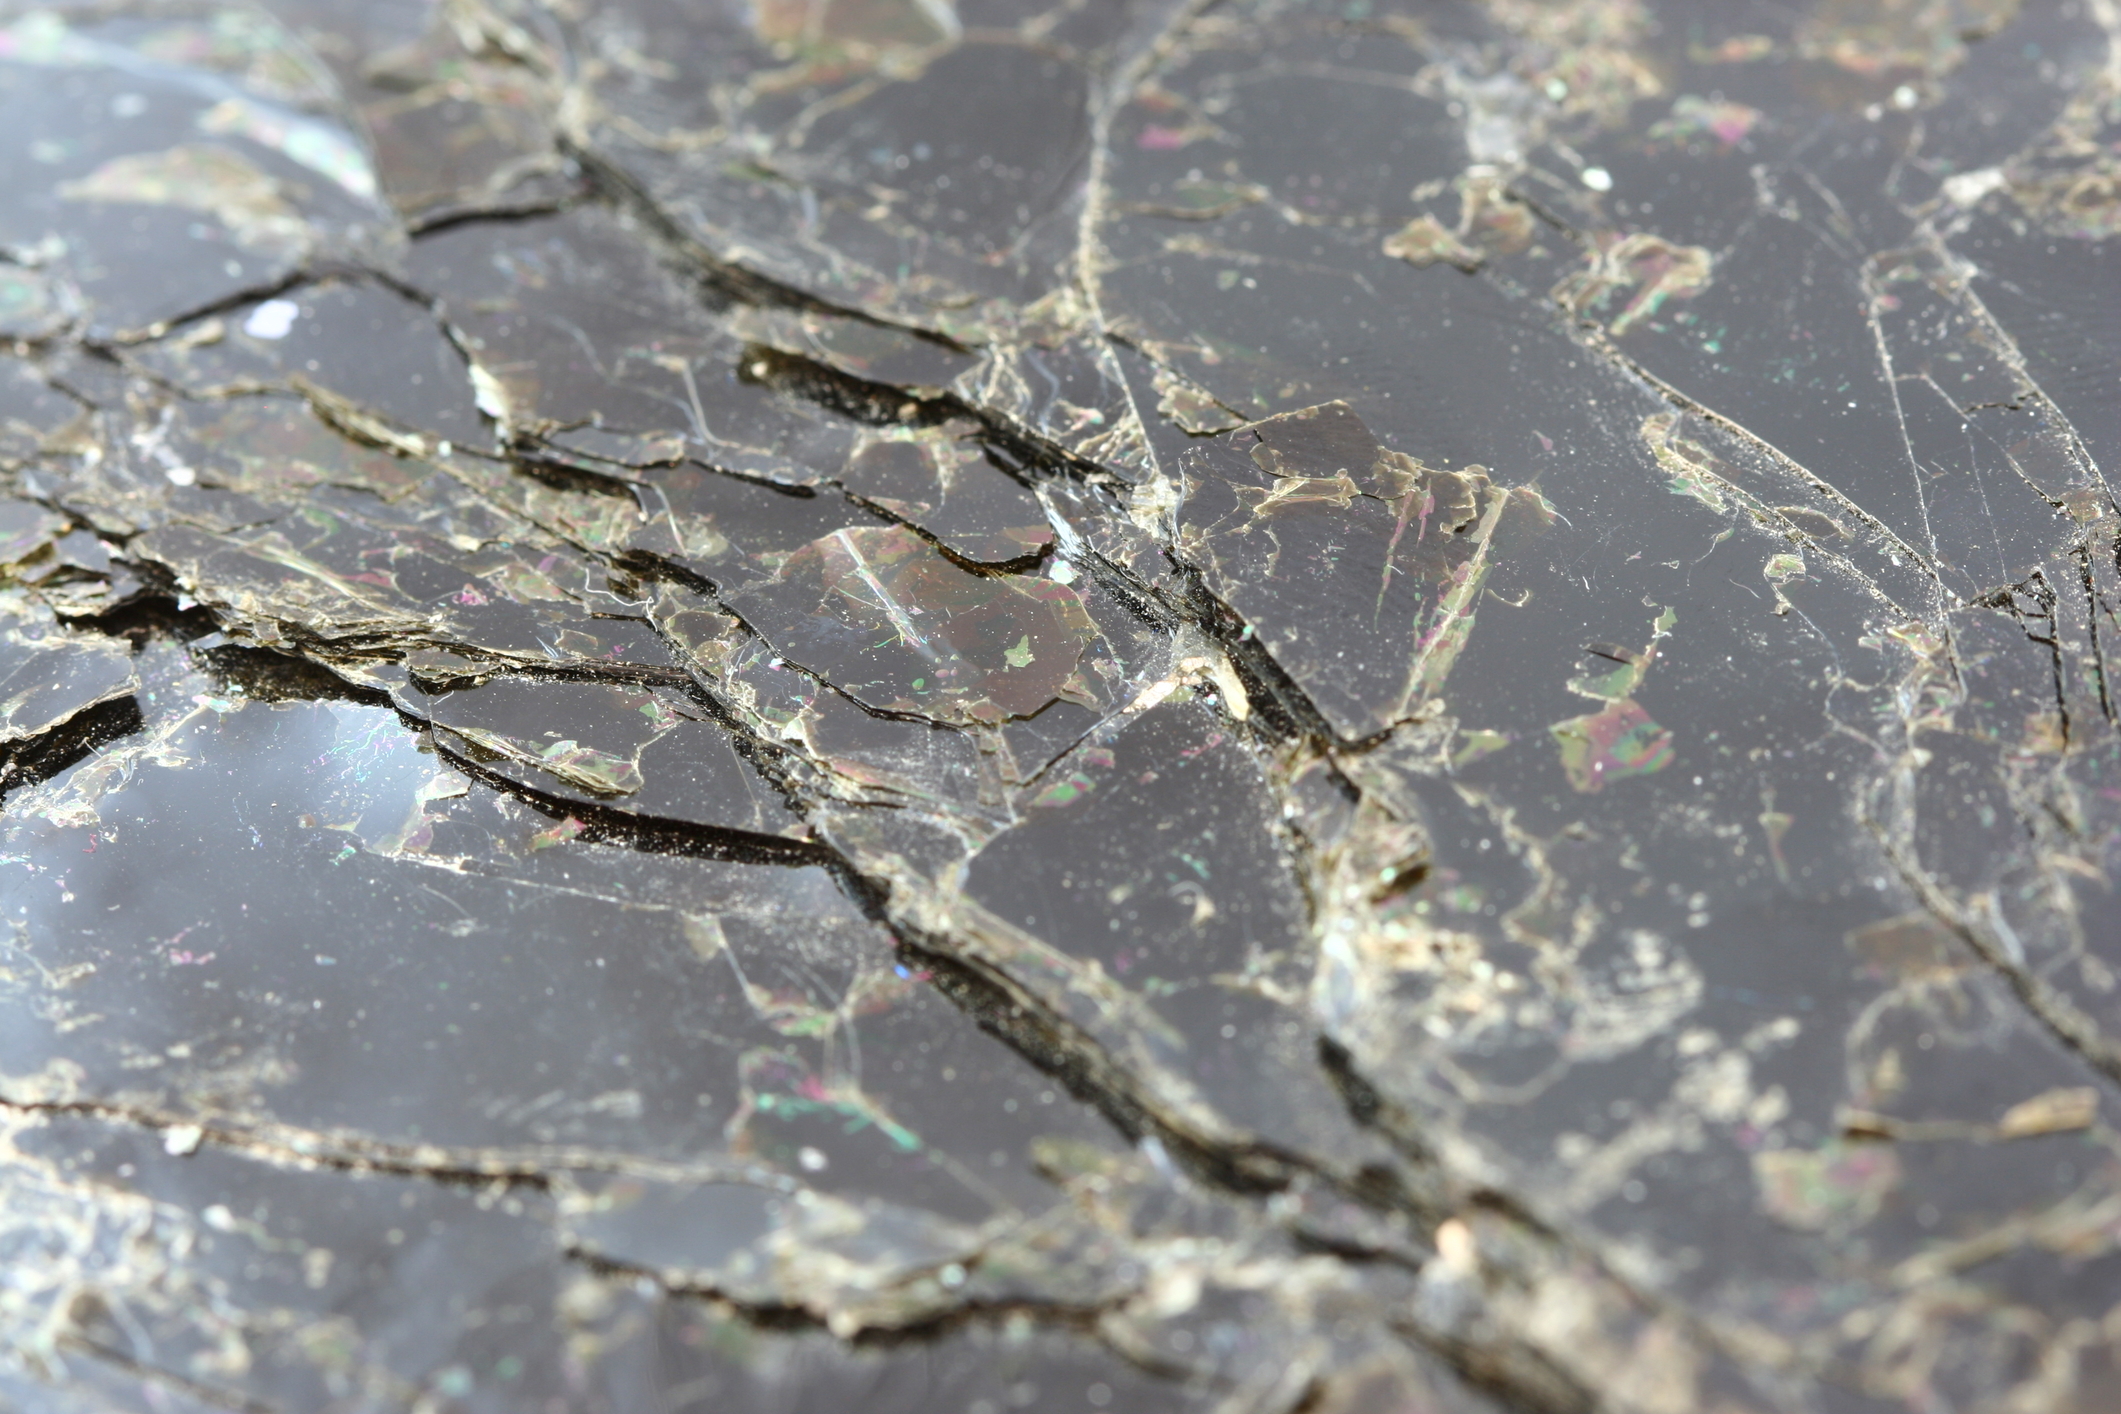
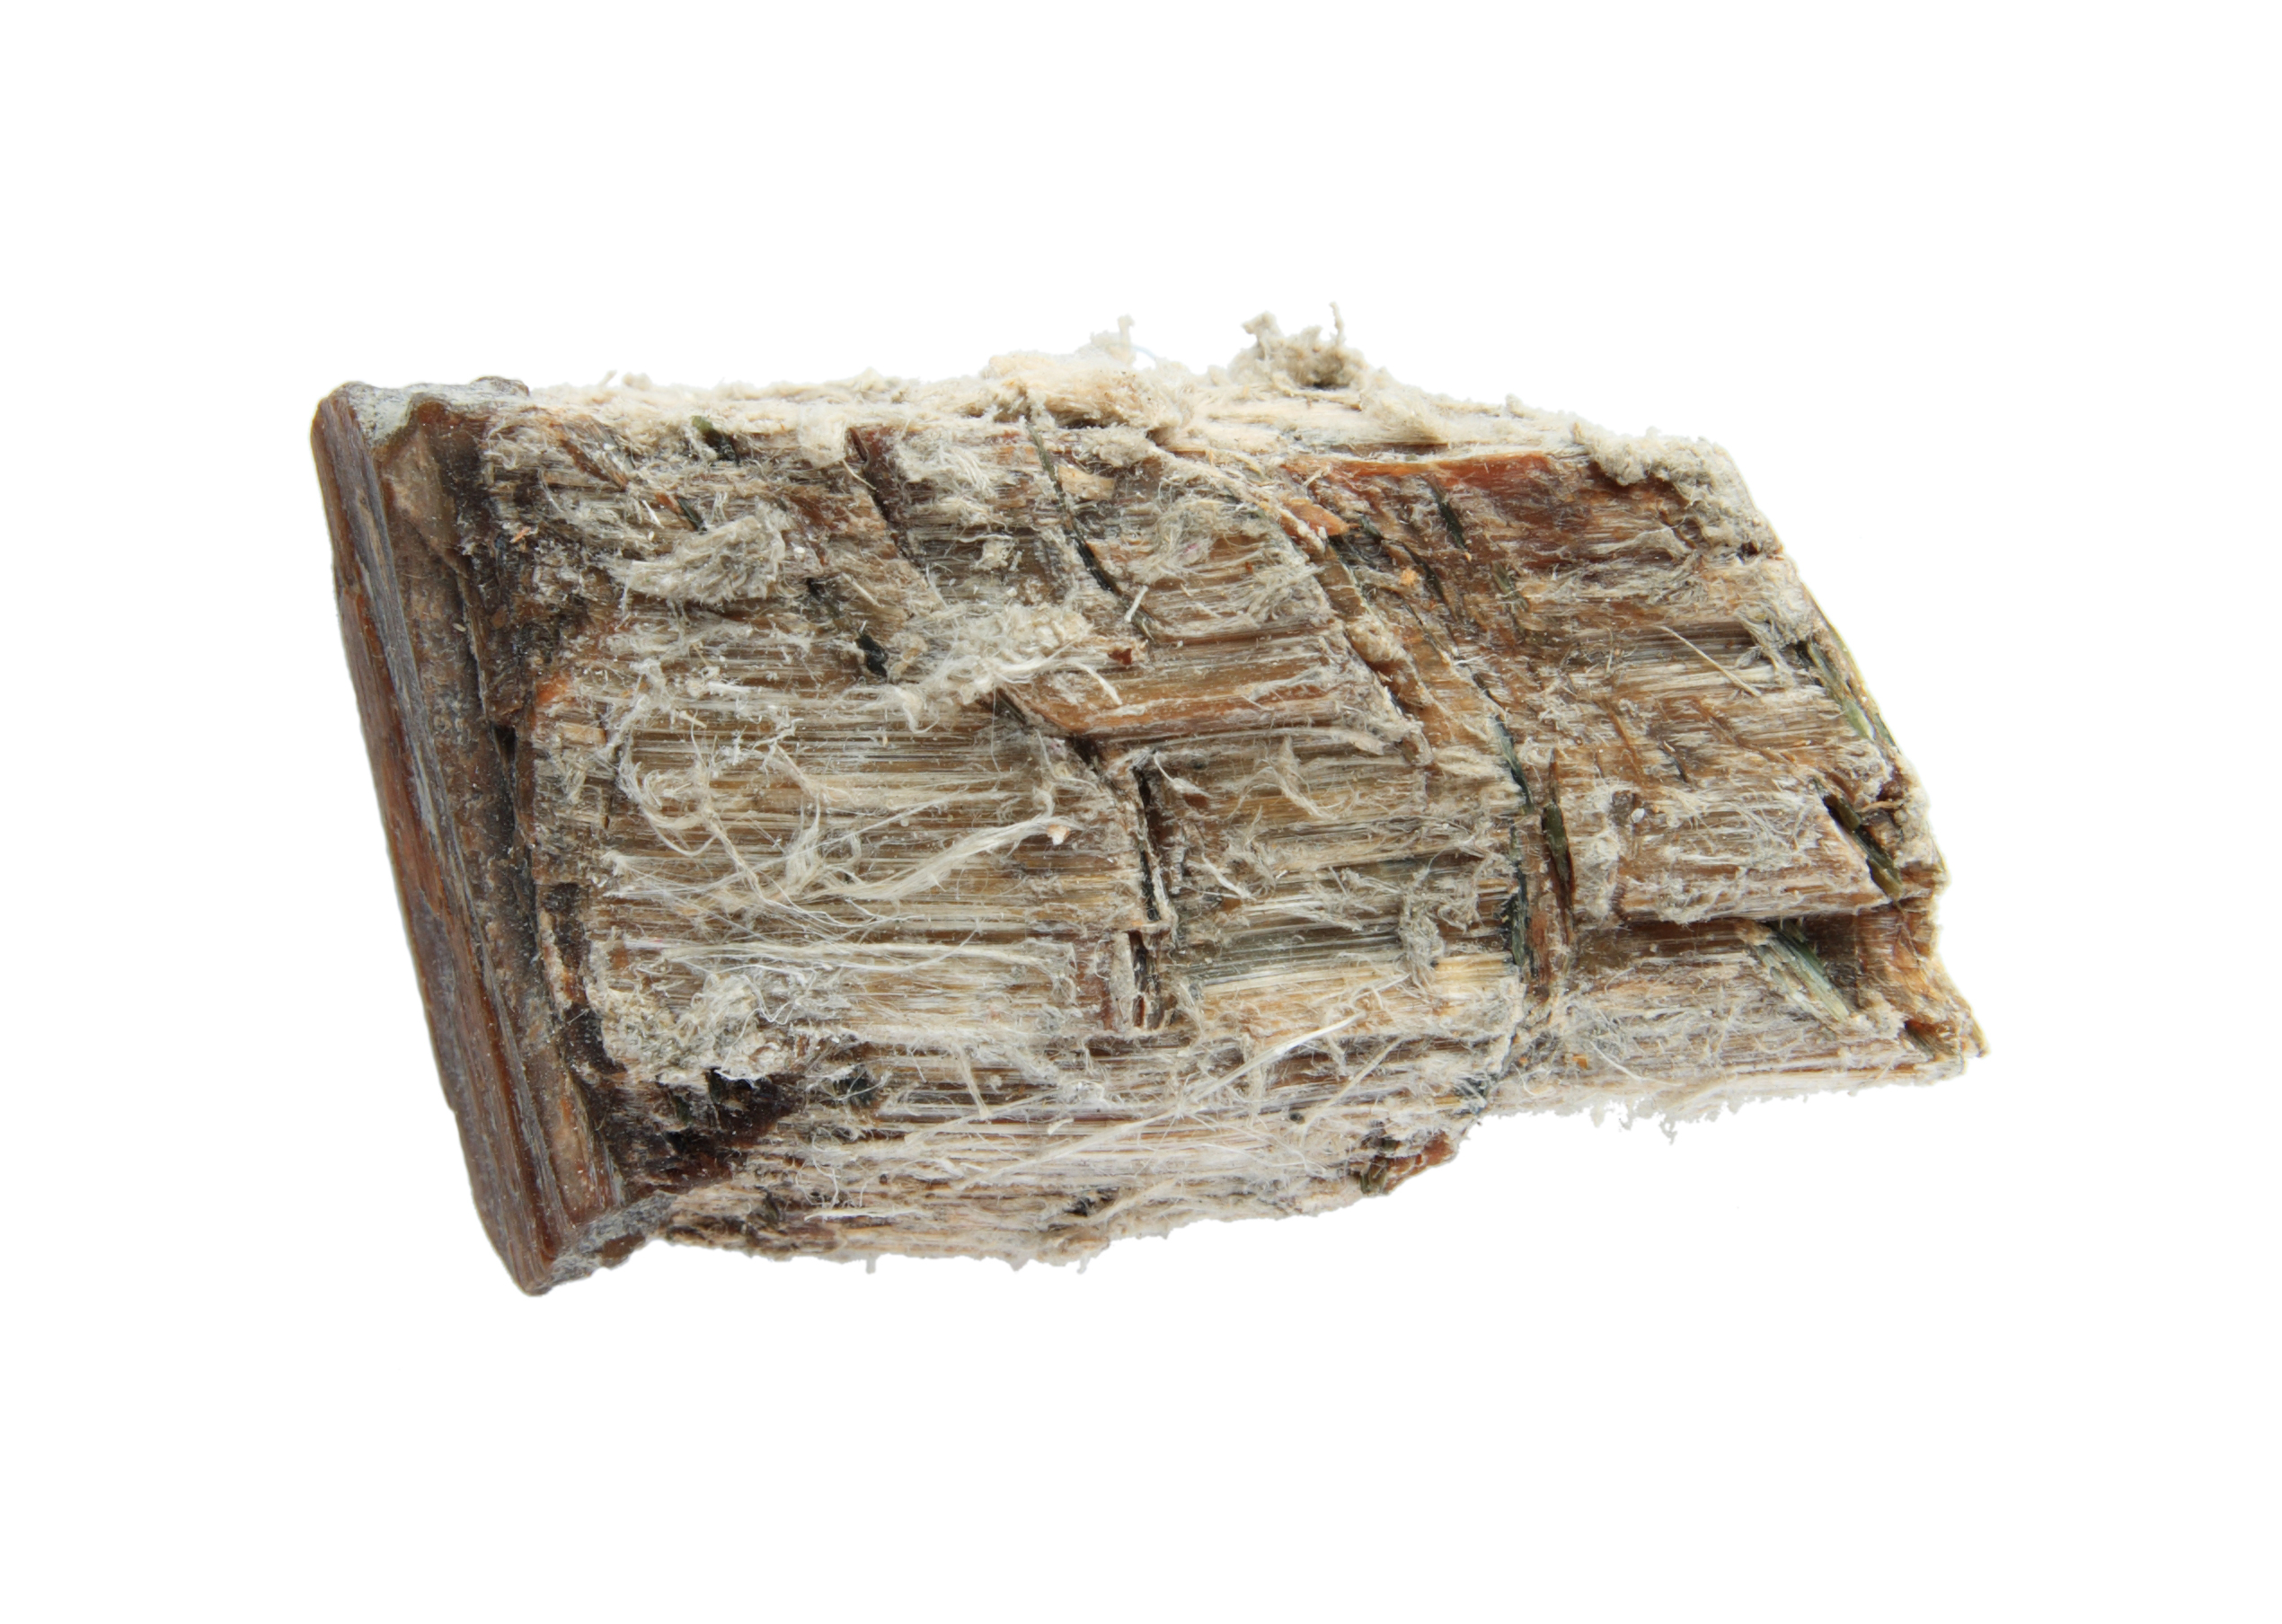
Fracture
Similar to cleavage, a mineral’s fracture describes the shape and texture of a mineral’s surface when it breaks. All minerals display some kind of fracture tendency, but it can be difficult to see if the mineral specimen displays strong cleavage. Fracture is, specifically, meant to describe how a mineral breaks along non-cleavage planes.
There are several types of fracture patterns that are commonly used when identifying minerals. Each one has a distinct look that can be very useful in identification.
- Conchoidal – Smooth, concave surfaces like the inside of a shell
- Subconchoidal – Similar to conchoidal, but with less curvature
- Earthy – Like loose soil, looks unconsolidated
- Uneven – Random and rough surfaces, very common
- Splintery – Long, sharp points, often fibrous in appearance
- Hackly – Sharp, jagged edges, often seen in metals
It is usually not necessary to break your specimen to observe or test for fracture. The specimen’s current form is almost always sufficient to get a good read on the fracture tendency unless the surfaces are particularly weathered and worn.
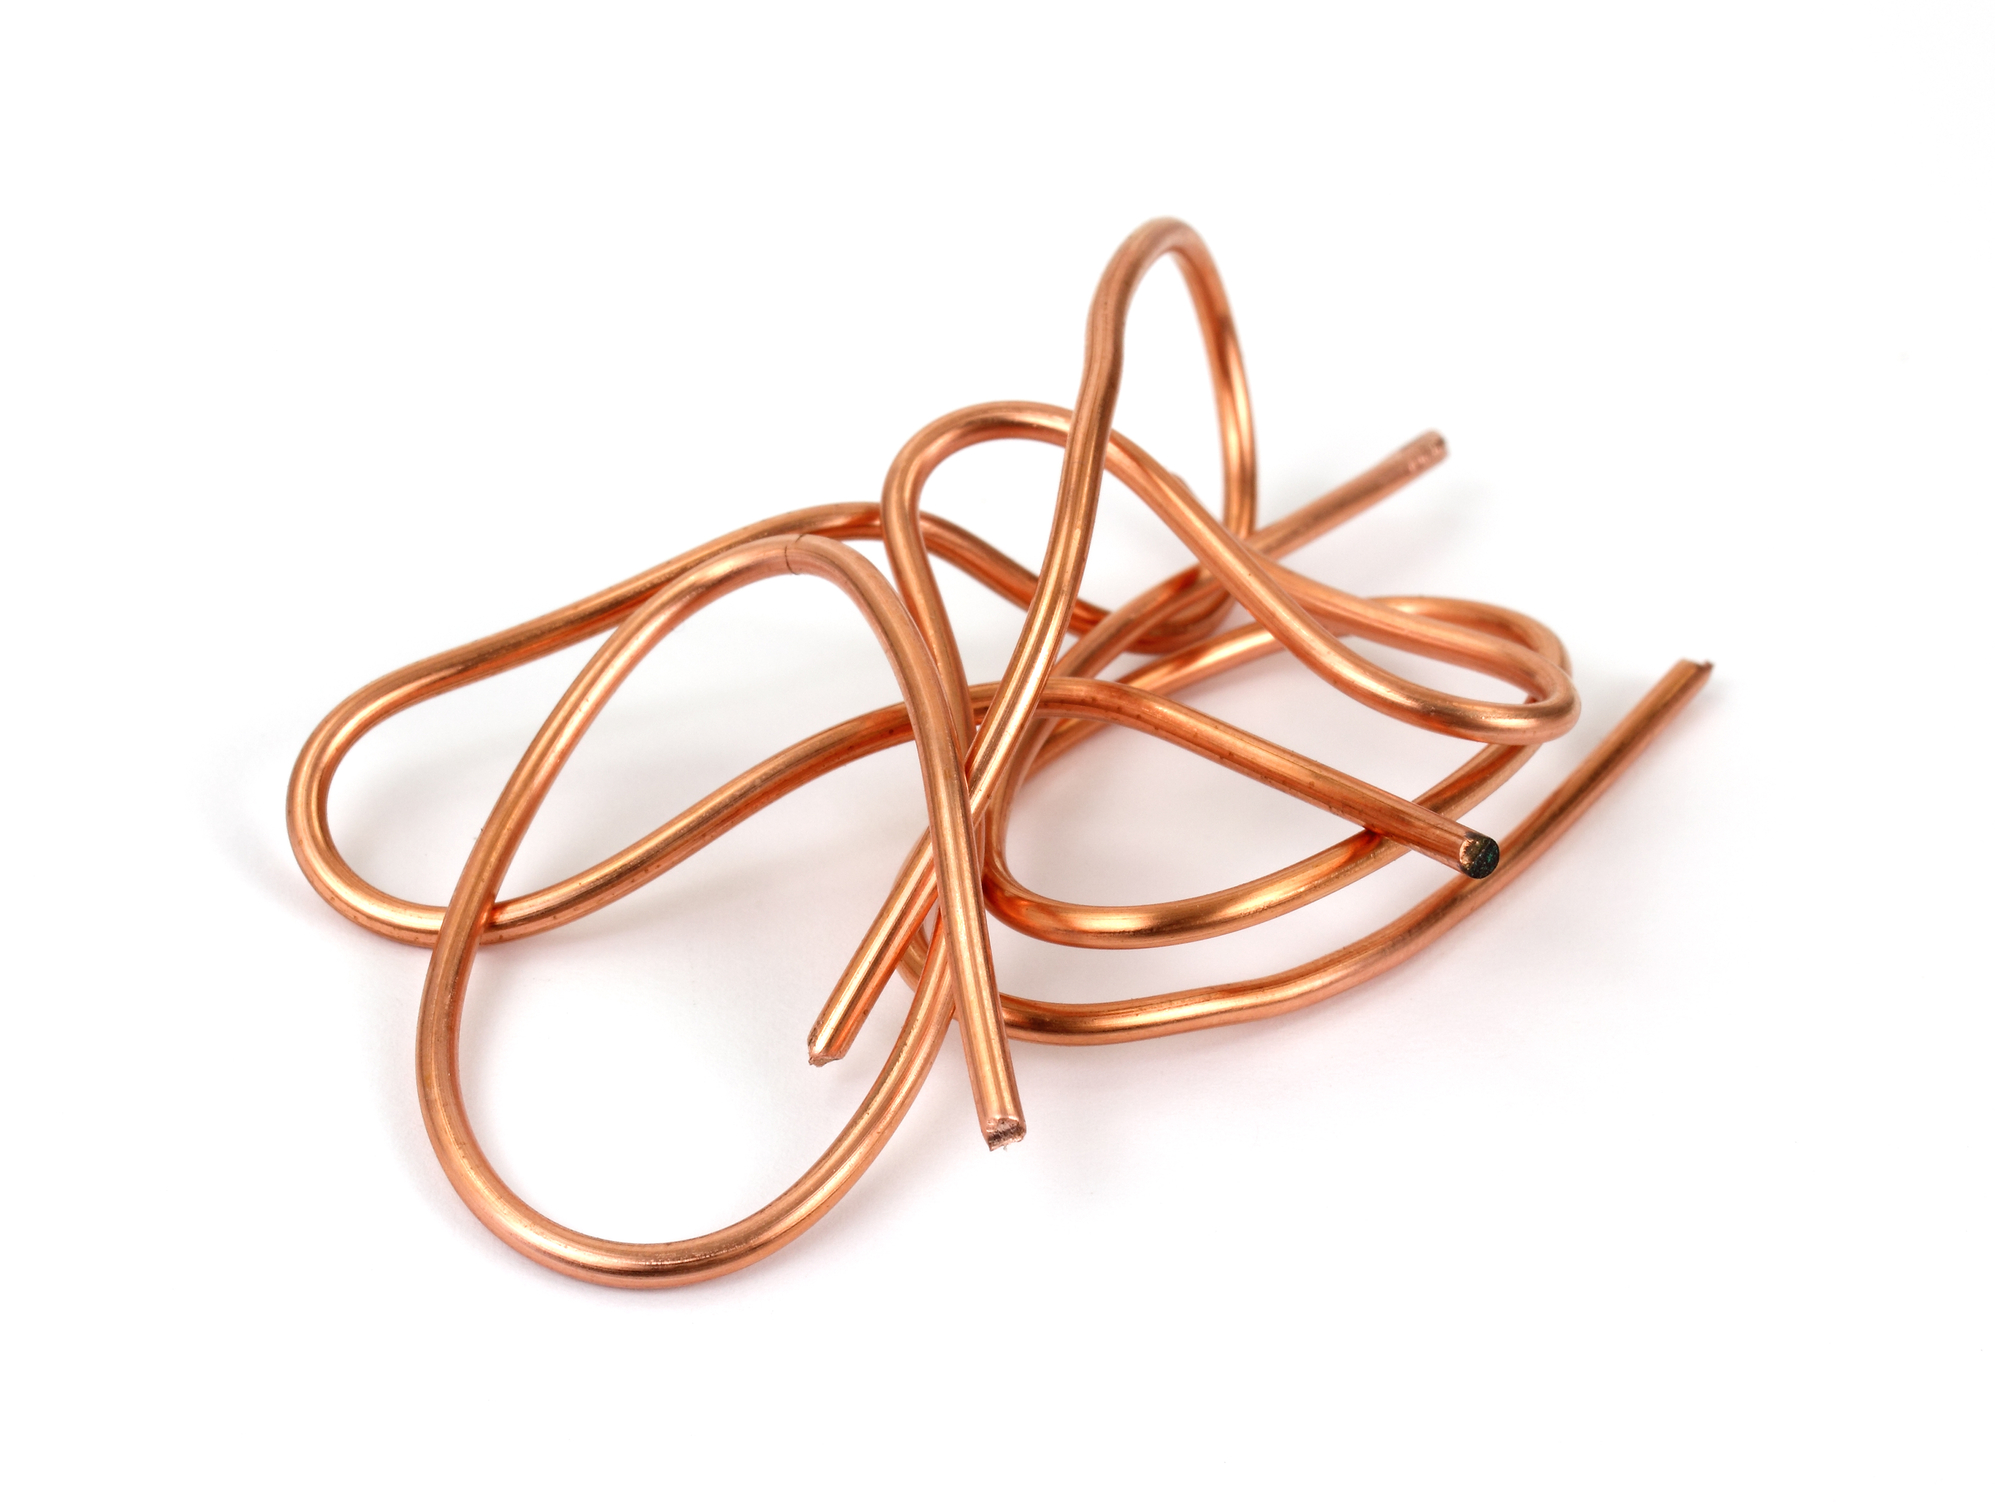
Tenacity
Tenacity is a mineral’s resistance to breakage through processes like crushing, twisting, and bending. Some minerals are very difficult to break while others are extremely easy. The tenacity of a mineral sometimes depends on the kind of stress you subject it to.
Unfortunately, in some cases, the only way to really test a mineral’s tenacity is to break your specimen. I usually don’t specifically test for tenacity unless absolutely needed or if I already have a small piece of the mineral that has already broken off.
The exception to this is when a mineral is brittle. When testing your mineral’s hardness, you may notice that when you try to scratch it with a harder substance the mineral turns to a powder. This means the mineral is brittle and there is no further testing needed to determine its tenacity. Thankfully, most minerals are brittle. Other tenacity tendencies are most commonly seen in metals like gold, silver, and copper.
There are six recognized tenacity behaviors for minerals:
- Brittle – Breaks easily or crumbles into a powder. Very common.
- Sectile – Can be cut smoothly with a sharp knife. Gold, for example.
- Malleable – Able to be smashed and smoothed into a sheet with a hammer.
- Ductile – Can be stretched into a wire, must also be malleable. Copper, for example.
- Plastic – Can be bent, and remains in the bent position. Copper, for example.
- Elastic – Can be bent, but returns to its original position. Serpentine, for example.
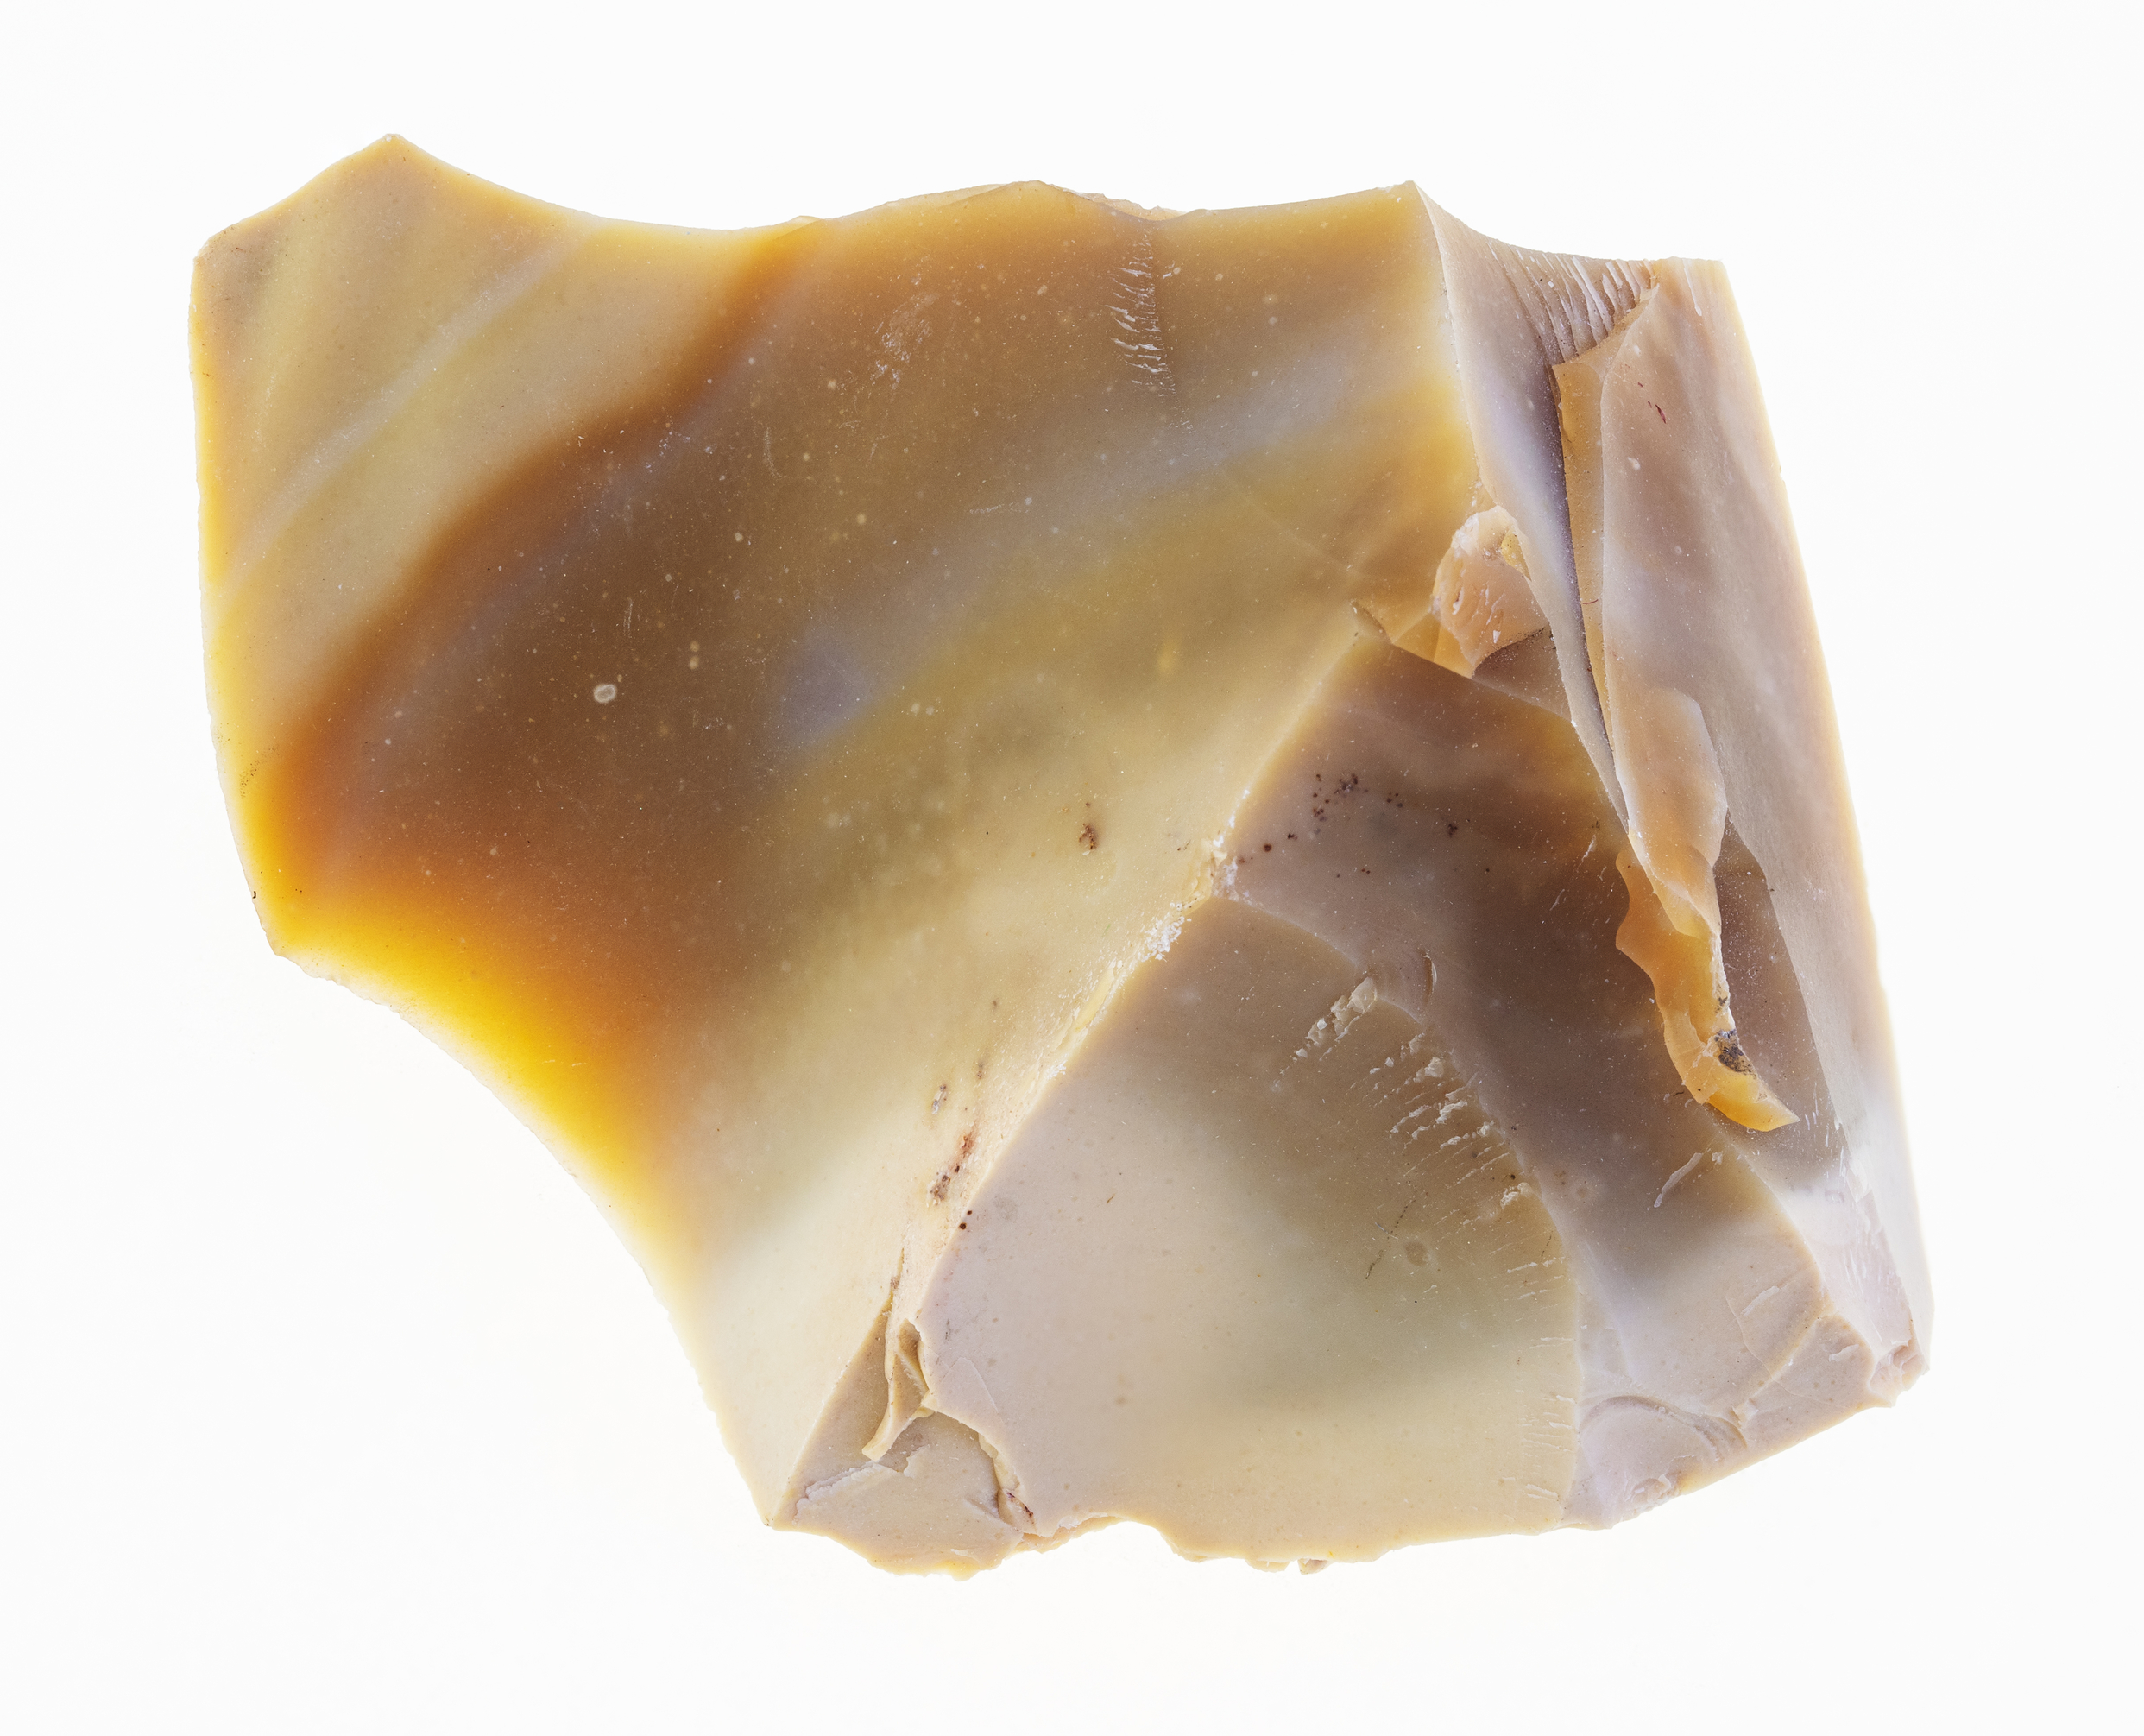
Diaphaneity
Diaphaneity is an easy and fun property to test. It describes the ability of light to travel through a mineral specimen.
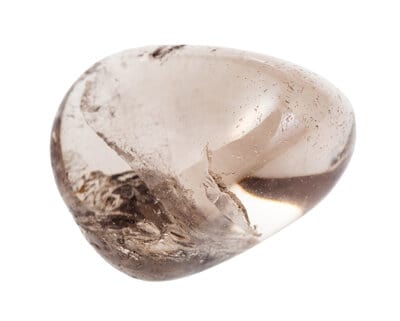
To test your mineral’s diaphaneity, simply hold your specimen up to the light or even try to shine a small pen light like this one from Amazon through it. Also, try putting your finger on the back side of the specimen, between it and the light source. You will be able to observe that your mineral falls into one of three categories of diaphaneity:
- Opaque – No light is visible through the specimen
- Translucent – Some light is visible, and you can see the outline of your finger
- Transparent – You can see through the specimen completely
Crystal Habit
A mineral’s crystal habit describes the general form and shape of its crystals. This sounds simple enough, but it can actually be very difficult for new (and even experienced) geologists to recognize. This is partly because not all specimens show textbook crystal habits, and partly because there are so many unique crystal habits.
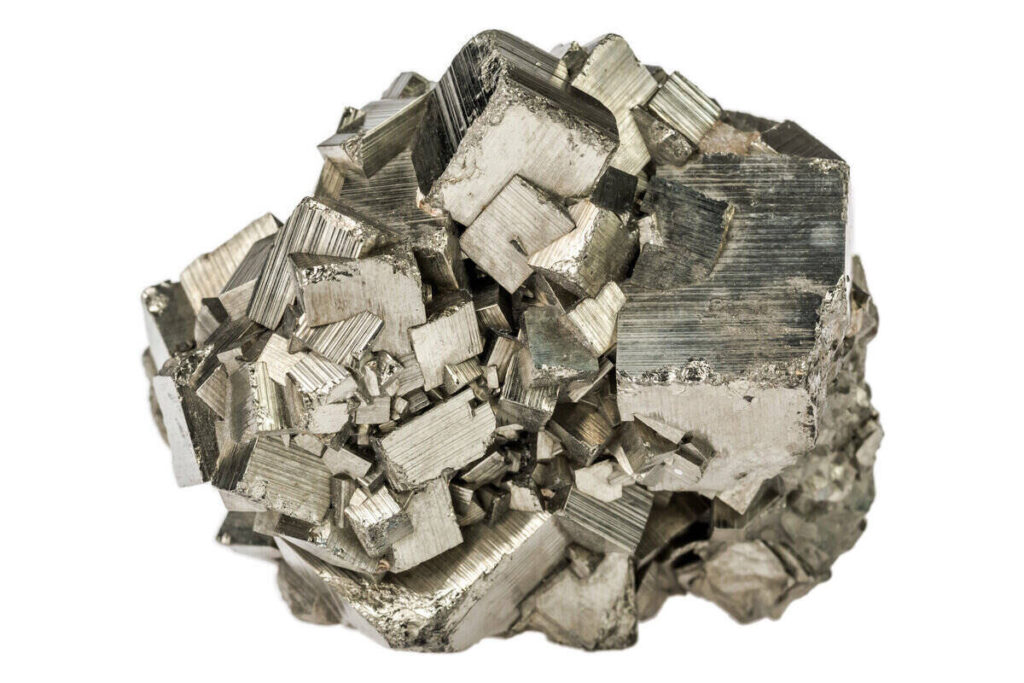
To make matters even more complicated, the same mineral can have several crystal habits depending on how it was formed. For example, pyrite normally forms with a cubic crystal habit but is also regularly found in ‘stellate’ discs.
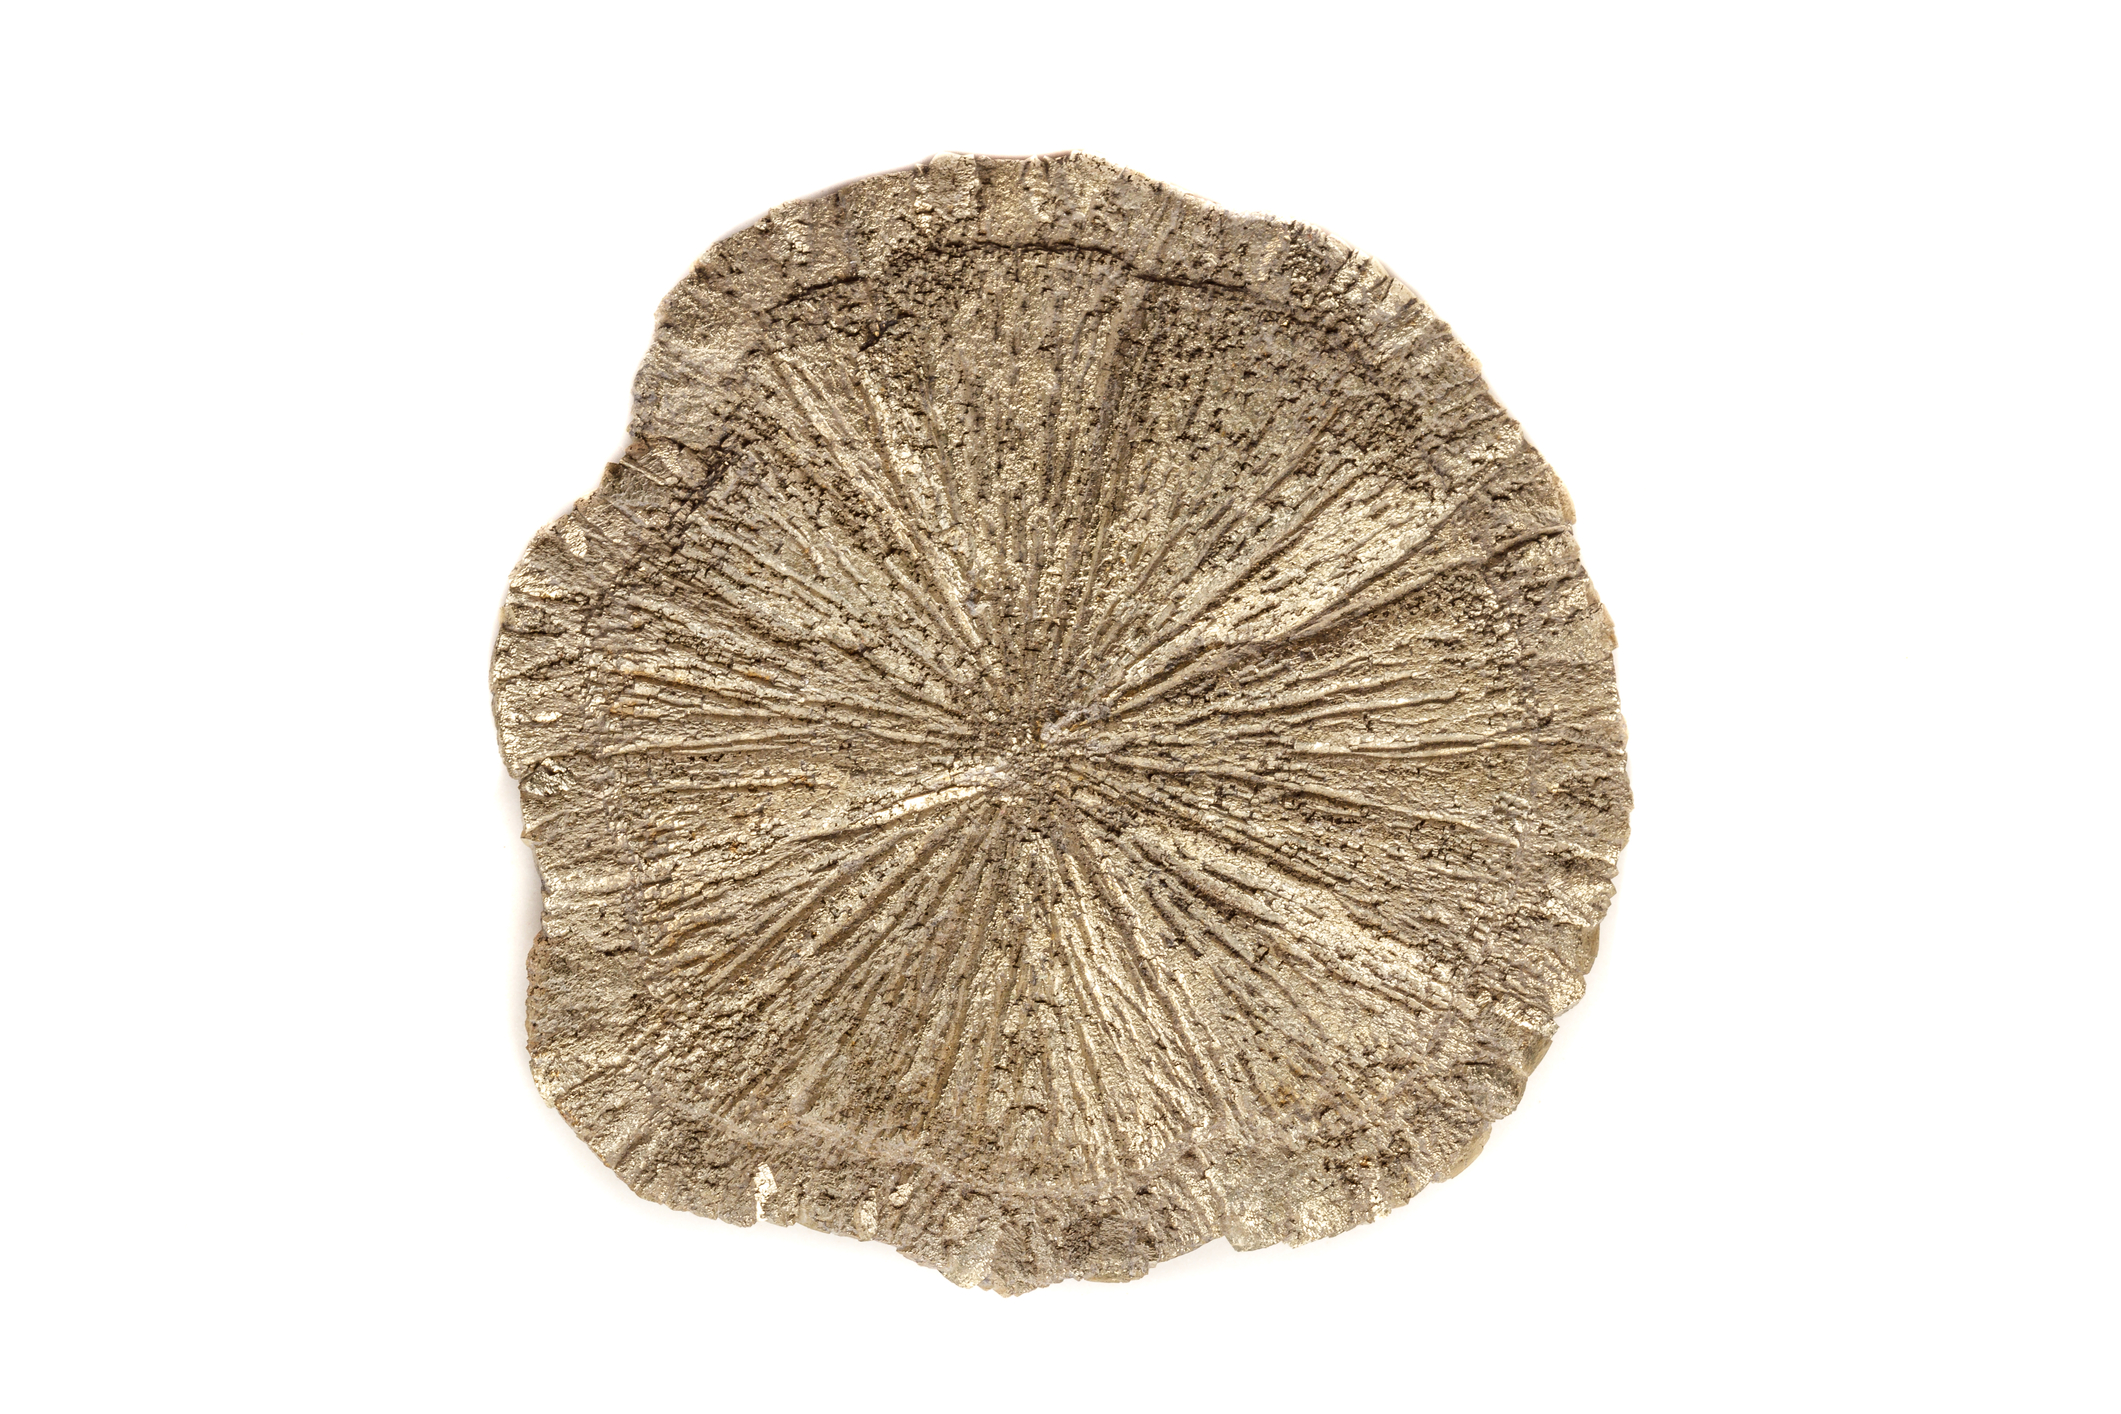
There are more crystal habits than would be practical to list here, so I will instead point you to the very good Wikipedia article on the subject that has good pictures and descriptions of each type.
Other Unique Identifiers
There are some minerals that have very unique identifying features. If you suspect that you might have one of these minerals then you can often test for these relatively unique characteristics early on in the identification process to narrow down your possibilities.
Here are some unique properties minerals can possess that may help you in your identification:
| Property | Description | Example |
|---|---|---|
| Magnetism | Attracted to a magnet | Magnetite, Hematite, Goethite |
| Acid Reaction | Fizzes with 10% hydrochloric acid | Calcite, Dolomite |
| Radioactivity | Emits radioactivity | Uranium, Thorium, Potassium |
| Fluorescence | Reacts with a UV light | Aragonite, Fluorite, Sodalite |
| Chatoyancy | Looks like a cats eye | Tiger’s Eye |
| Iridescence | Colorful play of light | Opal, Moonstone, Sunstone |
Note: Do not lick or taste your minerals. This is sometimes still taught to identify minerals like halite but can potentially be dangerous, especially with unknown minerals.
Compare the Mineral to Known Mineral Types
Once you have observed and recorded as many of your mineral specimen’s physical properties as possible, it’s time to use that data to identify your mineral. In order to do this, you simply find the mineral that best matches your specimen’s characteristics.
I have listed some of the most common minerals students are asked to identify below. Use this chart to see if you can match your specimen to a mineral on this chart. Remember that there are thousands of minerals, so if you can’t find a match here you likely have to consult so other resources. I would recommend this page as a good place to start, if need be.
| Mineral | Color | Hardness | Streak | Luster | Sp. Grav. |
|---|---|---|---|---|---|
| Quartz | White, Clear, etc. | 7 | Colorless | Vitreous | 2.65 |
| Feldspar | White, Tan, Pink | 6 | Colorless | Vitreous | 2.6 |
| Fluorite | Purple, Green, Many | 4 | White | Vitreous | 3.18 |
| Calcite | Colorless, White | 3 | White | Vitreous | 2.71 |
| Gypsum | White, Yellow, Many | 2 | White | Silky, Pearly, Waxy | 2.32 |
| Biotite | Dark brown | 2.5-3 | White | Vitreous, Pearly | 2.7-3.3 |
| Muscovite | White, Gray | 2-2.5 | White | Silky, Pearly | 2.75-3 |
| Hornblende | Black, Dark green | 5-6 | Light Gray | Vitreous, Dull | 2.9-3.6 |
| Topaz | Colorless, Blue, Many | 8 | White | Vitreous | 3.55 |
| Corundum | Clear, Brown, Many | 9 | Colorless | Adamantine | 3.95-4.1 |
| Pyrite | Brass yellow | 6-6.5 | Green-black | Metallic | 5-5.1 |
| Hematite | Gray, Rust-red | 6 | Dark Red | Metallic | 5.26 |
| Magnetite | Black, Gray | 6 | Black | Metallic | 5.17 |
| Galena | Gray, Silvery | 2.5 | Leag gray | Metallic | 7.2-7.6 |
| Garnet | Red, Orange, Many | 7 | White | Vitreous | 3.1-4.3 |
For the sake of space, I have only listed some of the physical properties discussed above in this chart. If you think you have a good match for your mineral, look up its other properties and confirm that all of your characteristics fit that mineral. If so, then you have successfully made an accurate identification!
If you’re still stumped, however, there is a bit more you can do. Read on for some more ideas on where to go from here.
Utilize Available Mineral Identification Resources
If you’ve gone through the identification process I outlined above, chances are you’ll be able to get a solid answer about what type of mineral you have. However, there are some additional tools available that could aid you in the process.
Some of these tools I have found very useful, while others are hit-and-miss. If you choose to use any of them I would still highly recommend that you first test your specimen for as many physical properties as possible.
Here are some of the most popular mineral identification tools available:
- Smithsonian Handbooks: Rocks & Minerals – This book is the most useful I have found for help in identifying rocks and minerals. It has gorgeous pictures and nice descriptions of hundreds of rocks and minerals. The only drawback to a book like this is that it can sometimes be difficult to sift through to find a mineral that matches yours. Even if you have gone through the process of documenting your mineral’s physical properties, it can take a while to match it with a rock type in the book.
- The Mineral Key – This tool is a little dated but the concept and information is great. Using many of the physical properties I listed above, you just answer questions about your mineral and it moves through a flow chart until you land on an answer. It’s a little simplistic and doesn’t cover every type of mineral, but for most major rock types it works very well.
- Stone ID App (Google Play) – This app uses AI and image recognition algorithms to identify what kind of mineral you have. You can also find it on the Apple store here. I have found that this app (and others like it) is unreliable, but your mileage may vary. They rely on sophisticated algorithms that compare an image of your mineral (taken from your phone) to thousands of others. Sometimes it works, and sometimes it doesn’t. If nothing else, it’s fun to play around with!
- What Is The Rock? Subreddit – This is a place dedicated to trying to figure out what kind of rock or mineral you have. It is often difficult to tell what a mineral is based solely on pictures, so the more information you can provide (like the physical properties I listed above) the better. Take nice, well-lit pictures from multiple angles, and then make a post on the subreddit. Users (maybe even me!) can then discuss and make the best guess about what kind of rock you have.
By the way, if you want to learn all you can about rocks and minerals, I would highly recommend subscribing to Rock & Gem Magazine. They have great articles from knowledgeable and respected geologists and gemologists all about rock collecting, faceting, field trip ideas, and projects for kids. It’s a must for any aspiring rockhound!

Get an Outside Opinion, if Needed
If you have gone through all of these steps and you still haven’t come to a satisfactory answer, there are some additional measures you can take. Geology can be absolutely crazy sometimes, and there are a lot of minerals out there that can stump even the most experienced rockhounds.
The first thing I would suggest is to take your mineral to a local rock shop, rockhounding club, or the geological survey for your state or country. You’ll find some experienced geologists and enthusiasts at these places that are likely extremely familiar with the local geology. This is particularly helpful if you found the mineral locally – chances are that you’ll be able to find someone who has seen a rock just like yours.