Making cabochons out of rocks is a great way to show off their inherent beauty and take your enjoyment of them to an entirely new level. Whether you’re making the cabochons for jewelry or as stand-alone pieces, a well-polished cab of a unique-looking rock is a striking piece of artwork. I recently started making cabochons and I decided to share what I’ve learned so that you’ll have everything you need to get started creating your own.
To make cabochons, at a minimum you’ll need a trim saw for shaping slabs of rock into roughly the shape you want, as well as a grinding wheel like a flat lap with grits ranging from 180 to 14,000 for a high polish. It is also useful to have a dop station with wax to hold the cabochon while working.
There are all sorts of ways to go about acquiring this equipment, ranging from buying high-end tools to building your own. You can get started with just the equipment I mentioned above, but there are some other useful tools and safety gear that will make your life a lot easier and give you more options when creating your cabochons. I’ll go into what this equipment is for and give you some options so you can find what’s right for you.
Tools Needed for Making Cabochons
Accumulating all of the tools you need to make cabochons and do other lapidary work can be a little intimidating. Once you have all of the necessary equipment this can be a pretty frugal (and even profitable) hobby, but the start-up costs can be daunting. I’ll tell you exactly what I learned while I was getting started so you’ll know what equipment is right for your situation.
1. Trim Saw with Diamond Blades
A good trim saw is one of the most important pieces of lapidary equipment because it’s used to form the rough shape of your pieces. If you’re skilled with a trim saw you can minimize waste and reduce the amount of time you have to spend grinding your rock into the desired shape.
All lapidary trim saws use some sort of coolant – either water or a specialized oil. Oil has better cooling and lubricating properties but tends to be messier and, while inexpensive, is more costly than water. Most trim saws nowadays use water and it is definitely the option I prefer due to the relative ease of cleanup.
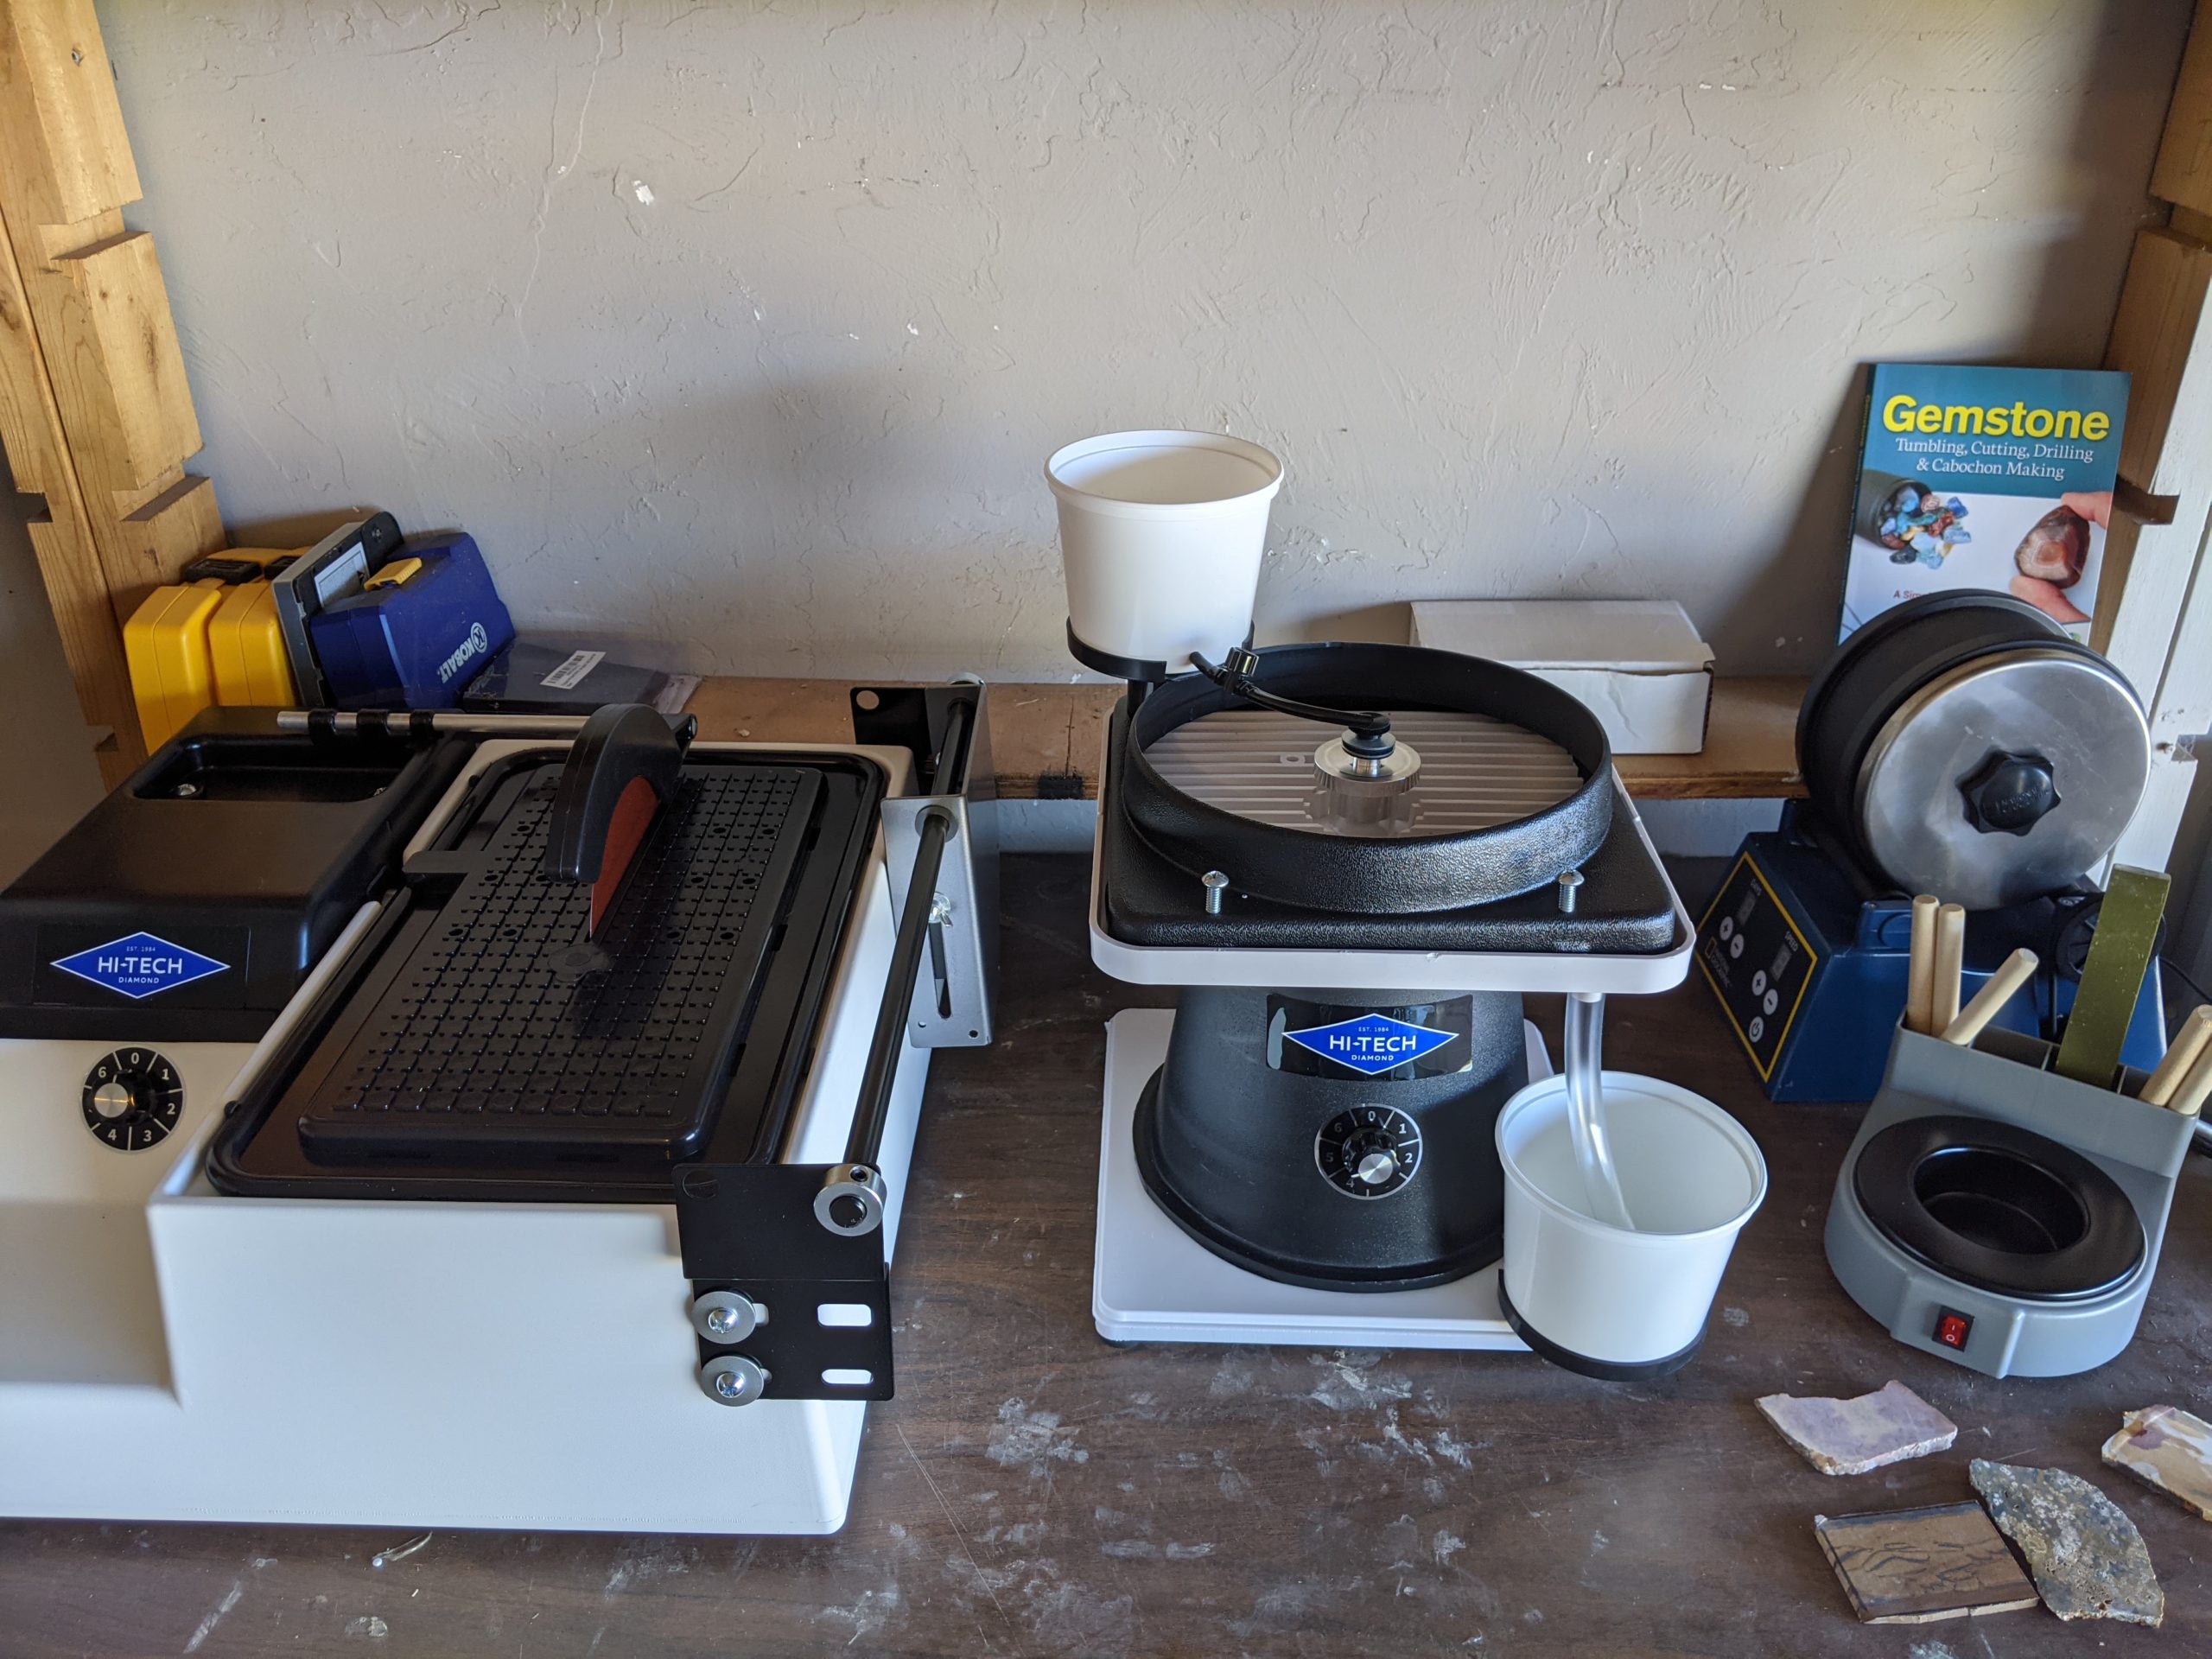
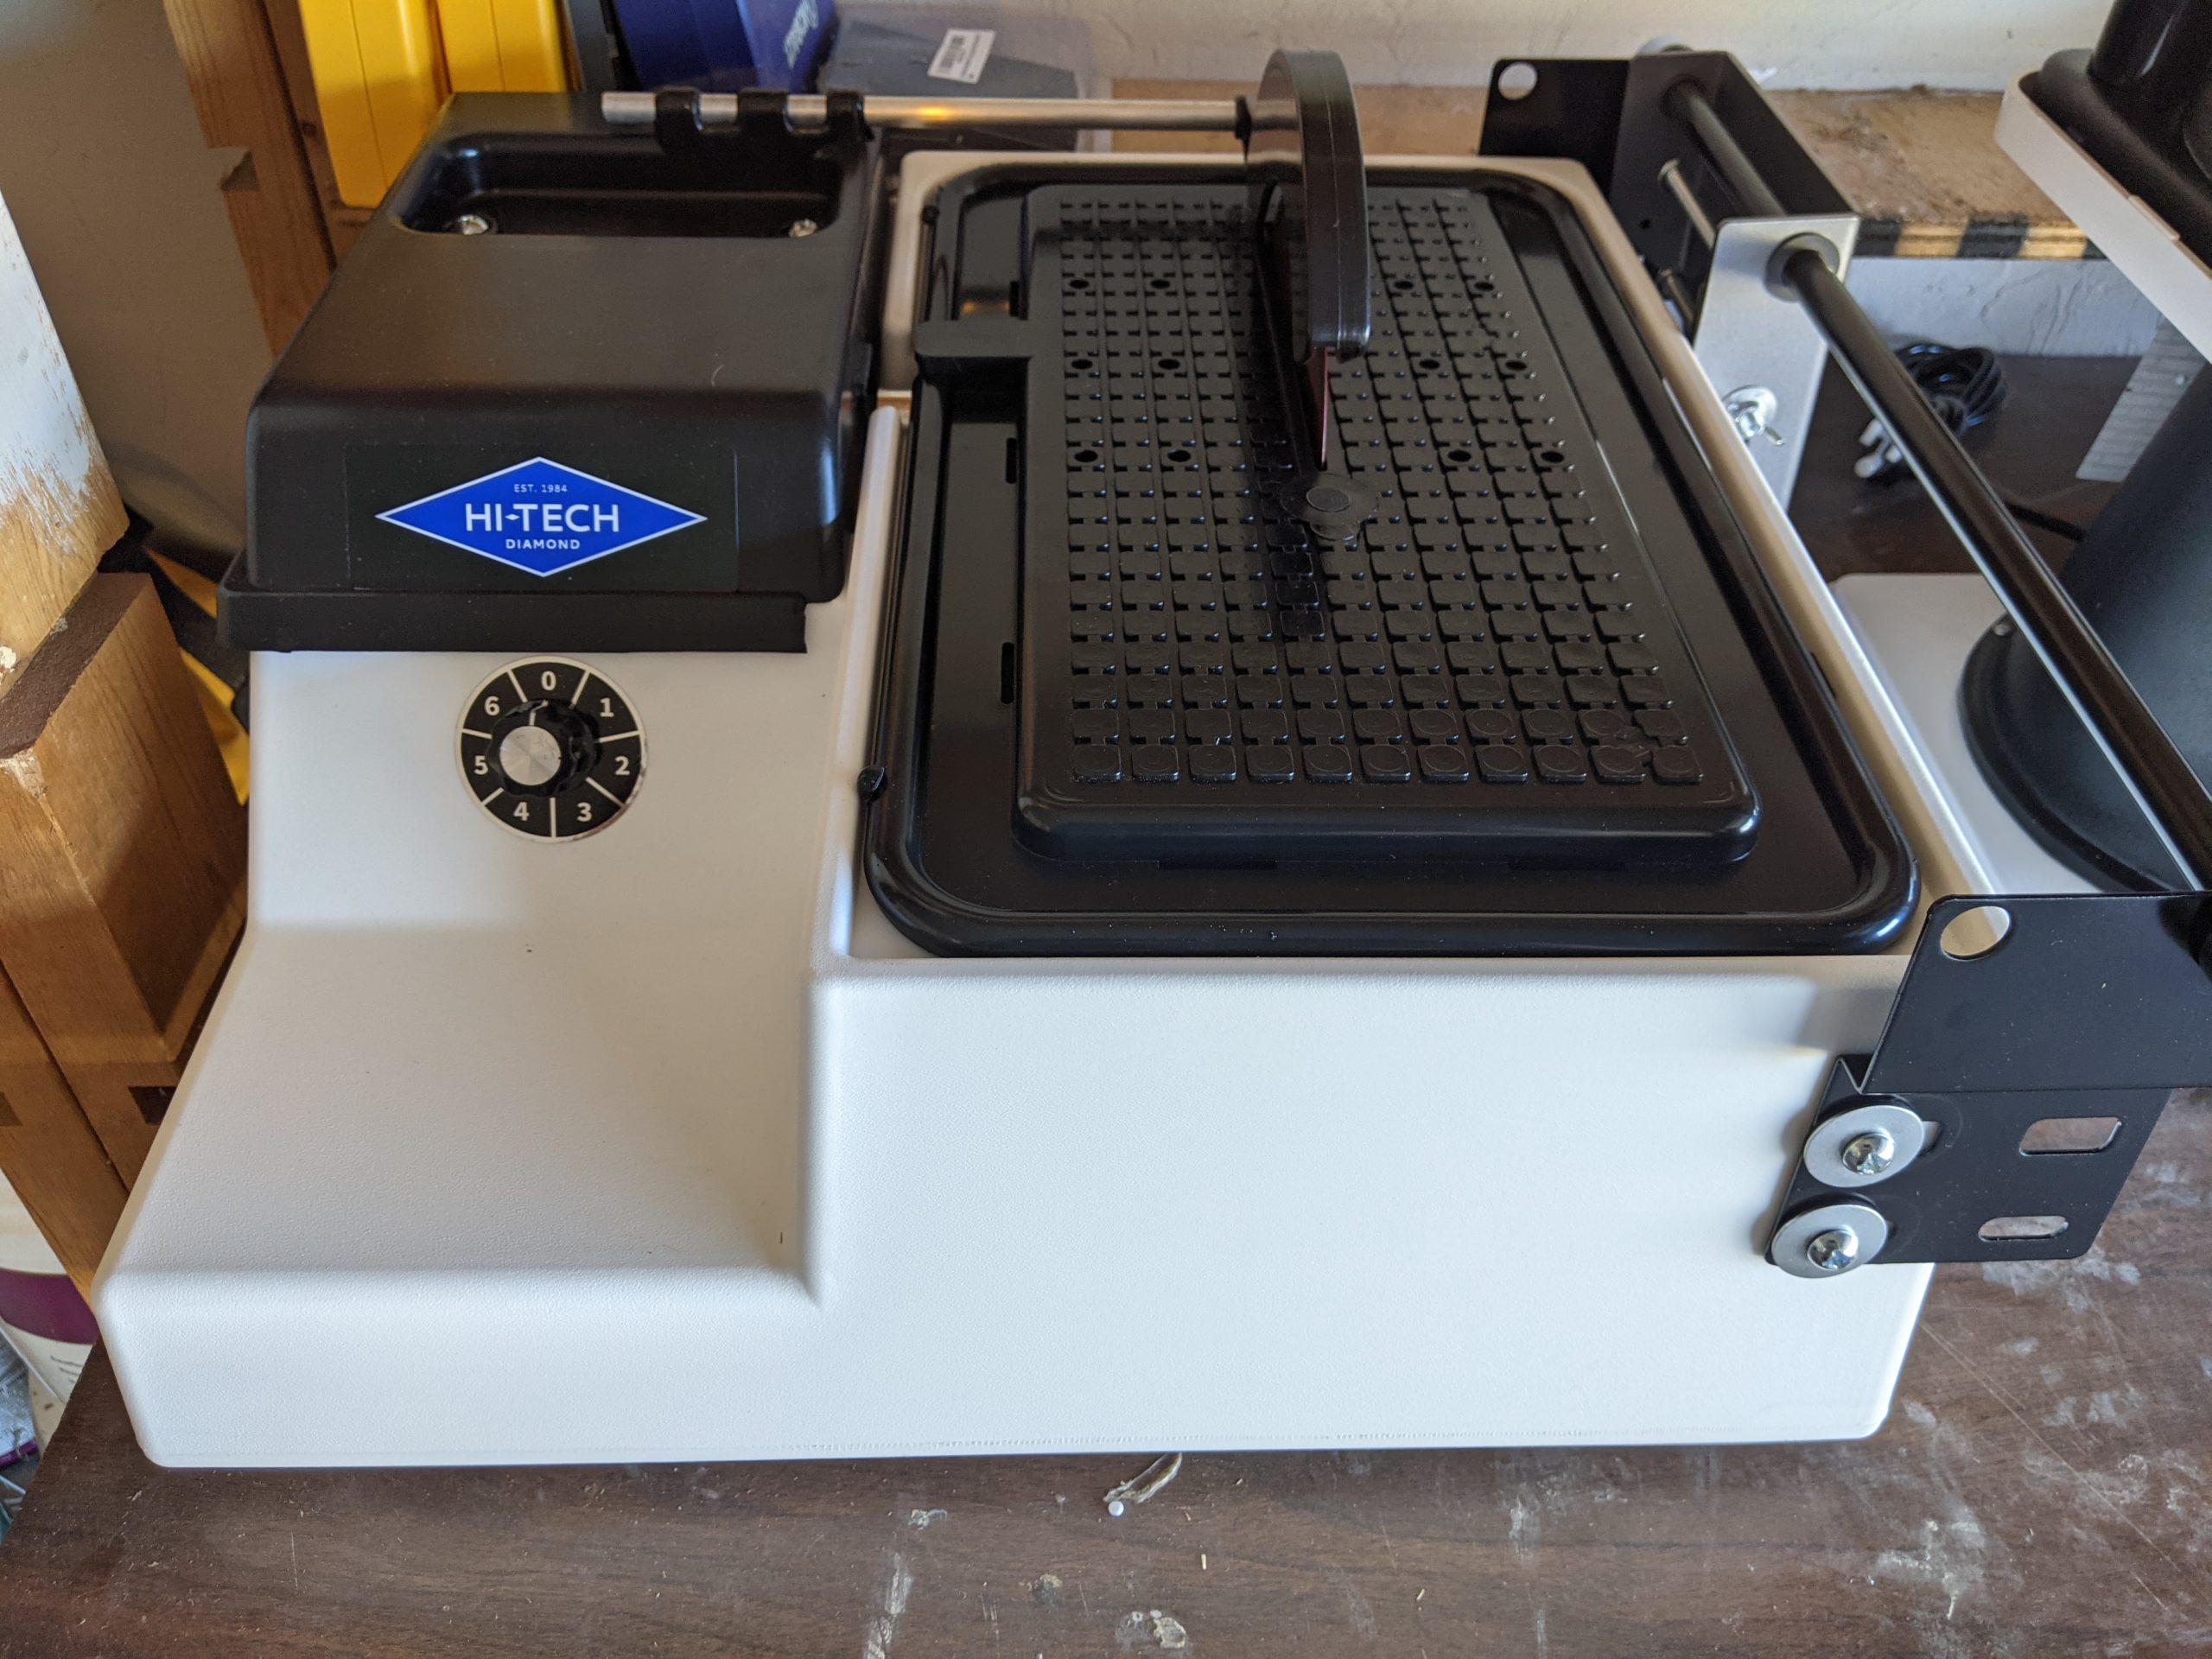
The lapidary trim saw that I own and recommend is the Hi-Tech 6″ Trim Saw. It’s tailor-made for lapidary work and comes with two diamond blades (for different types of rocks). It’s compact, has a variable speed motor, and is relatively easy to keep clean. I bought the vise attachment, and while I can certainly see myself making use of it in the future, I think you can easily get by without it for most applications.
I recommend the 6″ saw, but there are also 4″ and 5″ options available. The reason I went with the 6″ is that it gives you a lot more clearance and the ability to work with larger rocks. The 6″ blade sticks up about 2″ from the top of the table, while the 4″ and 5″ models have maximum heights of 1″ and 1.5″, respectively. If you ever want to cut a decent-sized rock in half it is well worth the incremental cost to get the 6″ lapidary saw, in my opinion.
Some hobbyists use tile saws as a substitute for a specialized lapidary saw. This can certainly work with the proper adjustments, and if you already own one I would suggest giving it a shot. I have heard from several lapidary artists that if you are at all serious about the hobby you’d do best to invest in a proper lapidary trim saw, but if you’d prefer to start with a more economical option I’d suggest going with something like this wet tile saw from Amazon.
If you choose to use a tile saw, make sure you still use a proper diamond blade like this one from Hi-Tech, otherwise you risk damaging your rock and your saw.
Tip: A sintered blade is a bit more costly at first, but more than makes up for that cost with its longevity compared to a notched blade.
Note that a trim saw is significantly different from a slab saw. I haven’t listed a slab saw in this article because they are generally very expensive, and for the vast majority of hobbyists they aren’t necessary. Slab saws are designed to cut larger rocks into manageable slices that can then be shaped with a trim saw.
You can easily find lapidary slabs for sale in local shops or online on places like Etsy, and for most hobbyists this will be the best place to start without having to invest in a slab saw. You can also use your trim saw to cut smaller rocks you’ve found and even form them into small slabs.
2. Flat Lap or Cabbing Machine
A good lapidary grinding machine is the cornerstone of any lapidary artist’s tool collection. They are used to grind, sand, and polish rocks into your desired shapes and bring out their color and character. These machines use discs or wheels with a series of increasingly fine grits to gradually create a smoother and smoother surface.
Lapidary grinding machines come in two main varieties. A flat lapidary grinding machine, more commonly known as a ‘flat lap’, is the most common and accessible for beginning hobbyists. A cabbing machine is larger and generally more expensive, but can also be faster and more convenient to use.
Flat Laps
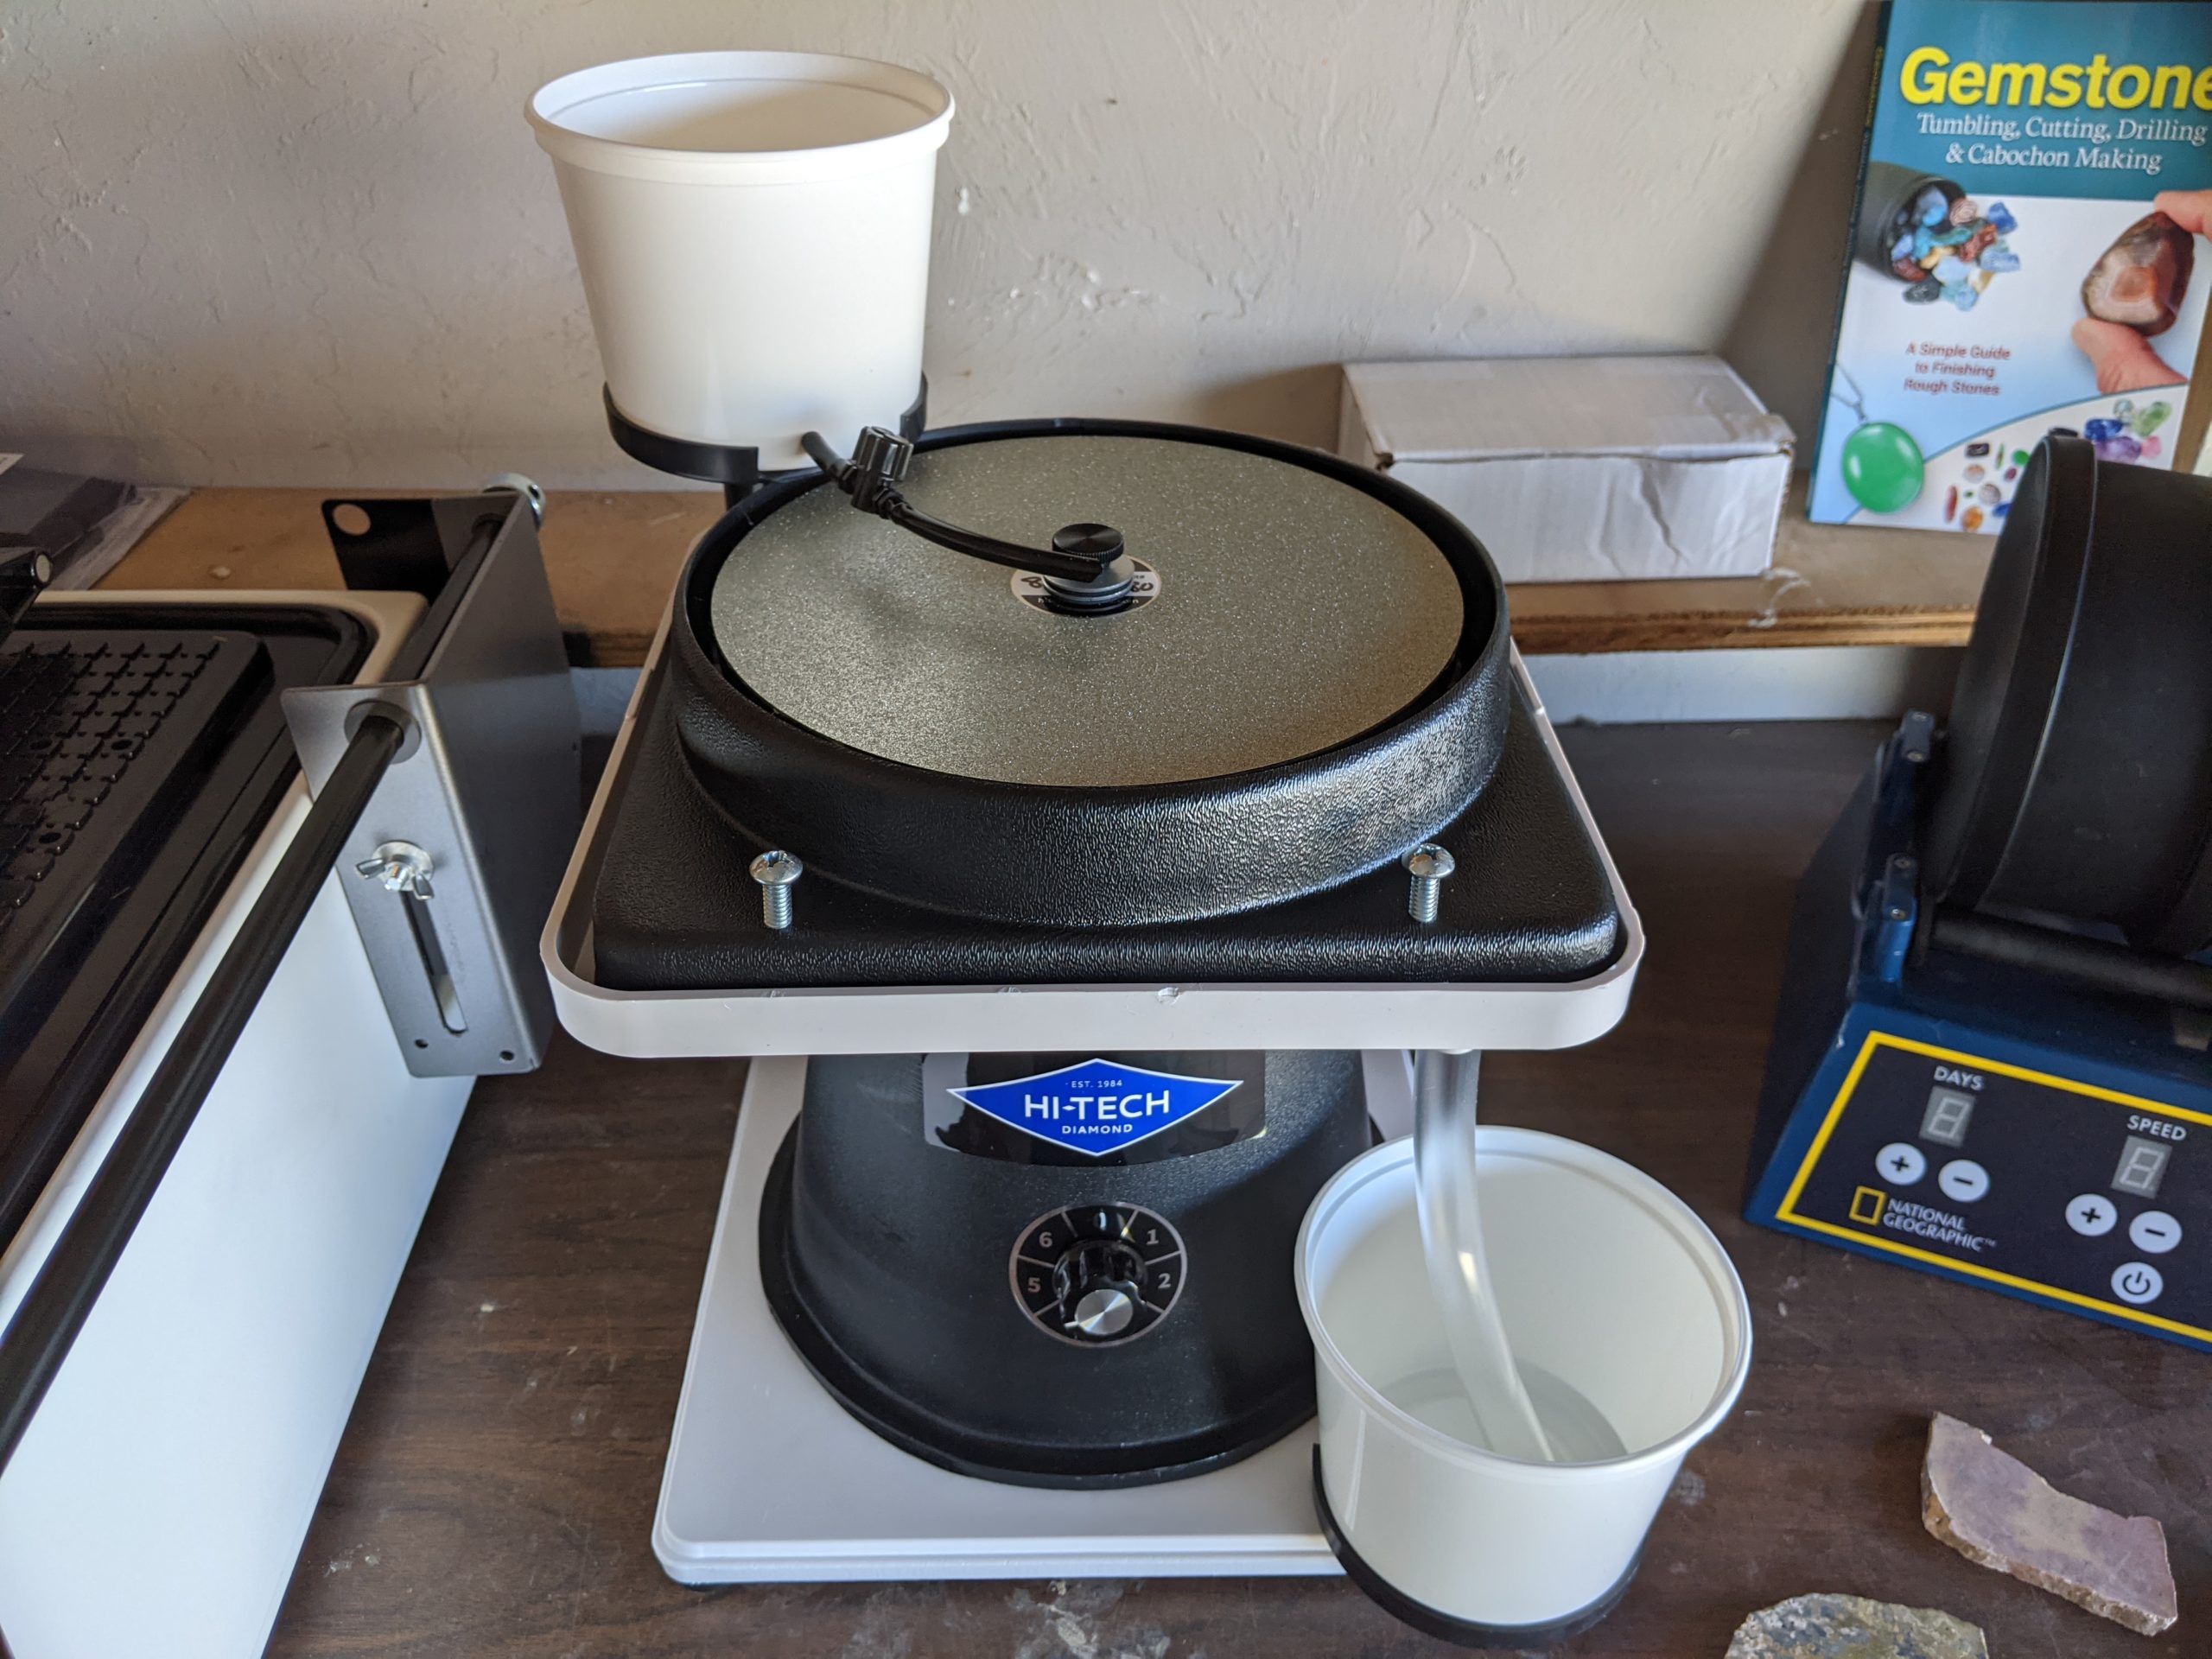
Flat laps are essentially just a motor with a spinning disc onto which a lubricant drips, and while the concept is relatively simple they are also extremely versatile, powerful tools. I own the Hi-Tech 8″ All-U-Need Flat Lap and it is everything that I could ask for in a machine. It can make cabochons or do face polishing with ease, and it comes with all the discs you need. I went with the 8″ model, but if you are mostly working with smaller rocks or you’re on a tight budget you can opt for the 6″ model.
What draws most people to flat lap machines is how easy they are to set up and maintain, and the entry price point is easier to stomach than a full-on cabbing machine. They’re also not nearly as messy as a cabbing machine because they don’t spray as much water around. Water slowly drips from a small reservoir onto the spinning grinding disc, lubricates the surface, and eventually settles and collects in another small bucket.
One slight drawback to the Hi-Tech All-U-Need Flat Lap is that the water reservoir is fairly small, so if you’re working for a long time on multiples pieces you will likely need to refill it (and empty the collection reservoir) several times. It’s only a minor annoyance, though, which I have mostly solved by keeping a gallon jug of water nearby and just draining the waste water into a 5-gallon bucket.
It’s also worth noting that some people choose to make their own flat laps. The concept of the machine is relatively simple and you can find how-to’s on YouTube, so if you’re really on a budget and feeling handy you can choose to go that route. You’ll still want to use dedicated lapidary diamond polishing discs, though, so be sure to factor that into your cost analysis.
Cabbing Machines
Cabbing machines are larger, more expensive pieces of equipment that are purpose-built for making cabochons. They come equipped with 6 grinding wheels that operate simultaneously, plus a full-face pad on one side for polishing or doing flat face work. I don’t own one of these myself, but I certainly see the appeal. With these machines, you don’t have to spend time swapping out discs and you can easily move back a step if necessary.
The obvious drawback is the upfront cost, but if you are serious about the hobby it would likely be well worth the investment. I have heard only good things about the CabKing cabbing machines which come in 6″ and 8″ models, so if you’d like to go this route I would recommend starting there.
3. Pre-Cut Rock Slabs
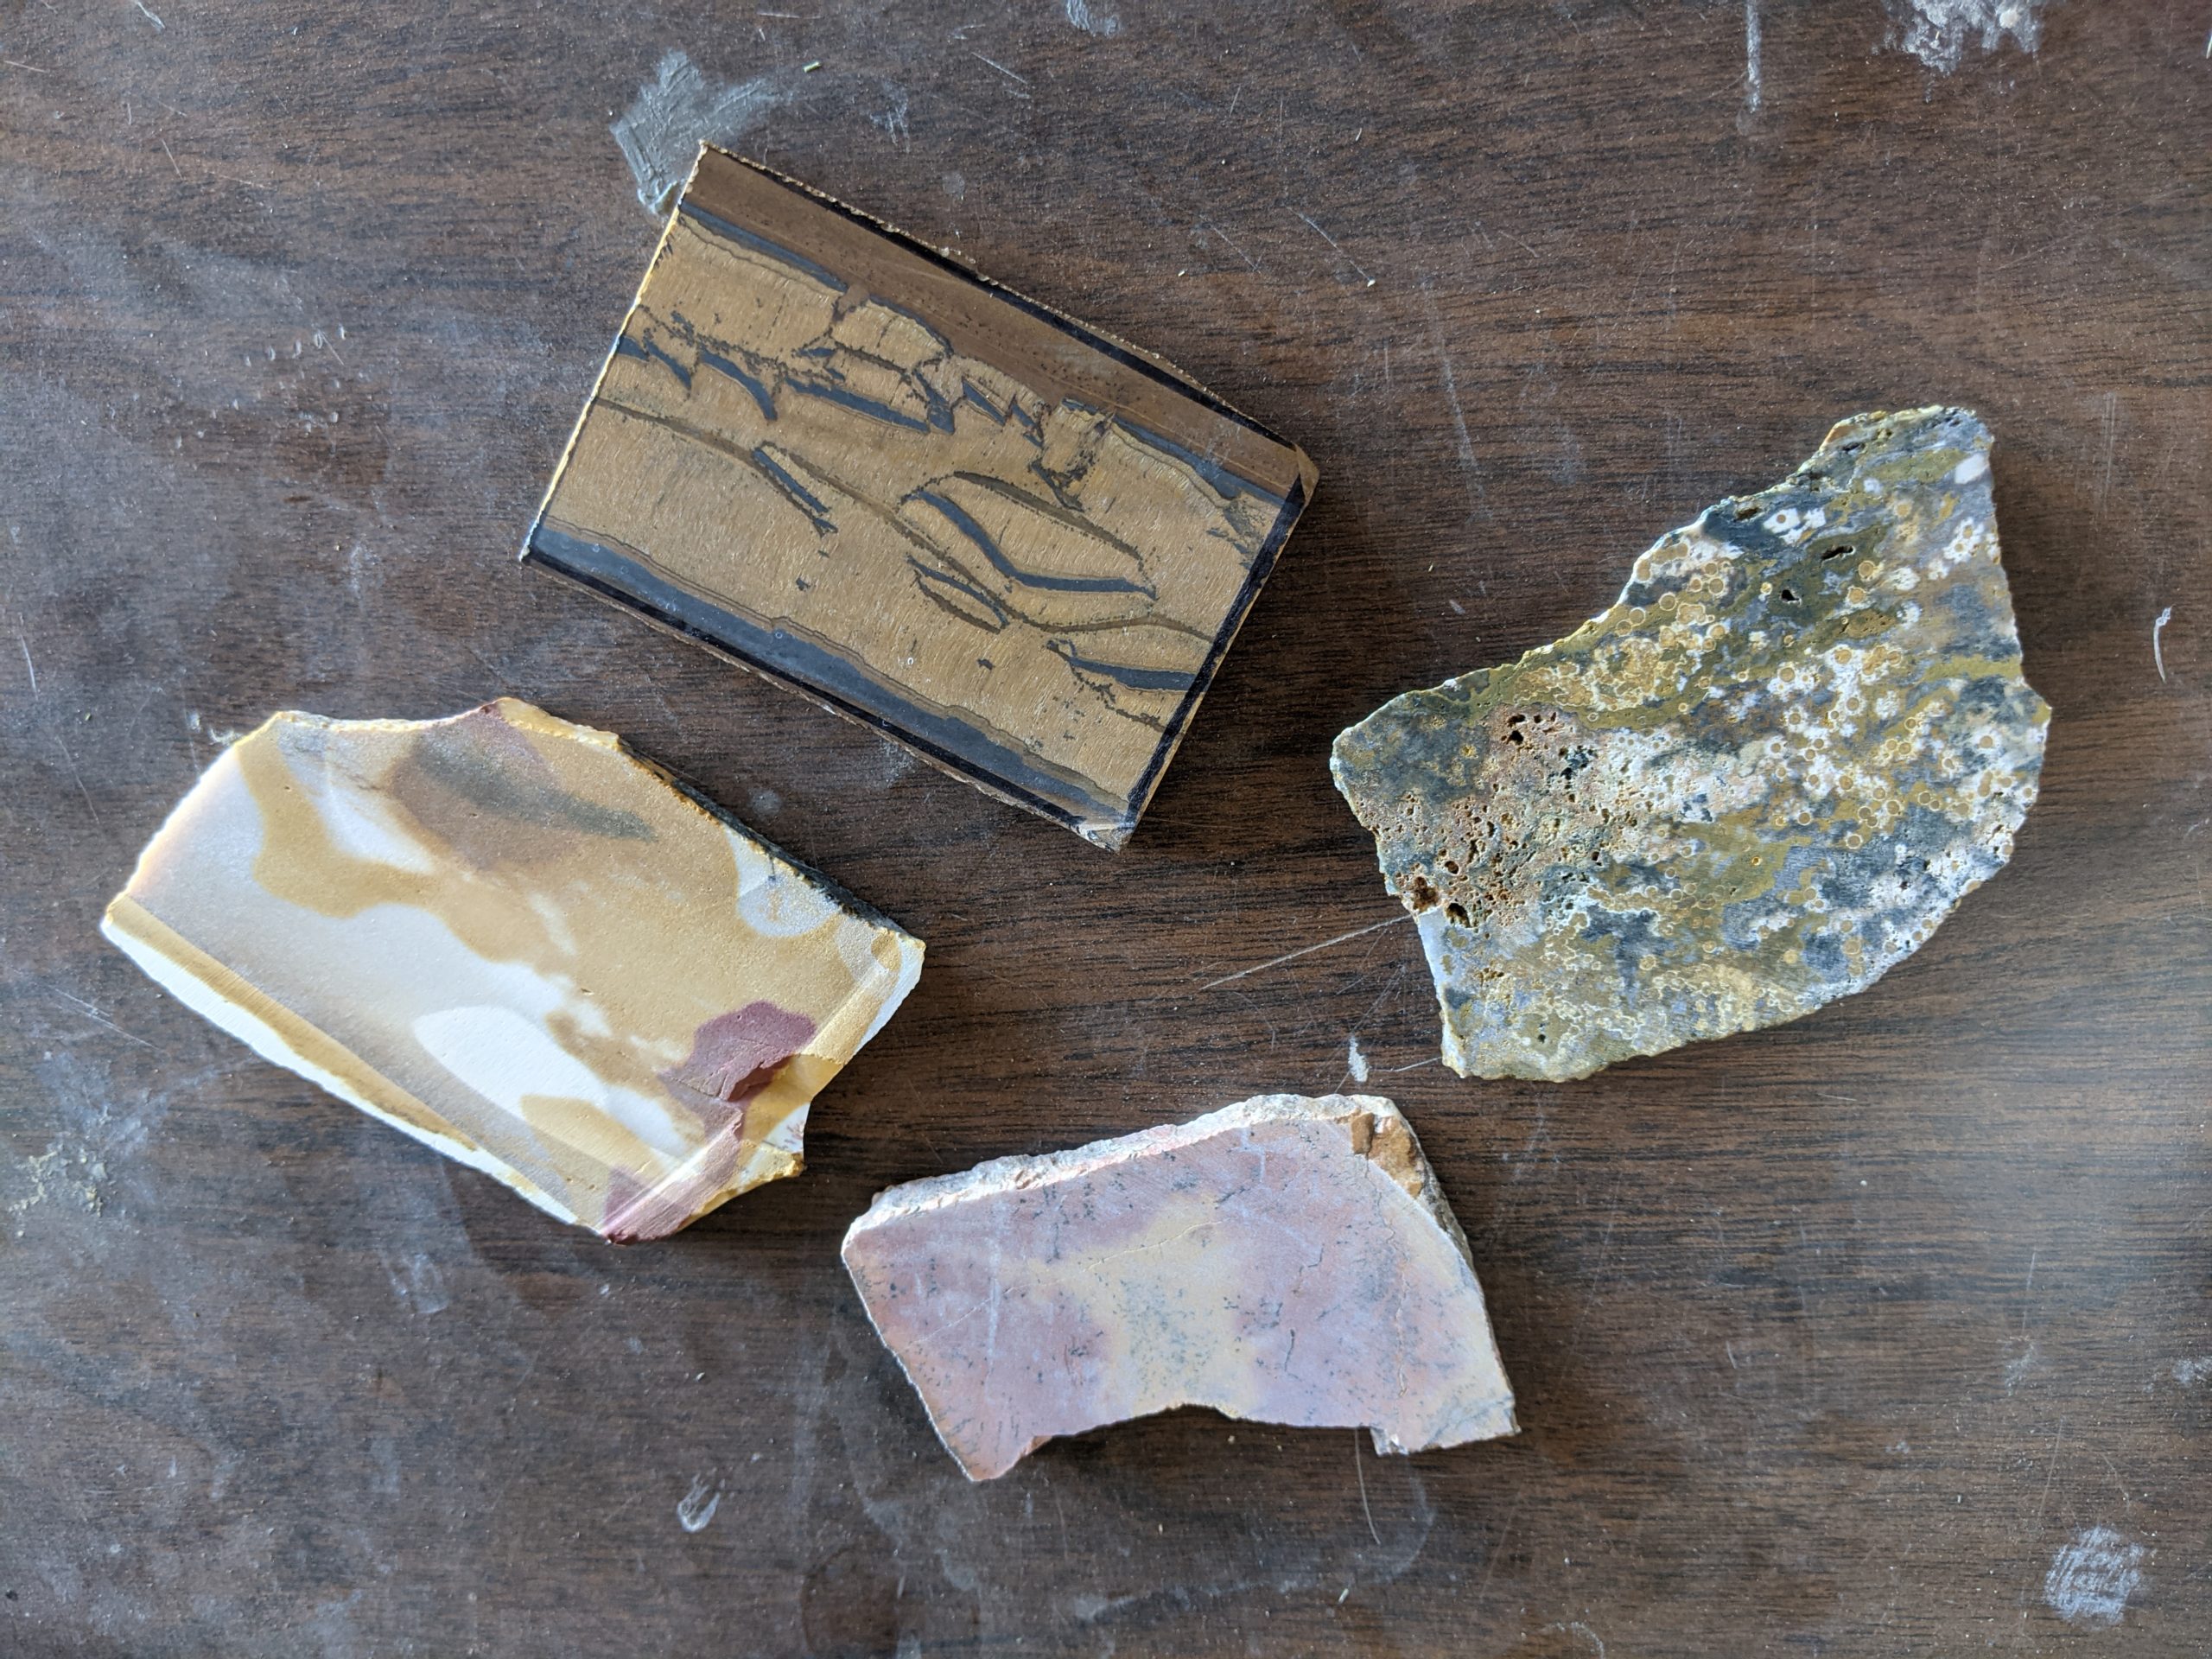
If you want to create a cabochon, you’ll need the raw material to start with. Most hobbyists start with rock slabs, which can be purchased at most local rock shops or online. You can also make your own if you have access to a slab saw, but these are very expensive pieces of equipment so you’ll likely just want to buy your slabs until you’re more firmly established with the hobby.
The best way to find good slabs for your cabochons is to visit a local rock shop or a rock and mineral show. This will let you see the material first hand so you know exactly what it looks like and how big it is. When you buy online it can be really hard to tell how big a piece is, even if they have it shown against a ruler for scale. It’s also nice to be able to check for cracks and inconsistencies that could make part of the slab unusable.
Buying slabs online can be hit-and-miss. In my experience, it’s mostly ‘hit’, but there are plenty of people who feel otherwise. You can greatly improve your chances of getting quality slabs by buying from a reputable source like KingsleyNorth.com or rockshed.com. Personally, I have had good success on Etsy. I would recommend the shop ‘Stony Mountain Stones‘ in particular – their shipping and customer service have been great and all the slabs I’ve received are exactly as advertised.
As I mentioned earlier, you can also choose to create your own slabs. This will take a slab saw which can be very expensive, but if you go through enough material you can more than make up for the cost because you can get large rocks in bulk for much cheaper than slabs. You can also sell extra slabs that you make and don’t want.
While I have not used one myself, Hi-Tech has a powerful 10″ slab saw with a really nice entry price point. It should be more than enough to get you started making your own slabs for cabbing. If you’re really lucky you may be able to score an old slab saw off of Craigslist or an estate sale, but I haven’t had that good fortune yet. High-end slab saws will slowly and automatically move the piece forward through the blade while the hood is closed, making it safer and more time-efficient.
4. Dopping Station & Wax for Shaping
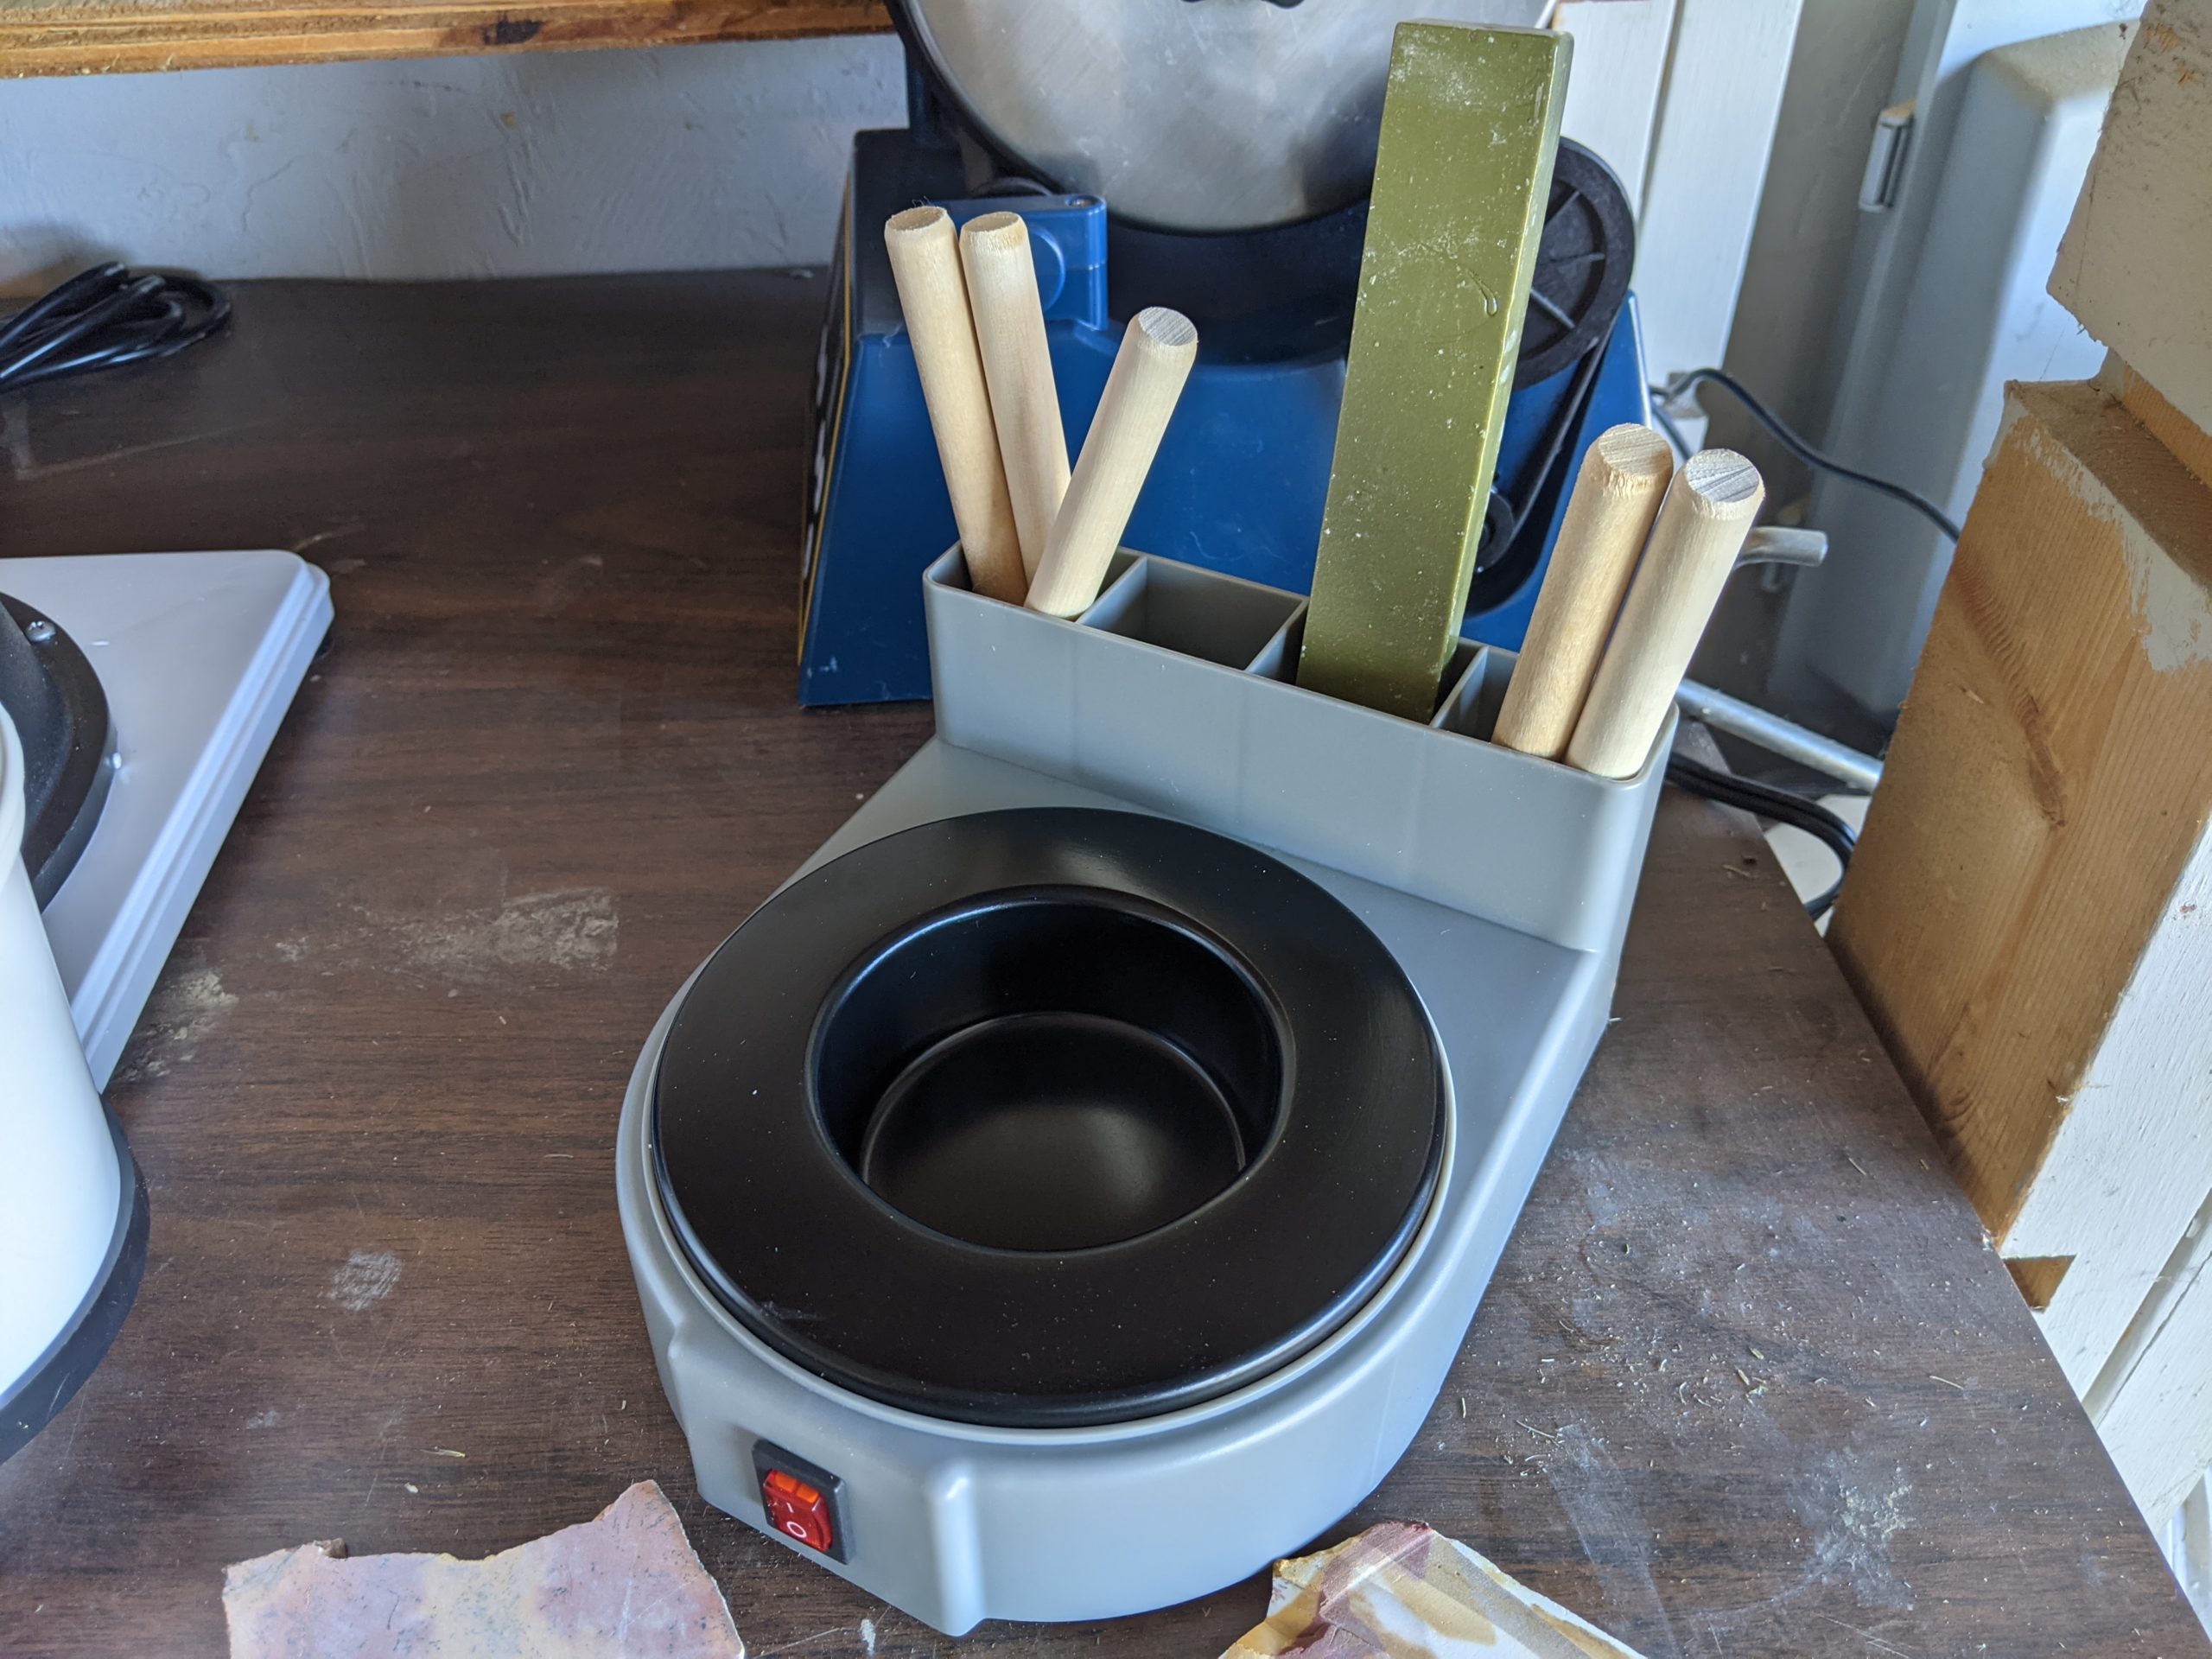
A good dopping station is a lapidary artist’s best friend. It’s possible to make cabochons without one, but I wouldn’t recommend it. Being able to dop your cabochons will save your fingers from a bunch of wear and tear, plus it will result in a better finished product. Dopping stations are very affordable and, in my opinion, are well worth the money for the quality of life (and your cabs).
The DopStation from Hi-Tech is probably the most popular dopping station out there, and it’s the one I use. It’s designed to quickly heat dopping wax to the proper temperature, and it has a large rim on which you can rest your cabs to warm them up before applying the wax (to help the wax adhere). Plus, it has handy holders for your dop sticks and extra wax.
Dopping your cabochons with dopping wax gives you more control while shaping the stone without your fingers getting torn up on the grinding discs. Some people do just hold their stones in their fingertips but speaking from experience I wouldn’t recommend it.
Dopping wax typically comes in two colors – green and red. Green wax like this from Hi-Tech is by far the most commonly used and is suitable for almost any rock you’re likely to work with. Red is less common, and is for rocks like ruby and sapphire that require higher temperatures.
5. Cabochon Template for Outlining
When it comes to shaping a cabochon there are literally infinite possibilities, but I have found that it’s nice to have a stencil or template to create the outline of the shape on my slab. It’s nice to be able to slide the shape around on the slab to visualize what the colors and patterns will look like on your finished piece and really helps create symmetrical pieces if you’re going for anything like a circle, square, or ellipse.
I ordered a couple of templates from Amazon to give me a bunch of options to choose from. You can take your pick, but I went with one for ellipses and circles and another with more free-form shapes like hearts and teardrops. Templates aren’t necessary, but they’re relatively cheap and I think they help me to more easily create a cleaner-looking final product.
6. Dressing Stick for Extending Blade Life
This is a little stick make of aluminum oxide, and it helps keep your diamond blades sharp and clean. Hi-Tech sells one for dirt cheap, and it can help extend the life of your sintered diamond blades, so in my opinion, it’s a no-brainer. Just do a quick cut on the stick every time you’re done with a trimming session on your saw and it’ll save you quite a bit of money in the long run.
7. Dremel or Drill Press for Holes & Carving
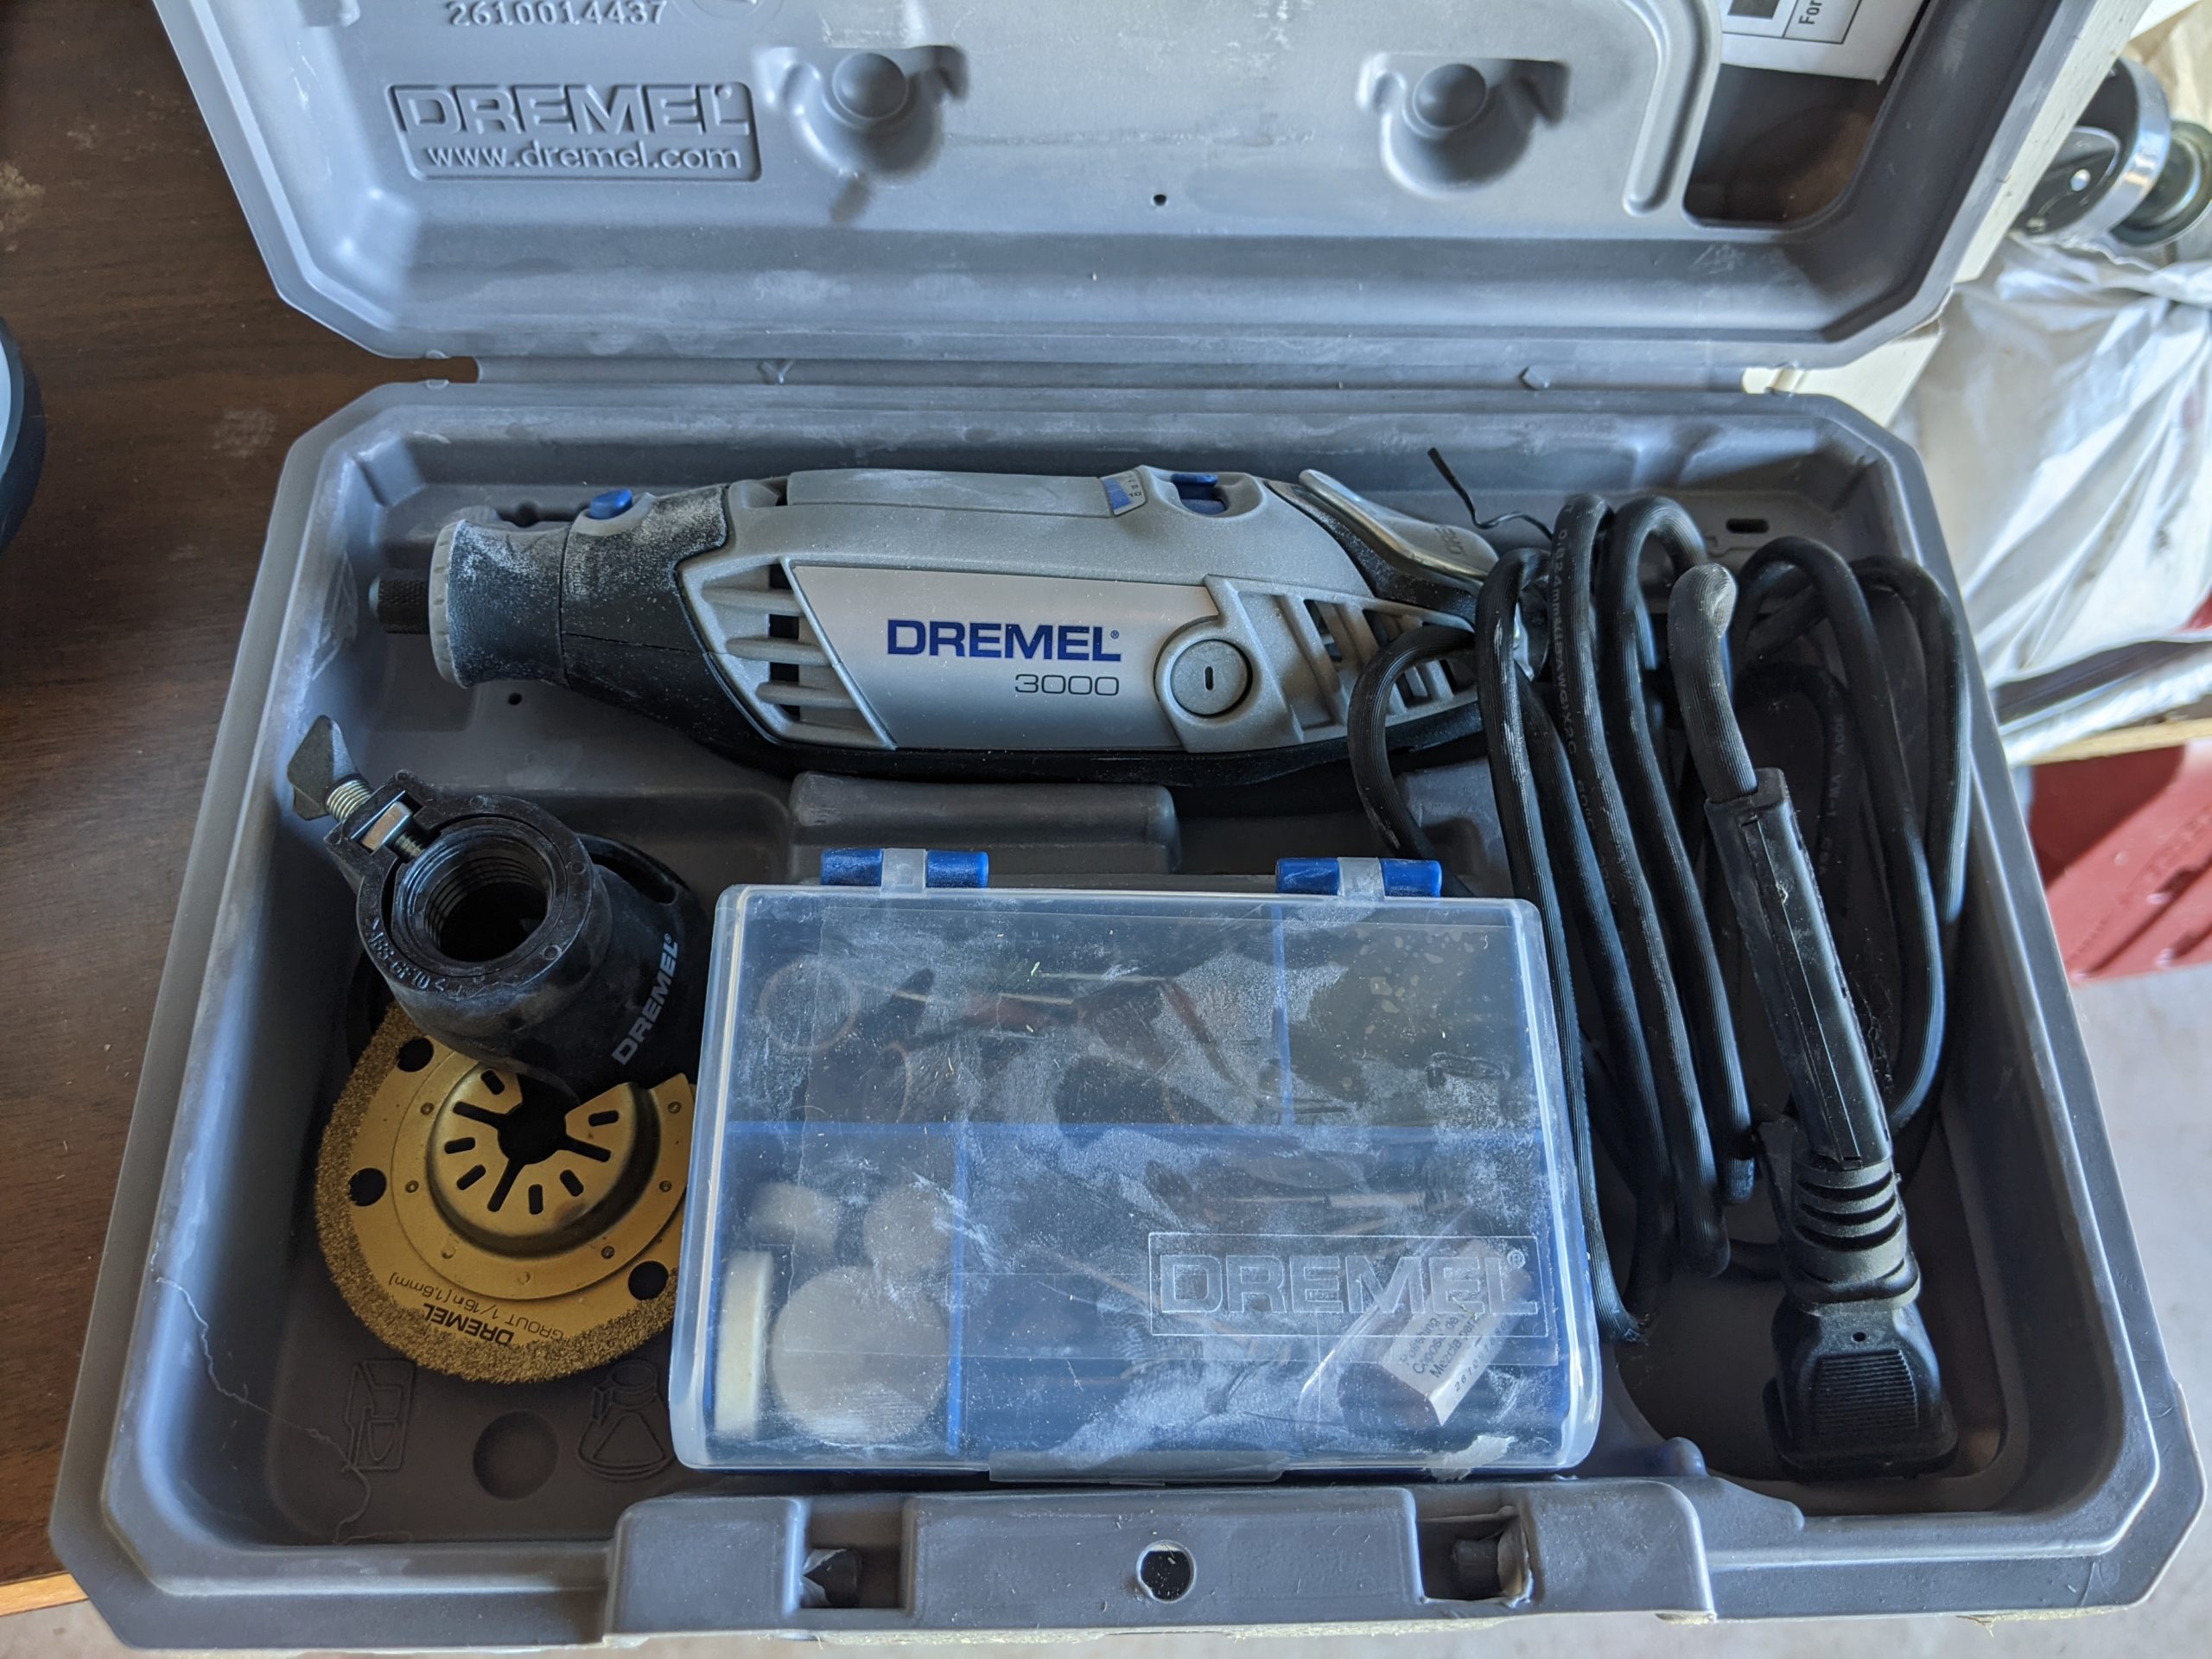
Whether or not you need one of these is entirely dependent on what you want to do with your cabochons once they’re done. If you just want to have them laying around on display then there probably isn’t any reason to drill holes in them, but most people want to turn at least some of their cabs into jewelry. The easiest way to do that is by drilling small holes into which you can insert jewelry findings.
There are two options here: a handheld rotary tool like a Dremel, and a drill press. Some of you may own one or both of these already, so if that’s the case I’d suggest you just roll with that. I already owned a Dremel (this model found on Amazon) when I got into lapidary work, so that’s what I’ve chosen to use.
Regardless of the type of drill you choose, you’ll need some diamond drill bits like these from Amazon in order to drill through your cabochons. I like to hold my cab in a little Tupperware container full of water to cool and lubricate the bit as I’m drilling with the Dremel and it works like a charm.
Note that you can also use a Dremel to carve your cabochons with decorative designs. All you need is some sintered diamond burs like these from Hi-Tech that will let you create any patterns, text, or designs that you want to put on your cab.
9. Ultrasonic Cleaner for Cleaning Your Cabs
This is another piece of equipment that isn’t entirely necessary but will definitely help you create better cabochons over time. Some cabbing material has minute cracks in it that won’t come completely out no matter how well you polish it, and those cracks can collect grit during the polishing process. That grit can show in the cracks and it’s nearly impossible to get rid of without the help of an ultrasonic cleaner.
You can get an ultrasonic cleaner like this one from Amazon for a pretty reasonable price, and it will save you a lot of wasted time and energy trying to scrub your pieces clean. You can throw your cab in there for just a few minutes and it will come out perfectly clean without you having to do anything else.
8. Calipers & Gauges for Precision Work
If you’re doing precision work like trying to create a cab that will fit into a specific jewelry setting or make something that is perfectly symmetrical you may want to consider getting a digital caliper. Most beginners won’t have any need for something like this but it’s a relatively affordable addition to your tool kit if you want to level up your game.
This digital caliper from Hi-Tech is custom made for this kind of work and is accurate to .01mm. You can also find similar ones on Amazon, so you can take your pick.
11. Safety Glasses to Protect Your Eyes
A good pair of safety glasses is probably the most important piece of safety equipment when it comes to lapidary work. The last thing you want is to end up with a sharp shard of rock in your eye, and it can easily be avoided with an inexpensive pair of safety glasses like these from Amazon.
If you’re worried about your fingers when using the trim saw, you really needn’t be. A diamond lapidary blade won’t cut your fingers (unless for some reason you really, really try), so there is no need for special gloves or a push stick.
12. Respirator or Mask to Protect Your Lungs
There is a condition known as silicosis that is caused by inhaling large amounts of crystalline silica dust over many years. This isn’t a serious concern for most hobbyists but it’s worth taking some reasonable precautions. It’s best to do your lapidary work in a well-ventilated area with a good fan but in certain situations, you may want to use a mask or respirator.
You don’t really need to worry about inhaling silica dust when using a trim saw or in the early stages of grinding and polishing your cabs because those steps are done with water that greatly reduces the amount of silica dust in the air. However, the polishing stage is done dry. This results in microscopic bits of silica dust in the air, so I like to use old N-95 masks I have leftover from the pandemic. Some hobbyists choose to use a respirator like this one from Amazon.