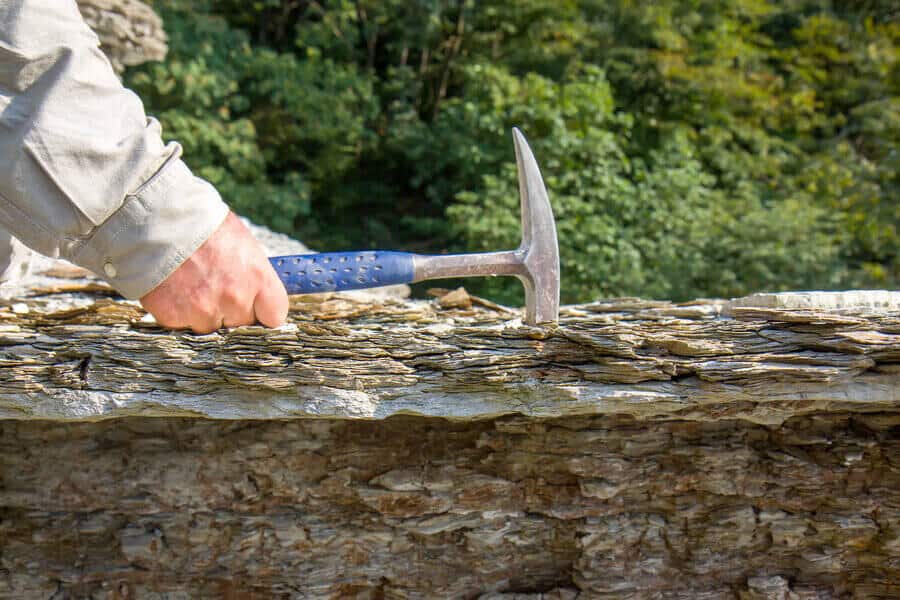
A good rock hammer is every field geologist’s best friend. I’ve used mine on just about every trip to the field that I’ve ever made, and when you really need one there is just no substitute.
To use a rock hammer, first make sure to wear proper protective equipment! If possible, only break portions of the outcrop that aren’t easily visible. Use the right hammer for the job, and use it with a chisel if the job calls for it. Use one powerful stroke instead of many small taps.
If you happen to be in the market for a rock hammer and aren’t sure which to get, I would highly recommend Estwing’s 22-ounce rock pick. I wrote an entire review of it here detailing everything I love about it.
A rock hammer is probably the most iconic part of a field geologist’s tool kit, but surprisingly even experienced geologists can look lost while using one. Luckily, just following a few simple guidelines will have you looking like a pro on your next trip to the field.
How to Use Your Rock Hammer – A Guide
Make Sure A Hammer is Necessary
The first thing you should ask yourself is “Do I really need to use a hammer?” Many people, especially those with less experience, just want a reason to put their hammer to use. After all, you’ve lugged it around in your pack all day – it would be a shame if you didn’t use it!
The main reason to use a rock hammer is to break off a piece of outcrop to expose a fresh surface or collect a sample to take with you. In most cases you should be able to find a suitable piece of rock at the base of the outcrop that has naturally fallen off. It is preferable to use these pieces if possible in order to avoid unnecessary damage to the location.
Many times a weathered portion of the rock outcrop will be more useful than a fresh exposure. It can help you identify minerals based on the weathering patterns, pointing out minerals that are less susceptible to wear from the elements.
Remember that outcrops are a finite resource. If you do manage to use a piece that has eroded off of the exposure this will save time and avoid unnecessary risk while also preserving the rock for future rockhounds.
Wear the Proper Protective Gear
If you do determine that the use of a rock hammer is necessary, the next step is to make sure you are wearing the proper protective equipment. I have personally been struck by shrapnel that was damaging enough to draw blood – it’s not something you want to mess around with. These flying fragments can come from either the hammer or the rock you’re striking.
The most important piece of protective equipment is safety goggles. You can get these at any home improvement store and they don’t have to be fancy, but make sure you’re not relying on your sunglasses to protect your eyes. Risking your eyesight isn’t worth it even for the shiniest of rock samples.
While not absolutely necessary, I would recommend wearing long sleeves and pants. This would offer some degree of protection from flying shrapnel. The piece that struck me hit my exposed skin and had flown over 20 feet (from where a colleague was working) before burying itself in my forearm.
Gloves and some heavy closed-toed shoes (preferably hiking boots or even steel toed boots) would definitely be advisable. Anything to protect your extremities from shrapnel and/or a misplaced hammer strike.
You also want to make sure that you alert anyone else in your party that you’re about to start hammering. Give people a chance to move out of the way and dawn their own protective equipment. If you start sending shards of metal and rock flying without giving people any warning you will likely end up ticking them off.
Find the Right Place
Now it’s time to find just the right place to go to work. If at all possible, aim to avoid damaging any portion of the outcrop that is easily visible. If you’re next to a road or a trail try moving further away from everyday traffic. In locations that are heavily studied you’ll want to move towards parts of the exposure that aren’t especially notable or that have already been hammered on.
Once you have found a suitable location, try to pick a portion of the rock that looks easily breakable and that is also fairly representative of the formation as a whole. It makes a lot more sense to break off a piece that is jutting out of the rock face than it does trying to beat away at a featureless rock face.
Choose Your Tool Wisely
Many geologists carry more than one hammer with them. If you only have one hammer, don’t fret! You can make just about any hammer work for most applications, but if you have a variety of tools to choose from them it makes sense to use the most appropriate one.
First, make sure that the hammer you’re using is designed to be used as a rock hammer. Don’t bring a normal claw hammer that you pulled out of your dad’s toolbox. Those types of hammers were designed for an entirely different purpose and can be dangerous if used in this application.
The biggest division you’ll see in the type of rock hammers is between ‘chisels’ and ‘picks’. Chisel hammers are typically used for splitting along bedding planes in sedimentary rocks. They can also be useful for prying open cracks. Picks are typically used most in igneous and metamorphic settings where you need to apply a lot of force to a specific point to crack off a sample.
The ideal size of your hammer will be directly proportional to the size of the job. The more damage you need to inflict or the harder the rock, the more heft you’ll want in the head of your hammer. For more precise work a smaller hammer will be preferable. Most rock hammers are around 2 pounds, but there is quite a bit of variability here.
Among quality rock hammers you will also have a choice between leather and rubber grips. I personally use and prefer leather grips – I find the impact absorption to be a little better and I think the aesthetic is significantly better. Rubber grips are very popular in their own right and may be more durable than leather over the course of many uses and exposure to the elements.
Another great tool to have at your disposal is a chisel. This can be used in conjunction with you hammer to score the piece of rock you have your eye on. Gently tap the chisel and mark a line on the rock where you want it to break. This will delineate a weak portion of the rock that will break when you hit it.
Strike Hard, No Mercy
Now it’s time to get down to business. Many inexperienced geologists are hesistant to use the appropriate force when using a rock hammer. Remember that the whole point of hitting the rock is to break it! Don’t be tempted to use a series of small taps. One forceful and deliberate blow is all you need to get the sample you’re after.
Keep your eye on the target – just like you’re catching a baseball. Look at the exact point you want to strike with your hammer and don’t get distracted. Take the hammer in the center of the grip. There can be a temptation to grip up on the handle, hoping that it will improve accuracy. However, this will sacrifice a great deal of power.
Swing the hammer from your elbow, not the wrist! Begin with the head of the hammer resting on the point you want to strike. Then bring the hammer up by pivoting at the elbow, holding the wrist firm and steady. Then bring the hammer down in one firm blow, intending to swing through the rock, not merely strike the surface. Strike with purpose and confidence!
If your first blow fails to break the rock, simply try again. If, after repeated attempts, you still haven’t been able to break off the piece you have your eye on it might be time to ask for help or try a different area.
If you follow these guidelines you should safely and effectively get the sample you’re looking for, and look like a pro while doing it.