If you’ve been collecting rocks and minerals for any considerable amount of time, you’ve probably accumulated quite a few specimens. Whenever I find or purchase a new specimen I know I like to take it home, admire it, and probably put it on display.
It’s easy to think that you’ll always remember everything about your new piece and not bother with properly labeling and cataloging it for your collection, but if you’re anything like me, you inevitably end up with plenty of specimens that leave you scratching your head years after they’ve been collected (which is probably why you found this article in the first place).
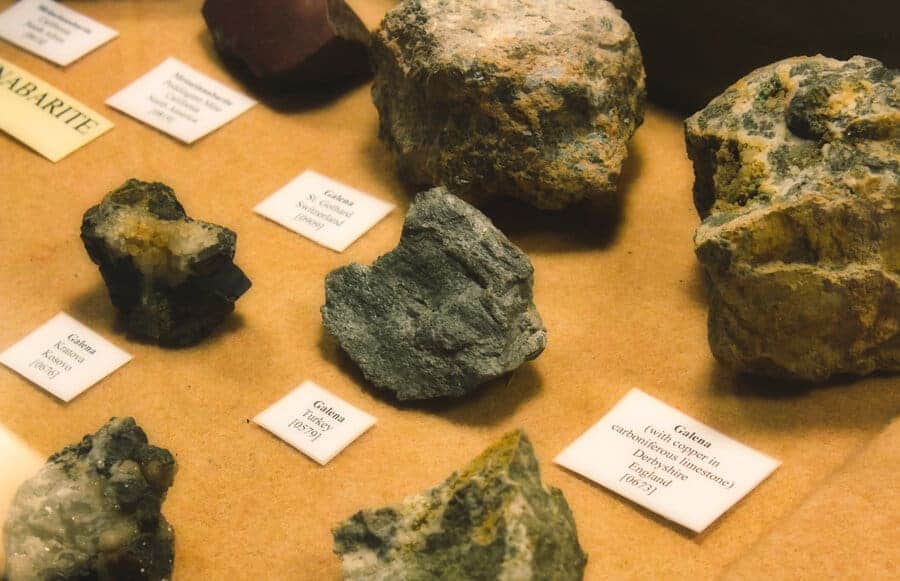
To label and catalog a rock and mineral collection, write information about each specimen on a card label. Include the mineral species name(s), location it’s from, who collected it and when, and an approximate value. If necessary, mark each specimen with a number and keep the cards in a safe place.
It can be a bit tedious to make sure all of your specimens are properly labeled, but it’s well worth it (and very satisfying) when it’s all done. If you ever plan on passing your collection down to your children or selling the pieces then having the information about each piece systematically recorded is invaluable. I’ll go into the details and best practices to follow when going through this process with your own collection.
Methods for Labeling a Rock & Mineral Collection
As you are likely aware, there is more than one way to label a rock and mineral collection. There isn’t necessarily one method that is absolutely correct for all cases. Which method is the right one for you depends on the type of collection you have and how you would like your specimens to appear when displayed.
Separate Card Label (Box Label)
This is the oldest and simplest method for labeling a collection. You simply write down all of the relevant information (more on that later) about your specimen on a card that is then kept with the specimen from that point on. One advantage of this method (beyond its relative simplicity) is that nothing needs to be done to the specimen itself. There is no need to paint or glue anything to the rock or mineral, leaving it completely unaltered.
If you choose this method then I would highly recommend using good card stock as opposed to common paper. These labels are meant to last, so you need to use paper that will hold up over time. At the very least I would recommend some heavy-duty index cards, cut to size. If you want a cleaner, more professional look then I’d recommend using some blank business cards like these from Amazon. If your labels are folded over to make them stand up they are referred to as ‘tombstone’ labels.
There are, however, several notable disadvantages to this method. The most common and disastrous of these is that the cards can easily become separated from their corresponding specimen, making them completely useless. If the cards get mixed up, lost, or damaged beyond recognition then all the information about their specimens is lost forever.
Another reason I personally dislike this method is that the label cards are unsightly when displayed with the rock and mineral collection. I like a very clean, uncluttered appearance in my displays. If you have to keep the label cards with every specimen things get busy very quickly in your display. I find that my collection looks a lot better when there aren’t bits of paper distracting from the main attraction – the specimens.
If you do choose to display your label cards with your specimens then a little uniformity can go a long way towards improving the aesthetics of your collection. Redo old or damaged cards and make them all look the same. Write legibly or print out labels. Do your best to make the labels a part of the display, not just something that is thrown in for record keeping purposes.
Mark Specimen with Index Number
This is the most commonly used method used today, and is my personal favorite. Every collection I used in college utilized this method with some degree of success. With this method, you create the labels just as you would if you’d be keeping them with the specimen, but then add a label number directly to the specimen and its corresponding card. This way you can keep the label card in a separate place and know which specimen it refers to without always having them together.
The only thing you need to add to the label card is an index number. Just start at #1 and work your way through to the end of your collection. The labeling of the specimen is a little trickier, however. You need to be able to write the corresponding number somewhere on the rock, and it needs to visible and legible.
The most common way of doing this is to add a little dot of white-out to your rock, then writing the number in marker. I prefer using the kind with a paintbrush like this from Amazon instead of the pen variety, but either will work. Make a small dot (less than 1/4″) on an unobtrusive part of the specimen and let it dry. Then you can use a felt-tipped sharpie to write the specimen number on the white patch.
While I have never had any problems with this method, some people report that the White Out eventually starts to crumble and come off of the specimen. This may be related to the specific type of rock or mineral you’re using it on. If you want to be extra thorough and give the labels a better chance at lasting then I’d recommend using a nail polish sealant like this one from Amazon. Just go over the White Out spot once everything is dry and it should seal it away from any moisture.
This is my personal favorite method because, while it does physically damage the specimen a bit, it is very unobtrusive and leaves a nearly permanent identification mark on the sample. If the collection or individual items are moved, there is no danger of the information about it being lost as long the cataloged cards are moved with it.
Speaking of which, if you choose this method then make sure your label catalog is kept in a safe location. I prefer to keep both physical and digital copies. For your physical copy, you can just keep a rolodex or binder of all the label cards in numerical order, which makes it really easy to pull up any information. I keep mine in a fireproof home safe, but if you want a more affordable option I’d recommend a fireproof and waterproof box like this one from Amazon.
I find it really convenient to keep a digital spreadsheet of my collection’s catalog. It’s easy to update and since it’s stored on the cloud I don’t ever have to worry about losing it. For your convenience, I created this Google Spreadsheet that you can create a copy of and use yourself!
Wherever you choose to keep your catalog, make sure that it’s protected. Both of the methods I listed above are sufficient, as they will protect against fire and flood. Using both methods is about as safe as you can get – even if your fireproof box is lost or stolen you have an online backup, and if something happens to Google’s servers you have a physical backup.
Label Directly on Specimen
If, for some reason, you are completely averse to creating label cards (whether they be kept separately or with the specimens) there is another option available. I have never personally used this method but it is becoming more popular, especially in collections that change hands often such as those in schools and universities.
This method involves creating a small label that is directly attached to the specimen itself. All of the relevant information is printed on a very small label, then glued to the specimen so that it will forever be kept together. This is probably the surest way I’ve found to keep identifying information together with a specimen, but it is not without faults.
If you choose to use this method, I would again highly recommend using thick, heavy-duty paper or card stock. If you use thin, cheap paper then the glue you use may bleed through and damage the print on the label. Use regular paper glue, nothing special is required. However, you do want to make sure that the pen or printer ink you use to write the label isn’t water-soluble, otherwise, it may start to bleed and fade over time.
One of the big reasons I am not a fan of this method is that, however small you make the script, the label inevitably ends up being rather large. Unless you have uncommonly large cabinet specimens it’s likely that this labeling method will be visible and unsightly.
On a related note, if you have small thumbnail specimens you simply won’t have the space to attach a label in this manner. Some people suggest tying or gluing the label to these small specimens, but I find that even more repulsive to look at. Still, for some applications, this method is a very practical solution – particularly those applications which don’t place an emphasis on display or presentation.
| Method | Pros | Cons |
|---|---|---|
| Separate Card | No specimen damage, very easy | Ugly, risk of labels becoming damaged or separated |
| Numbered Specimen | Better for display, easy, long lasting | Slight specimen damage, need for separate, safe label storage |
| Direct Label | Ensures that label is never lost | Slight specimen damage, very ugly, can be cumbersome |
Information to Include on Rock & Mineral Labels
At a bare minimum, a rock specimen label should include the species of mineral(s) and the locality in which it was originally found. If possible, also include the name of the person who originally acquired the specimen, when they found it, and a rough approximation of what it’s currently worth. If the specimen has changed hands, keep a record of all the previous owners or collections they have been a part of.
- Mineral species name(s)
- Locality
- Name of person who acquired it
- Dare of original acquisition
- Value approximation
- History of ownership
The more information you can include, the more complete the story behind each specimen becomes. It’s okay if you don’t have every piece of data for every piece in your collection, but make sure to record everything that you do know. It may seem trivial at the time, but years from now that information may become important or valuable to you or whoever inherits your collection.
The mineral identification and locality are by far the most important pieces of information. You don’t necessarily have to identify every mineral visible in the specimen, but certainly at least make an attempt at the predominant ones. The locality is especially important if you ever intend to sell the specimen – the same mineral type from one location may be worth significantly more than that from another.
Dealing with Old Specimen Labels
Some of you won’t be starting totally from scratch. Specimens or entire collections change hands fairly often, and with any luck, the informational label came along. If you purchased specimens from a shop then they definitely should have come with a fairly complete label. You might be wondering what to do with the old cards and how to integrate them into your own system.
I prefer to keep the old label cards, but also to create my own label to match the rest of my collection. I then paperclip them all together with my label on top. Some people store them all together in little plastic sleeves like you’d use for baseball cards. That way everything stays uniform but I also have the most complete records. That may be overkill for a lot of you – as long as you transpose all of the information from the original label to your newly created one then you can safely discard the old one.
If you purchased a particularly expensive specimen, keep the receipt and paperclip it to the label card as a record of what it may be worth. The value of rocks and minerals change with time and other factors (link goes to my article on the subject), but it can be especially useful for subsequent owners to have a record of what specimen has previously sold for.
If the old specimen label has an ID number on it, make sure to scratch it out so as not to confuse it with your label IDs. Similarly, if your specimens have been marked with White Out and marker by a previous owner you should take care to fix that as soon as possible to avoid confusion. Just go over the spot with more White Out and create your own ID number.