Rock tumbling is a relaxing and rewarding hobby for people of all ages. My daughter and I enjoy tumbling batches of rocks together and she particularly enjoys finding creative ways to use the exceptionally beautiful rocks that are produced as the end result. If you’re interested in getting into the hobby of rock tumbling yourself but aren’t sure where to begin, you’ve come to the right place.
As a professional geologist, I know quite a bit about rocks in general, but I had never tumbled rocks before I got into the hobby with my daughter. I have learned a lot about the process and how to produce the best results and I wanted to share that knowledge. Here is a complete guide to rock tumbling, with everything you need to know from start to finish.
Acquire a Rock Tumbler & Supplies
If you want to get into rock tumbling, the very first thing you’ll need to do is get your hands on a rock tumbler. Rock tumbling as a hobby isn’t particularly expensive, but your first rock tumbler will definitely be the biggest investment you’ll have to make.
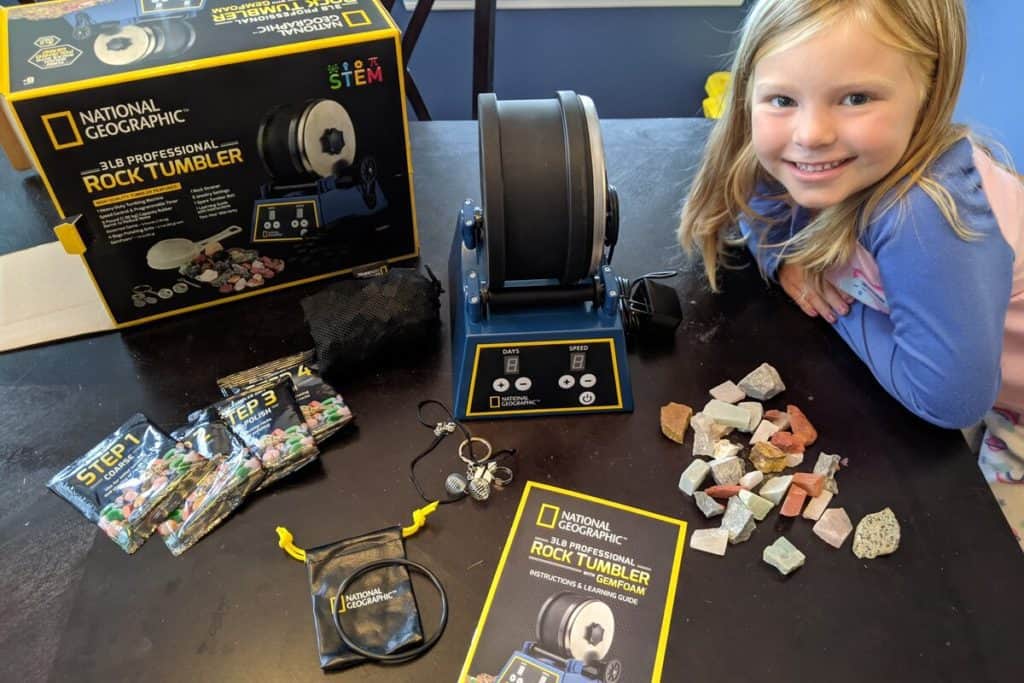
You’ll want to consider the size, quality, type, and price of your first tumbler to make sure you get the right one for your situation. If you’re looking for a great rock tumbler to get started with the hobby then I’ll point you towards my ‘recommended rock tumbler‘ article where I detail everything I love about National Geographic’s 3 lb Rock Tumbler (link to Amazon).
What Size Tumbler To Get
Tumbler size is defined by the size of the barrel you put the rocks in. They are usually described in terms of pounds of rocks that the barrel can fit. Many beginners are tempted to get the cheapest, smallest tumbler available. These tend to be 2-pound barrels or less, are geared more towards kids, and are really more of a toy than a serious rock tumbler. In my opinion, these are a waste of money and should be avoided, even by casual beginners.
I would suggest that most people start out with a 3-pound tumbler. This is large enough to tumble a decent amount of rocks and anything that comes in this size or above will be more likely to be of a higher quality. Make sure that the barrel of your tumbler is made of high-quality rubber and not plastic. Plastic will be much louder and will drive you crazy with the amount of noise it makes.
You can purchase tumblers with barrels much larger than three pounds, but I wouldn’t advise this for beginners. The same goes for tumblers with more than one barrel. Invest in a decent quality 3-pound single barrel tumbler, and if you go through a few tumbles and want to upgrade to something bigger or fancier then go ahead.
Rotary or Vibratory Tumbler?
As you’re looking around for tumblers you may notice that some are described as ‘rotary’ while others are ‘vibratory’. When most people think of rock tumblers they picture a rotary tumbler, which is definitely what I’d recommend a beginner start out with.
Vibratory tumblers are great because they take much less time to produce results, but they are also more expensive and quite a bit louder than rotary tumblers. They are also typically used in conjunction with rotary tumblers, not as a complete replacement.
Rotary tumblers work by turning the rocks over in a barrel, causing the rocks and grit to rub against each another. Vibratory tumblers work by rapidly shaking a bowl which causes the rocks to flow over one another. If you’d like to know more about the differences and which type is right for you, I wrote an entire article comparing rotary and vibratory tumblers.
Tumbling Media
A good tumbler isn’t the only piece of equipment you’ll need. In order to get good tumbling action in your barrel, it needs to be filled up around 3/4 of the way full with rocks. During the tumbling process your rocks will gradually get smaller and smaller as they get worn down. This means that for each tumbling step, the volume of the rocks in the barrel will decrease. That’s where tumbling media comes in.
In order to replace the lost volume of the ground up rocks you can use tumbling media. For example, if your barrel started at 3/4 of the way full in the first tumbling step but by step 3 it’s down to half, you can fill your barrel up with tumbling media to make it 3/4 of the way full again. This keeps your rocks tumbling well in the barrel and prevents them from getting ‘bruised’ (more on that later).
The most popular types of tumbling media are ceramic pellets and plastic pellets. If you are using a vibratory tumbler then only ceramic pellets are recommended, but if you’re using a traditional rotary tumbler you can use either. I prefer using ceramic media because I find it contributes more to the smoothing process. It’s even better if you get varying sizes of ceramic media, but that is far from necessary.
If you want to check out my reviews of all thee tumbling media and grit I use I’ll point you to my recommended gear page. The ceramic media that I myself have used can be found here on Amazon. If you’d prefer to use plastic pellets as your media I’d suggest these from Amazon.
Tumbling Grit
The last essential item you’ll need is tumbling grit. This is the stuff that does all the grinding and polishing – the secret sauce. It’s tiny little particles of very hard material that your pour into the tumbler. While the barrel turns, the rocks get coated in with the grit and it rubs on their surface, slowly grinding and polishing the rocks until they are nice and smooth.
You’ll need at least four different sizes of grit – one for each tumbling step. You can buy them in pre-measured sets for one tumble, or buy the grit for each step in bulk. For your first tumble, I would recommend buying a pre-measured set of grit. Once you get a feel for things you can buy more grit in larger quantities if you’d like.
Most tumblers that you buy will probably come with grit for your first tumble, but if you bought yours used or it didn’t come with any I would personally recommend that you buy this set of grit from Amazon.
Helpful Accessories
There are some other items that are very helpful but not necessary for the tumbling process. These will make your life easier and might help you get better results.
The first is a child’s toothbrush with a short handle, preferably one with soft bristles. You can use this in between tumbling stages to clean the grit out of the tumbling barrel and to thoroughly clean off your rocks. The short handle is important because you won’t be able to get the toothbrush into the barrel at the proper angle if it has a longer handle.
The next is a designated colander for rinsing off your rocks. You can use one from your kitchen but I know my wife would frown on using the same one we use for cooking. I’d also recommend using a plastic one because it won’t scratch your rocks – a metal one might scratch up your fresh, shiny rocks before you even get to enjoy them.
Gather Rocks to Tumble
Of course, you’re going to need some rocks to tumble! This is where the real fun begins. Not every type of rock is suitable for tumbling (in fact, most aren’t), but there are still plenty of unique and amazing rock types to choose from. If you’re looking for inspiration, I wrote an entire article on the best kinds of rocks to tumble.
What Type Rocks to Tumble
Good tumbling rocks will be hard, dense, and relatively smooth. Most of the best rocks to tumble will be between a 6 and an 8 on the Mohs hardness scale. This harness range contains all of the many varieties of quartz including agate and jasper.
It’s also important not to mix softer rocks with harder ones. The harder rocks will ‘eat’ your softer ones by gradually grinding them completely away. Depending on how long you plan to tumble your rocks and how big they are, I would suggest trying to keep their relative hardness within a range of about 1.5 on the Mohs hardness scale.
Here are some of the best rocks I’ve found for tumbling. If you want to know more about each of them please see the article I posted above (or click here).
| Name | Hardness | Color(s) |
|---|---|---|
| Quartz | 7 | White to clear |
| Agate | 6.5-7 | Varied: banded brown, white, pink, yellow, red |
| Jasper | 6.5-7 | Varied: brown, yellow, red, orange, green |
| Sodalite | 5.5-6 | Most commonly blue with white veins |
| Rose Quartz | 7 | Light Pink |
| Amethyst | 7 | Varying shades of purple & violet |
| Tiger’s Eye | 7 | Golden to red-brown, banded/fibrous |
| Aventurine | 6.5-7 | Most commonly seafoam green |
Inspect Your Rough
Before you begin the tumbling process make sure to do a visual and tactile inspection of each of your rocks. You want to make sure that each rock is suitable for tumbling, because even one sub-par rock can negatively impact (or even totally ruin) all of the other rocks in the barrel.
Things to check before tumbling your rocks:
- Make sure all rocks are of similar hardness – Softer rocks will get completely worn away and destroyed by harder rocks.
- Discard any rocks with obvious fractures or cracks – Break cracked rocks in two along their fractures if you want to include them in the batch. If a rock breaks mid-tumble the sharp edges will damage other rocks in the barrel.
- Remove rocks with pores or cavities – Small cavities on the surface of a rock will trap grit and bring larger sized grit to the next tumbling steps, resulting in a hazy and undesirable final product.
- Use a good distribution of rock sizes – Differently sized rocks tumble more smoothly and evenly, and result in more points of contact between the rocks and better grinding action. Use ceramic tumbling media as a substitute if you only have large rocks.
Where to Find Rocks
Many people prefer to tumble rocks that they collect themselves. This can be a lot of fun and very rewarding, but is also time consuming and not everyone has access to places with rocks suitable for tumbling. Try scouring locations known for rocks like agate, jasper, and other varieties of quartz. If you’d like to find your own rocks but aren’t sure how to start I’d recommend checking out my article on the subject.
Where to Buy Rocks
There are plenty of places to buy tumbling rough (un-tumbled rocks) online. You can buy differently sized batches and all different kinds of rocks. Some people prefer to tumble entire batches of a single type of rock, while others enjoy tumbling an assortment of rocks.
For beginners, I would recommend this 3-pound assortment of rocks from Amazon. It has a really nice mix of jasper, agate, quartz, and other rocks in an assortment of sizes for really nice tumbling action at a reasonable price.
Tumble Rocks with Coarse Grit
Now we can really get down to business. Time to start tumbling! The tumbling process is almost always done in four steps. Each step uses progressively finer and finer grit like you’d do with sandpaper when smoothing a piece of wood. The first step in rock tumbling is done with coarse grit.
Purpose of Coarse Grit Step
The coarse grit step (usually referred to by hobbyists as ‘Step 1’) is very important because it’s where your rocks really take their shape. If you want your rocks to be well rounded with few bumps or irregular shapes then you want to take special care with this step. Once your rocks move beyond step 1 they won’t change shape much. It is worth leaving your rocks tumbling a little longer in order to achieve the rounded shapes you desire.
| Purpose of Step | Grit Size | Grit Amount | Tumbling Time |
|---|---|---|---|
| Shape & round the rocks | 60/90 silicon carbide | 2 Tbsp / pound of rock | 10-14 days |
Loading the Barrel

Open up the barrel of your tumbler and make sure it’s clean. Rinse it out with water and make sure there is no lingering dust or debris. Also rinse your rocks off (either by hand or in a colander) and then place them into the barrel.
The barrel should be at least 2/3 of the way full, but ideally closer to 3/4 of the way full. If it’s not full enough then top it off with some of your tumbling media. This is essential to get the proper tumbling action. If it’s not full enough the rocks will fall irregularly and with too much force, potentially causing them to break. Conversely, if it’s too full the rocks will be too jammed in there to move as necessary.
After loading your rocks, it’s time to add the tumbling grit. For most rocks, the coarse grit will be 60/90 grit silicon carbide. You want to add about two level tablespoons of grit for every pound of rock. If you’re using two pounds of rock, then use four level tablespoons of grit. Note that that this doesn’t refer to the size of your barrel – it is the actual weight of the rocks you’re tumbling. The amount isn’t an exact science so don’t fret over exact measurements.
After adding the grit, all that remains is the water. Fill the barrel up so that the water just barely covers the top of the rocks – don’t fill it to the brim. If you have especially hard tap water you might consider using distilled water, but it’s far from necessary.
Now that your barrel is filled it’s time to seal it up. Each model of tumbler barrel is a little different by the concept is the same – you just want to ensure that the seal is tight and completely waterproof. Check for any stray grit or bits of rock along the edges before sealing it up, otherwise the seal will gradually degrade and eventually you’ll end up with a big mess on your hands.
How Long to Tumble
For step 1 of the tumbling process, most rocks should be tumbled between 10 and 14 days. This stage takes longer than the others because it’s where the vast majority of the rounding and shaping occurs. If for some reason you’re concerned about tumbling your rocks too long you can stop the tumbler at 10 days and open it up and spot check your rocks. If they are well-rounded enough for you then you can stop there, but otherwise, let them go for a few more days.
Some tumblers have multiple speed settings. If this is the case for you then I’d recommend setting the speed towards the higher end of the spectrum for this step. This will make the rocks round more quickly, but more importantly it will increase the chances of breaking rocks before they get to a later step. If your rocks have weak spots that will potentially cause them to break it’s best to get it out of the way early so that those sharp edges have a chance to smooth out.
Clean Rocks After Tumbling
Once your rocks are done tumbling it’s time to clean them off and prepare them for the next tumbling step. If possible, take your barrel outside next to a hose. If not, you’ll need a 5 gallon bucket to trap the slurry. DO NOT PUT THE SLURRY DOWN A DRAIN. It will clog your pipes and you’ll have a very bad time.
Do NOT put the slurry down a drain.
Carefully open up your tumbler barrel, making sure not to splash the contents everywhere. Then take a colander (preferably a designated plastic one as I discussed earlier), hold it over the grass or your 5 gallon bucket, and pour the contents of the barrel into it. It will trap the rocks and any tumbling media you used, allowing the slurry to drain through.
Next, thoroughly rinse the rocks with your hose or a pitcher of water, etc. Give the colander a few shakes and really try to remove as much of the slurry as possible from the surface of the rocks. Then, if you tumbled the rocks with any tumbling media, pick the rocks out and place them somewhere clean. You can save the media in a container (I just use a plastic bag) to be used in step 1 of another batch.
At this point, I like to wash each of my rocks individually using a toothbrush to make sure they are completely devoid of any lingering grit or slurry. At the very least, look your rocks over again and make sure there are no fresh cracks that could be hiding grit or cause the rocks to split in the ensuing steps. Even a few missed grains of coarse grit can cause your rocks to come out hazy and dull if they get moved to the next steps, so make sure each rock is very clean.
Prepare Barrel for Next Step
Just like you did with the rocks, now you need to make sure the tumbling barrel is super clean. Rinse it out really well with warm water and that should take care of the vast majority of the slurry, and do the same with the lid. Then take your short-handled toothbrush and really scrub the corners/edges of the barrel where slurry tends to stick and accumulate.
Keep rinsing and scrubbing until everything is gone, then give it a good wipe-down with a paper towel. Then rinse it with warm water again. At this point, you’re probably good to go. It should look just like new when you’re done. All this effort will give you better results in the end and it will also extend the life of your tumbler.
Continue Tumbling Rocks with Medium Grit
Now it’s time to move on to the medium grit phase of the tumbling process, typically referred to as ‘Step 2’. In most respects, this will be very similar to the previous step.
| Purpose of Step | Grit Size | Grit Amount | Tumbling Time |
|---|---|---|---|
| Finish shaping, begin polish | 150/220 silicon carbide | 2 Tbsp / pound of rock | ~7 to 10 days |
Purpose of Medium Grit Step
This step will continue to shape the rocks, although to a much lesser extent than the coarse grit stage. At this point, the rocks are pretty much in the general shape that they will stay in for the remainder of the process and we’re just smoothing them out. The medium grit step does the bulk of the work smoothing the surface of the stones, preparing them for pre-polishing and polishing.
Loading the Barrel
You’ll now load the tumbler barrel pretty much the same way you did in the last step. Everything should be nice and clean already, so just place your rocks in the barrel.
At this point, you’ll want to take note of how high full the barrel is because each rock will be significantly smaller than it was before the tumbling process began. If the barrel is less than 2/3 of the way full, add some tumbling media to get it up to 2/3 or 3/4 of the way full.
Next, add your grit. For this stage you’ll probably want to use 150/220 silicon carbide. The amount will be the same as in Step 1, which is 2 tablespoons per pound of rock. (Note that you should include the media in this weight calculation.) If you’re using a 3 pound tumbler then you’ll be safe using 4 tablespoons of grit.
After that, add your water. Fill the tumbler up so that the water almost covers the top of the rocks, leaving about 1/8 of an inch of the rocks exposed above the surface. All of these ingredients together will mix up and for a nice slurry.
How Long to Tumble
The amount of time to tumble your rocks will vary with their hardness, but for the vast majority of popular tumbling rocks you should put them in for about 7 days. For slightly harder rocks or rocks that still need a little more shaping you might want to leave them in for up to 10 days. If your tumbler has multiple speeds then choose a slow setting for this step.
If you are tumbling rocks on the softer side (with a hardness of 5 or lower) then you will likely want to adjust the time spent on this step to 4 or 5 days, checking on them every couple of days. You don’t want your rocks to be completely eaten up by spending too much time in the tumbler.
Clean Rocks & Barrel After Tumbling
Once the rocks have tumbled long enough, stop the tumbler and clean your rocks and barrel in exactly the same way as you did in Step 1. Make sure you don’t rush the process. Get every little drop of slurry and bit of grit off of the rocks and out of the tumbling barrel, and don’t forget: do not pour the slurry down your drain.
Tumbling Rocks with Pre-Polish / Fine Grit
The next step is usually referred to as ‘Step 3’ and it’s where your rocks will really start polishing up. The grit you’ll use is very small, and is sometimes called ‘pre-polish’. The procedures in the step will be almost identical to those of the medium grit phase (Step 2).
| Purpose of Step | Grit Size | Grit Amount | Tumbling Time |
|---|---|---|---|
| Continue Polishing | 500 silicon carbide | 2 Tbsp / pound of rock | ~7 days |
Purpose of Fine Grit Step
In this step, there will be virtually no re-shaping or additional rounding of your rocks. The shape they enter in will be pretty much their final shape. This step is where your rocks will start really polishing up. When they’re done in the fine grit they will really begin to shine and some may even start displaying some luster.
Loading the Barrel
You’ll load the barrel just like you did in the previous step, the only difference being the type of grit you use. Load up your clean rocks, add about 2 tablespoons of grit per pound of rock (about 4 tablespoons if you’re using a 3-pound tumbler), and add enough water to almost cover the top of the rocks. As always, make sure the seal of your barrel lid is extremely clean so that it doesn’t degrade or lead to leaks.
How Long to Tumble
This step should take about 7 days for most types of rocks, including just about every type of rock that a beginner will be working with. I wouldn’t leave any rocks in this step for any longer than that unless you’re tumbling something unusually hard like a form of corundum. If you are polishing softer rocks then 4 or 5 days will probably be sufficient.
Clean Rocks & Barrel After Tumbling
Just as you’ve done in the previous tumbling steps, thoroughly clean off your rocks using the colander and a soft brush. At this stage I think it’s especially important to use a plastic colander – a metal one will scratch up your rocks which would be disastrous. Clean out your barrel with even more care than usual this time, because any leftover grit will potentially ruin the last and most important polishing step.
Finish Tumbling Rocks with Polishing Grit
This step is probably the most important one, and in my opinion is also the most exciting. You’ll want to take extra care with this step because this is where they’ll develop the nice shine and luster that every tumbling enthusiast is after.
| Purpose of Step | Grit Size | Grit Amount | Tumbling Time |
|---|---|---|---|
| Finish polishing | Aluminum Oxide Powder | 2+ Tbsp / pound of rock | ~7 days |
Purpose of Polishing Step
We’ll be using extremely fine grit on this step that will polish your rocks to a nice smooth shine. This phase is usually referred to as ‘Step 4’ in most instructions. If you’re done everything correctly up to this point they should be looking good already, but the polishing step will really make them pop.
Loading the Barrel
The barrel loading process will be pretty much the same as previous steps, but with some possible slight variations. Some people that have been tumbling for a long time have a dedication barrel that they use only for the polishing step, the idea being that you can avoid possible contamination of larger grit sizes from previous steps. This certainly isn’t necessary, but if you do happen to have two barrels then it’s not a bad idea.
Your barrel and rocks should be clean already, but take this time to double check everything. Even a few pieces of larger grit or a stray drop of slurry can pretty much ruin a polish step, wasting your time and money.
Put your rocks in the barrel, and top it off with as much ceramic or plastic media as needed to make the barrel 3/4 of the way full. Then, put in the aluminum oxide polishing powder. This stuff is extremely fine, so take care not to pour it too quickly or it’ll puff all over the place. Use the same amount as in previous steps (~2 tablespoons per pound of rock), with maybe an extra tablespoon if you’re feeling generous.
Fill the barrel with water almost to the top of the rocks, just as you did in the previous two steps. Then seal up the barrel with the lid, once again checking to make sure the seal is extremely tight and there is no grit or debris getting in the way.
How Long to Tumble
Most rocks will polish very well in about 7 days. I like to let them go for about a week, then open up the barrel and spot check them. If they look the nice, polished, finished product I’m looking for them I’ll end it there, but if not then just let them go for another day or two.
Clean Rocks After Tumbling
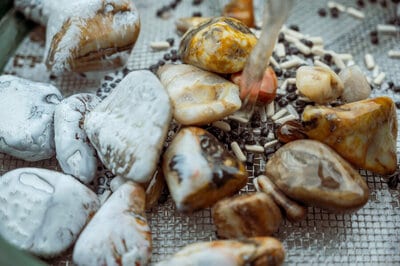
Once your rocks are done tumbling then just clean them off as you’ve in the previous steps. They’re all done… probably. When you’re cleaning them off take note and see if you’re satisfied with the results. If they are super smooth but don’t have that nice mirror shine you were hoping for then you’ll likely want to move on to the burnishing step. If you’re satisfied with the results, then congratulations!
Clean the Barrel Thoroughly
In the excitement of completing your tumbling process and inspecting your finished stones, don’t forget to clean out your tumbling barrel. The slurry will dry in there quickly and become almost like cement, so don’t delay in cleaning the barrel out. Leave it clean enough that you can pull it out and begin your next round of tumbling with ease.
Burnish the Rocks If Necessary
If your rocks were a little disappointing at the end of the polishing process, don’t fret just yet. It’s pretty common to have really smooth stones that come out looking a little cloudy or hazy, in which case you will want to add the extra ‘burnishing’ step.
| Purpose of Step | Powder | Grit Amount | Tumbling Time |
|---|---|---|---|
| Enhance shine | Ivory Bar Soap Shavings | 1 Tbsp / pound of rock | ~4 hours |
Luckily, this step is pretty quick and doesn’t cost very much because it doesn’t use specialized grit. You’ll just need a bar of original Ivory bar soap, chopped up into little shavings (use a cheese grater or sharp knife for this).
Load up your rocks and tumbling media and then add about 1 tablespoon of the soap shavings to the barrel. Fill the barrel with water until the water level is just below the top of the rocks, seal the barrel, and let it tumble for about 4 hours. Sometimes this process can really enhance the shine of your rocks, so in my opinion it’s usually worth the time.
There are some tumbling kits out there that come with specialty products for this step. For example, the National Geographic Tumbler that I originally bought came with little cubes of foam they call ‘gem foam’ that are supposed to burnish the rocks. I have never had great success with this kind of stuff, but I also don’t think it hurts.
Use & Enjoy Your Polished Stones
Now that your rocks are done, it’s time to enjoy them! Lots of people like to just keep them in glass jars around their home to put them on display, but there are many fun ways to put your stones to more practical use. My daughter enjoys making little gifts for her friends and family with them.
Some ideas for what to do with tumbled rocks include:
- Make them into refrigerator magnets
- Wire wrap the stones into jewelry
- Use them as game pieces
- Turn them into decorative key chains
- Fill transparent vases
- Use them as paperweights