Rock and mineral collecting is a popular hobby all over the world. I’ve collected rocks in some capacity since I was a kid, and I even went on to become a professional geologist. Collecting rocks and minerals makes for a great hobby because you get to spend time outdoors, it’s affordable, educational, rewarding, and you can find specimens almost everywhere.
Rock and mineral collecting isn’t always the easiest hobby to break into, though. It can be daunting thinking about what to look for, where to look, and what tools you might need. I decided to put together this complete guide to help anyone thinking about getting into rockhounding.
Here is the complete 10 step guide to rock and mineral collecting:
1. Decide What to Collect
The very first thing you need to do when getting into rock and mineral collecting is deciding what sorts of things you’d like to collect. This doesn’t have to be a final decision, but you should think about the sort of items you might be interested in. This will give you a sense of purpose and direction when going through the subsequent steps. After all, it’s hard to collect something if you don’t know what you’re looking for!
What you decide on doesn’t have to be overly specific, either. You may just want to collect something as vague and indiscriminate as ‘cool looking rocks’ or ‘crystals’. While many collectors choose to specialize in very specific niches, they almost never start out that way. If you aren’t sure what you’d like to collect then it might be best to just start with specimens that available locally.
If you’d like to start your collection with a bit more purpose then there are plenty of options available. Types of rock and mineral collections include:
- Specimens from a specific locality
- Specimens from places you visit on vacation
- Types of rock (igneous, metamorphic, sedimentary)
- Rocks or minerals of a certain color
- Specific mineral types or families
- Decorative, high-quality display pieces
What you decide to collect isn’t a critical decision. There are no wrong answers here, and you can always change what you’re looking for as you learn more and your interests change. What’s important is that you have some idea of what types of specimens you’re after – otherwise you can wander around (literally or figuratively) aimlessly not knowing a good specimen when you see one.
In my opinion, you should ultimately decide to collect rocks and minerals that appeal to you. Don’t worry about what other people say is the best or what you think a preconceived notion of a rock and mineral collection might look like. You’ll have the most fun collecting pieces that you like, and that’s really what it’s all about.
2. Choose a Collection Method
Okay, so you have a pretty good idea of what it is you’d like to collect. Now you just have to figure out how to go about it – this is where the fun starts! There are three methods available for acquiring rock and mineral specimens. You can choose between them or do a little bit of each. Most collectors utilize some combination of the three and their methods will evolve with time.
Which of these methods is best for you comes down to personal preference. There is no ‘right’ answer here. If you are the type of person who likes to get outside and use a little elbow grease then you will likely get a more rewarding experience by collecting your specimens in the field. If you just want cool stuff to look at in your collection then you might lean towards purchasing your specimens online or in a rock shop.
Field Collecting
Good old fashioned rockhounding. This is the most common and authentic way to expand your rock and mineral collection. It involves doing some research, grabbing your gear, getting out into the wild, and earning your specimens with a little hard work. This is my preferred method of collecting, but it’s not for everyone.
Collecting rock and minerals yourself is undoubtedly the most difficult and time-consuming option, but in spite of (and in many cases because of) that it is the most popular method. The effort that you have to go through to find each piece will help you establish a more personal connection to your collection. Each specimen will have a story and you’ll have the satisfaction of knowing exactly how and where you found it.
There is a steep price to pay for that connection, however, in the form of time and effort. It can take a long time to properly research your rockhounding locations (more on that later), and of course it can take hours or even days of effort to find anything worthwhile once you’re there.
If you aren’t willing or able to devote the time or effort into collecting your pieces then field collecting probably isn’t for you. But no worries – there are definitely other options available for you to grow your rock and mineral collection. I’ll go into how to buy rocks and minerals in this article, but if you want an even more in-depth guide then I’d recommend this article I wrote on the subject.
Purchase in person
If field collecting seems too daunting or just isn’t up your alley, then I would definitely recommend purchasing your specimens from a local rock shop or a gem & mineral show. You can find at least one good rock shop in almost any decent sized city, and if you keep an eye out you will probably be able to find a gem & mineral show somewhere in your area during the year.
Rock shops will be the best place to buy specimens for several reasons, the most important of which is the ability to establish a relationship with the shop owner/manager. He or she will be able to learn types of specimens you’re looking for and help you build your collection. They will also probably be able to put you in contact with other enthusiasts to trade, talk, or go rockhounding with.
A good rock shop will have a wide variety of items to pick through and hopefully their inventory will rotate often enough to keep things fresh. If there is something in particular that you have in mind that isn’t in stock then a good shop owner might be able to help you get your hands on it even if they don’t have it in stock at the moment. Finding a great addition to your collection in a shop can be almost as rewarding as finding it in the field.
Purchase online
This is a surprising option for a lot of people, but believe it or not you can buy high quality rock and mineral specimens online if you know where to look. You need to be careful to avoid scammers and fakes, but there are plenty of reliable specialty auction sites and online dealers you can do business with.
The big advantage of buying online is the sheer amount of inventory available. You can find almost anything you’re looking for online, and of course the inventory is always refreshing.
The biggest downside of buying online is the potential for fakes and scammers. There are, unfortunately, a lot of sellers out there that will create fakes specimens (sometimes very good ones) or market their items as something they’re not. This can mostly be avoided by buying from reputable sites and sellers.
Another downside of buying online is that you don’t get to establish any sort of relationship with the seller. It can be nice to have a person to talk to about the pieces you’re buying and you probably won’t get that online.
If you want a great list of reputable auction sites and online dealers I’ll again point you to the article I wrote about how to buy rocks and minerals:
If you’ve decided to purchase your rocks and minerals instead of searching for them yourself in the field, you can skip ahead down to Step 7. Otherwise, we’re ready to get down to the business of researching where to look for rock and mineral specimens.
3. Research Where to Look
If you’ve decided to head to the field and search for your own specimens, good for you! You’re about to have a lot of fun. But first you need to know where to look. For most rockhounds this is the biggest roadblock, and for good reason. While you can find rocks just about anywhere, if you want high quality specimens or you have something specific in mind you will need to do some research to know where to look.
Luckily for us there are plenty of resources available to help us with this research. You can sometimes get everything you need online, but there are also plenty of print materials to aid you in your quest. The best way to find good collecting locations, though, is by networking with fellow collectors in your area.
Search Online
If you’re anything like me the first place you’ll look for information is online (you’re reading this article, after all). There is a ton of information out there to aid you in identifying good rockhounding locations it is often scattered and hard to find.
The best and most comprehensive website that is recommended by rockhounds everywhere is mindat.org. They have a huge searchable database of localities and specimens which can definitely point you in the right direction. The search function isn’t the most intuitive but if you spend a bit of time looking around you’ll be able to find some leads.
In addition to mindat I’d recommend just Googling the term ‘rockhounding locations in my location‘ where ‘my location‘ is the state or city you’re wanting to search. You’ll probably have to pour through quite a few pages, forums, and discussions but there is almost always some good information to be found.
When looking for locations keep in mind your end goal. Ideally you’d like to know what can be found, have GPS coordinates, know how to get there, and be able to identify who owns the land. That last bit about land ownership is critical because you’ll need to make sure you have permission to collect on whatever land you’re searching on.
Read Rockhounding Guides & Maps
If at all possible, I would definitely recommend getting a hold of a rockhounding field guide for your area. There are a few book series out there that break down good rockhounding locations for individual states, although not all states are covered by these series.
Rockhounding guide books are generally very affordable on Amazon or elsewhere, and would be one of the best investments you can make for your hobby. You may be able to find them in local or university libraries, but it would be best to own them yourself so that you can use and abuse them in the field.
These types of books are usually written by experienced Geologists and rockhounds that are intimately familiar with the geology of their state. I live in Oklahoma and the definitive book for my state is ‘Roadside Geology of Oklahoma’ (link to Amazon). It happens to be written by one of my favorite professors from the University of Oklahoma. These books will contain lots of insider knowledge you may not be able to get anywhere else.
In addition to guide books you could see if you can get a hold of rockhounding maps. These are sometimes available at BLM or USFS offices, but the first place I would check is local rock shops. They will often have some maps of popular rockhounding locations in the area that will remove a lot of the guess work. The owner will also hopefully be able to put you into contact with any landowners you may need to get permission from.
Ask Local Rockhounding Groups
One of the most reliable and fun ways to find good rockhounding locations is to hook up with local rockhounding clubs. You can probably find a club near you regardless of where you live. You can check the link below which has a huge list of rockhounding clubs broken out by state.
Some of the very best locations are located on private land and are only accessible through personal connections. Making friends through rockhounding clubs is the best way to establish these connections and get access to these exclusive spots. Plus you’ll make a lot of new friends and learn from experienced collectors in your area!
4. Get the Right Gear
One of the best things about rockhounding is that it’s a pretty inexpensive hobby to get into. That being said, there are a few essential tools that any hobbyist should own if they plan on doing field collecting. I wrote a helpful post on the most important pieces of equipment you’ll need here.
Of the items on that list, the most important are a good backpack and a quality rock hammer (and of course the appropriate safety gear). If you plan on doing any digging then you’ll definitely want to add a collapsible field shovel to your packing list. If you are wondering exactly what to get I’d point you to my Recommended Gear page, where I take out all of the guesswork.
As time goes on and you get more and more into the hobby you’ll probably want to add additional pieces of equipment to your collection, but it’s okay to start with minimal gear. Exactly what types of equipment you’ll end up needed will largely rely on the geology of your area and what types of specimens you intend on collecting.
5. Plan Your Field Trip
Alright, so you know what you’re looking for, where to look, and what to bring. Now it’s time to plan your trip to the field. You’ve already done the hard parts – now it’s time to really start enjoying the process. How you plan your trip will depend mostly on how far away your search location(s) are and how much time you plan to spend there.
For most beginner rockhounds I would recommend a short excursion for your first outing just to get your feet wet. The best thing to do would be to go with a local rockhound group that can take care of all the planning for you. That way, all you have to do is show up and do what everyone else does without worrying that you’re dong something wrong.
If you’re planning your own trip to the field then the first thing you need to do is get permission from the landowner to collect on their property. I can’t stress this enough.
If Land is Privately Owned
If the land is privately owned then try to contact them beforehand via phone or email. You can generally find out who owns a piece of land by checking local and county records.
If you can’t find their contact information then it’s worthwhile to knock on their door and ask them in person. Just politely introduce yourself, explain that you’re a recreational collector (not doing it for profit) and you’d like to search on their land. Many people will gladly let you do this if you treat their land with respect, but be prepared to graciously accept a ‘no’ answer.
If Land is Publicly Owned
It can be difficult to determine whether or not rockhounding is permitted on public land, but luckily for you I put together a comprehensive article covering the legality of rockhounding on every single type of public land in the U.S. here.
It’s best to go rock and mineral collecting with a partner for safety reasons, but if you plan on going along make sure to let other people know exactly where you’re going and don’t deviate from that plan. That way if something goes wrong while you’re in the middle of nowhere you aren’t stranded there with no hope of rescue.
Make sure to scout out a place to park your vehicle and know how far away your search site is. If you plan on taking multiple days away from home then reserve a hotel or camp site in advance. If you’re planning on hitting multiple locations in one trip then allocate a certain amount of time for each before your trip begins.
The purpose of planning your trip in advance is to remove as much uncertainty as possible. This will let you enjoy the process of collecting without getting distracted by the tangential details. It’s okay to make changes to your plan on the fly once you’re out there, but it’s always best to have a rough outline for the day.
Another reason to do as much advance planning as possible is that many great rockhounding locations don’t have cell service. You don’t want to be on site needing to look something up on your phone only to realize that you need to hike a mile back towards civilization just to do it.
6. Search for Specimens
The really exciting part! Follow your plan and head out to the field. Exactly how you go about searching for your rock and mineral specimens will depend almost entirely on what you’re searching for and the geology of your specific search location. That being said, most good rockhounding spots fall into one of seven categories:
- Mine tailings – Mines will almost always have dumps nearby where they deposit loose unused material. Abandoned mine tailings are extremely popular rockhounding locations because mineral-rich rock is already busted up and collected in one place, making for relatively easy pickings.
- Open fields – Sometimes the best place to find rocks is just out in an exposed field. Recently tilled soil on farmland is often a prime target for rockhounds looking for things like agates. This type of searching is especially popular for people who don’t want to do much hammering or climbing around.
- Beaches – The constant wave action and exposed gravel on beaches make for ideal rockhounding. This is true of both ocean and lake beaches, as long as there is sufficient energy to transport and expose fresh material. Some of the most famous locations in the world for agate hunting are the beaches of the Pacific Northwest and the shores of the Great Lakes.
- Road cuts – Road cuts are really fun and popular places to collect. They are easy to access, but can be a little dangerous due to traffic. The amount of rock exposed leaves a lot to be explored and they offer a great look at the underlying stratigraphy of the area.
- Exposed outcrops – Similar to road cuts, if you can find exposed outcrops such as cliff faces or protruding strips of rock then it can make for a great rockhounding experience. Be sure to treat these outcrops with respect and don’t do any unnecessary damage. You can almost always find good specimens that have recently eroded off near the base of the outcrop.
- Creeks & Trenches – Creeks can make for good rockhounding because the running water transports and exposes fresh material on a regular basis. Check around tree roots and areas where water might slow down and pool since larger pieces will tend to settle there.
- Tunnels & Adits – Old mines will commonly consist of old tunnels or adits. It is never a good idea to go exploring these areas! They are often unstable and could collapse on you, plus there is a very good chance that the air in the tunnels is toxic. Do not enter tunnels or adits when rockhounding!

Wherever you’re searching it’s important to treat the location with respect. In general that just means that you should leave the areas you’re collecting on in as good a shape or better than you found them, but to be very specific there is an actual ‘Rockhound Code of Ethics’ that provides guidelines about behavior when collecting rocks and minerals.
The Rockhound Code of Ethics (outside link)
Follow the plan you created as best you can, but feel free to improvise once you’re out there (within reason). If you have multiple locations in the same area I’d definitely make sure you get to each one and spend some time there. Don’t be afraid to leave a good spot to explore somewhere else – you can always come back later!
It can also be really helpful to take some field notes. Bring a field book with you and jot down interesting things you observe and where you collected each of your samples. It’s easy to assume that you’ll remember everything when you get back home but you’d be surprised how easily and quickly you forget the details of your trip.
7. Catalog and Label Your Finds
Very shortly after getting back from your trip with your new specimens you should catalog and label them. Do this while each piece is still fresh in your mind so that the information you record is as complete and accurate as possible.
The two primary methods are to have a label card with all the relevant information kept with the sample at all times, or to mark the sample with a small dot of white-out and a number in black sharpie and keep the corresponding label card separate.
Pro Tip: Take a photograph of each item with its card and save it somewhere secure in case the card is ever lost.
How you catalog your samples is up to you. At a bare minimum, I would recommend including the name of the rock or mineral, where it was collected, the date it was found, and who found it. If you purchased the specimen then document who you purchased it from and anything else you know about it.
Of all the information you record, the identification of the specimen is probably the most important. This can be tricky even for experienced rock and mineral collectors. If you need help I would recommend taking some pictures and asking around online in places like the “What’s This Rock” subreddit , taking them to a local rock shop, or you could try this online tool.
Now would also be a great time to make sure you have a backup of your catalog. The photographs I mentioned earlier are a great way to do this, especially if they’re stored in the cloud. You can also make duplicates of the labels and keep them in a fire-proof safe, or make a digital record and save it in multiple locations.
8. Clean Your Specimens
It may come as no surprise to you that the rocks and minerals you find in the field could use some cleaning. They don’t exactly look like the beautiful pieces on display in museums! But that’s (at least partly) because they haven’t been cleaned up yet. Once you treat them with a little love and care they will ready for you to proudly display in your collection.
Mechanical Cleaning
The first step in cleaning your specimens is just to physically remove all the mud, dirt, and clay that you can by mechanical means. I like to start by just running them under a faucet or hose and rubbing off anything I can get with my fingers.
After you’ve removed the biggest chunks of dirt by hand you’ll need to start using some tools. A brass bristled brush will be your best friend, and you can pick one up from just about any hardware store. The brass bristles are hard enough to remove most stubborn dirt, but soft enough so as not to scratch most rocks and minerals (brass is about a 4 on Mohs hardness scale, so anything softer than that will scratch).
After giving your specimen a good brushing there may still be some dirt left in hard to reach nooks and crannies. A very small screwdriver or pick is the tool for the job here. Anything you can use to remove significant amounts of caked on dirt will help.
At this point if you have access to a lapidary saw or want to try your hand at a hammer and chisel you can trim pieces down to size if you’d like. This is especially important if you have crystals that have a disproportionate amount of matrix rock attached to them.
Chemical Cleaning
After you’ve removed everything you can through mechanical means you will very likely need to use some chemical processes. This may sound daunting, but it’s not too difficult – all it takes is time and some fairly common chemicals. I’d recommend using oxalic acid to remove iron stains (most of the brown stains on rocks and minerals). Make sure to test this process on small pieces before using it on your best specimens.
Chemically cleaning rock and mineral specimens is a multiphase process:
- Purchase oxalic acid – This is a common acid found in almost any hardware or home improvement store, usually advertised as wood bleach. Buy 1 pound.
- Mix oxalic water with acid – Fill a large plastic bucket (that has a lid) with about 1 gallon of water. Add the oxalic acid and stir thoroughly. Do not add water to the acid! Be careful not to inhale or touch the acid. Wear proper PPE – it is highly toxic.
- Submerge specimens in acid – Put each specimen in a small plastic container (I like to use tupperware) and then pour in enough of the acid mixture to cover it, then put the lid on. Leave the specimen for several days – probably about a week.
- Use heat if possible – Heating the specimen up in the acid mixture can greatly speed up the process. Put it outside in the sun if it’s hot out, or use a hot plate to warm it up. Do not boil it, as the fumes are very toxic.
- Remove and rinse – After the stains are gone, use rubber gloves and pour the acid back into the large acid mixture container. Then run the specimen under some running water in the Tupperware for a few hours. You can reuse the batch of acid many times before it becomes ineffective.
- Soak in water – It’s important to rinse away all of the acid. In a separate tupperware container, drill a small hole in the bottom and place the specimen inside. Run warm water into the container for several days. The acid will settle to the bottom and run out of the hole.
Get Professional Help
If you are unable or uncomfortable with this process then you can always seek professional help. Lots of rock shops are able to help with this process and charge reasonable rates. I would certainly recommend going this route if you happened to have found a very high quality piece that you are afraid of damaging and/or you’re still relatively inexperienced in this area.
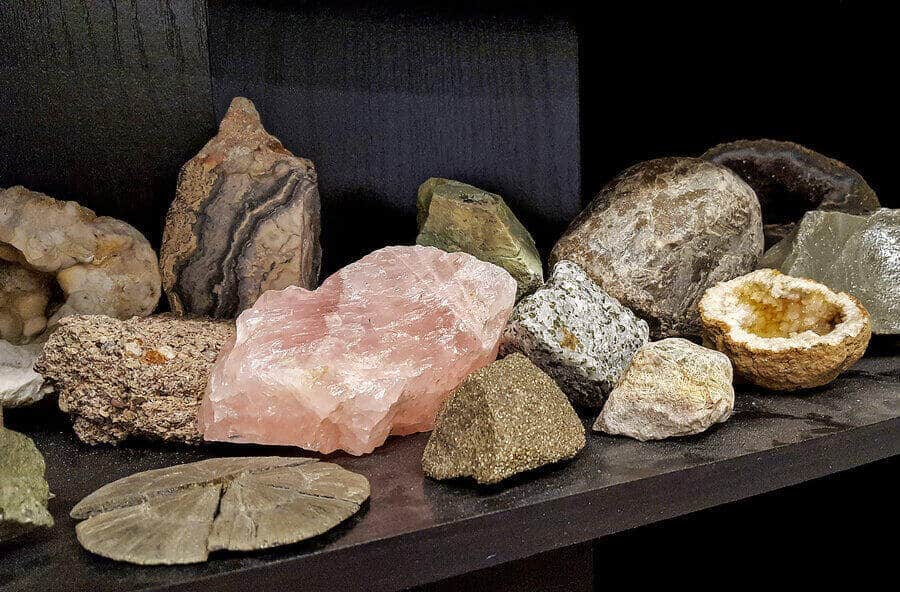
9. Display Your Rocks & Minerals
Now it’s time for the big payoff – you get to display the results of all your hard work! Adding a fresh new piece to your collection is immensely satisfying. It’s a sort of trophy that will always be there for you, your friends, and your family to enjoy. Each piece has a unique story that only you fully appreciate, making them great conversation pieces.
There are endless options available when it comes to how you display your collection. Most of the other geologists I work with have rocks and minerals covering the windowsills, desks, and bookshelves in their offices. Many people choose to put them on display somewhere in their home.
A nice, well-lit display case will probably do your collection the most justice, but is far from necessary. Try to put your rocks in minerals somewhere that is well lit, and consider surrounding them with mirrors. Uniform, printed labels can give your collection a more professional look, but it’s entirely up to you.
Try to avoid exposing your rocks and minerals to too much direct sunlight. The sun can damage and discolor the specimens over time. The same is true for any place that is too damp or too dry (depending on the type of specimens). I would caution against keeping your collection in a damp basement, for example.
10. Rinse and Repeat
To build a rock and mineral collection you’re proud of you’ll have to go through this process many times. That’s what makes the hobby so fun! There are always new places to explore and new finds to be discovered. As your collection grows and evolves your tactics may change, but the basic workflow remains the same.
Remember that your collection is your own and it can become whatever you want it to be. I hope this guide has helped you get started or gave you some new ideas and resources. Best of luck out there!